

If You Have Empty Tuna Cans, You Have The Start Of A Rustic Wind Chime

We may receive a commission on purchases made from links.
Wind chimes can make for a whimsical yard and garden feature, creating a delicate jingling sound with the slightest breeze, and serving as a charming decoration for porches or low-hanging boughs. While you can certainly pick up one from your local garden store, you can also easily make a cute, rustic wind chime of your own by upcycling old tin cans you happen to have lying around, some paper napkins, and some Mod Podge. DIY blogger Patti at Hearth and Vine demonstrates just how easily this project can be achieved– you'd never guess it was assembled from items that might otherwise have been tossed away! This craft is great for anyone looking to reduce their household waste output while also not break the bank on new decor items.
To recreate Patti's project, you'll need an assortment of aluminum cans in different sizes that will nest together– tuna cans make a great start for your smallest layer, while soup cans and paint cans work well for the larger sizes. You'll also require paper napkins with an attractive pattern, Mod Podge or white glue, white paint, twine, scissors, a hammer and nail, polyurethane spray, and some sandpaper. Make sure you've removed all the labels from the cans so you have a clean surface to work with. This could usually be achieved with warm water, but for particularly stubborn labels, you might want to try a more industrial product like Goof Off, an 8-fluid ounce can of which is available on Amazon for $12.
How to build your wind chimes
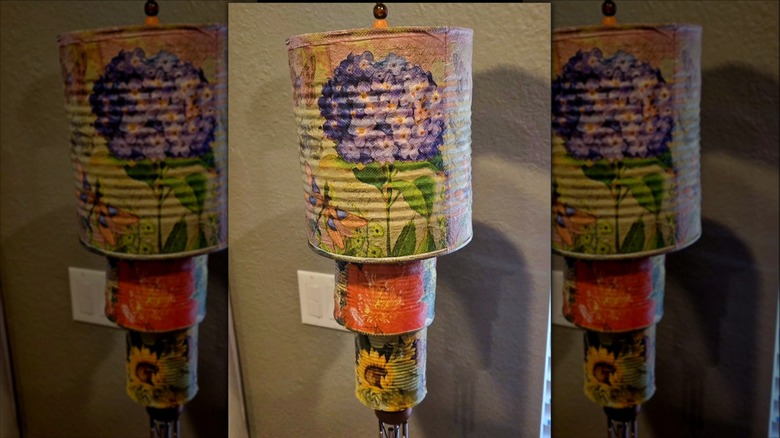
To create the wind chimes, start by painting the cans with your white paint. Patti recommends a chalk paint for its fast-drying properties, but explains that a spray paint will work just as well. Next, punch a hole through the center of the top of each can using your hammer and nail, or a drill if you happen to have one– this is what you will thread your twine through to suspend the cans. Then, remove the plain white backing from your decorative napkins, and use the remaining patterned sheets to cover the cans so you can an idea of placement, leaving a little extra on the top and bottom. Remove the napkins and apply Mod Podge or a thinned, white glue to the exterior of the can, replace the napkins, and apply another layer on top of the napkins. Use your sandpaper to remove the extraneous napkin on the top and bottom of the can– Patti notes that a nail file will also work if you don't have sandpaper. Fee free to add a bit of extra beads and string to decorate the cans more or add a hanging bottom layer. Because they're going to be hung outside, give them a coat of polyurethane spray to protect them from the elements.
Now to hang your cans. Thread the twine through all of the cans while leaving enough excess at the top to hang the chimes, then tie a knot on the underside of each can so the chime will stay in place. The idea is to space the cans out enough that they are just slightly overlapping, creating a nesting effect that will cause a clinking noise when they move. It's worth noting that if you want the sounds of a more traditional wind chime, you might want to augment your design with wind chime tubes, like XIXILINRUIYUN's 30 Piece Wind Chime Kit on Amazon for $6, and suspend from the bottom of your smallest can. This enables you to preserve your unique DIY, while still getting that fairylike wind chime sound every time the breeze blows!