

Say Goodbye To Dated Closet Doors: The Picture Frame Hack That Makes Them Look Custom

You've probably seen professional designers and DIYers alike substantially elevating rooms without renovating them. One of the easiest ways to do this is to install picture frame molding on the walls. The same technique works on interior doors, too, including closet doors. Picture frame molding is one of those small details that can give bland doors character with the look of custom millwork, but it takes time and skill to cut the trim and add it to the door. Numerous clever DIYers, such as TikToker curatedbyconstance, are turning to the item from which picture frame molding gets its name to add that upscale look to boring doors. Large-format wall frames, such as those measuring 11 by 14 inches, are just the right size and proportion to easily mimic decorative molding.
If your closet door has a dated appearance and can use a glow-up, this hack lets you add it without going through the trouble of measuring and cutting trim down. However, using actual picture frames still requires you to prime and paint the frames and the closet door. That step doesn't have to take all day. In fact, there's a hack for painting doors in half the time it normally takes, so you can finish painting and get to the fun part: adding literal picture frames to the door.
Finding and installing the frames
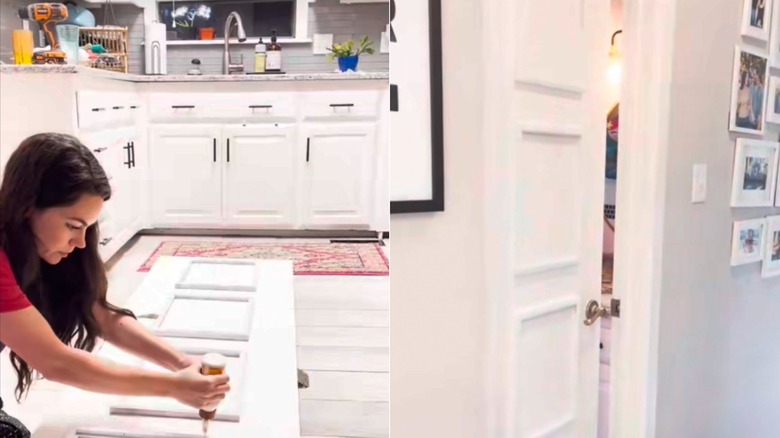
To choose the best picture frames for your project, start by using painter's tape to make a loose layout on the door, outlining where you want the frames to go. This can help you decide on which frame sizes work best and how many you might need for your project. Painter's tape peels off without marring the door's finish, making it ideal to test several sizes and layouts. The type of frame you choose is also important. Wood is the most popular material for trim because it's durable and paintable (as well as easily re-paintable multiple times),so wooden picture frames will probably work best for this project. If cost is a concern, scour discount and craft chains such as Hobby Lobby, Michaels, and Dollar Tree for sales on wood frames. Finally, although a flat profile on the frame is acceptable, if you want to achieve that classic picture-frame molding look, go with frame profiles that have curved, rounded, or beveled silhouettes. Make sure the frame backs lay flat before buying them. Test them on a table or shelf to make sure they will lay perfectly flat against the door
Once you choose your frames, grab a level, tape measure, and painter's tape to map out the final placement. There's no hard and fast rule for spacing between and around the frames, but some designers suggest that on walls, you should use a 3-to-4-inch gap around the frames and from the wall edges. Take this advice into consideration if you like, and don't forget to include the same spacing from the doorknob. Then, remove the backing and glass, and install the empty frames using the same methods you would with real molding and trim (such as wood glue and brad nails). Finally, prime and paint the frames and door. If you're unsure what hue to use, these color ideas for interior doors may offer inspiration.