

Cover Old Jars In Fabric To Make The Cutest Matching Storage Containers

Are you constantly adding glass jars to your recycling bin? There's no need to throw them out — repurpose them as storage containers. All it takes is a few pieces of fabric and notions from your stash, along with some cardboard and wooden skewers to make the cutest matching set. YouTuber @EverCreativeDIY uses a simple technique that's easy to customize to match your existing decor. She simply covers old jars in a little ModPodge before wrapping them with fabric and notions. Then, she sits the matching storage containers inside a small tray made from jute- and wood-covered cardboard.
Matching storage containers are one of the keys to a truly satisfying organized bathroom. They're the perfect place to store Q-tips, cotton balls, or other must-have items that don't look great in their original packaging. You could also use this DIY to tuck away small items on a desk, dresser, bookshelf, or countertop.
Creating identical storage containers can make your messiest spots look less chaotic by reducing visual clutter. It's also easier than you might think as long as you start with the right materials. Choose jars that held the exact same product. Think spaghetti sauce, pickles, nut butters, or jams and jellies. Use a little shortening to easily remove pesky stickers from your glass jars before cleaning them thoroughly with hot, soapy water. Then, raid your craft supplies for a large piece of attractive fabric, enough ribbon and lace to wrap around the diameter of your chosen jars, and a discarded cardboard box. And, if you don't have them already, you can easily find a cheap pack of long wooden skewers and a roll of thin jute twine at your local dollar store.
Use fabric, ribbon, and embellishments to customize your old jars
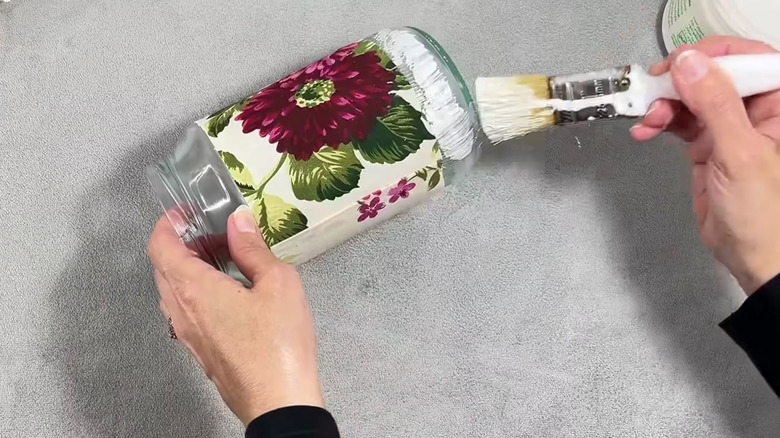
It's easy to transform old jars into high-end storage in just a few steps. First, cut two pieces of cloth into long strips that wrap completely around the jars. Next, use a small paintbrush to apply a layer of ModPodge to the jars before carefully wrapping your strips around them. Fold the top end underneath itself for a clean finish.
The next steps are optional, but provide a nicer finish to the storage containers. First, apply additional ModPodge to the bottom section of each jar before wrapping it with a thick ribbon in a color that complements your fabric. You could also substitute additional fabric strips, rope, or yarn depending on the look you want to achieve. For added flair, hot glue thin strips of lace to the top and bottom seams where your colored ribbon meets the patterned fabric.
Covering the lids is another optional step that allows for additional customization. Use more ModPodge and matching fabric cut in a circle slightly larger than the lid itself, being sure to fold the fabric edges underneath the lip of your lid. If you're working with a thicker fabric and are concerned about the lid closing (a concern raised by one commenter on YouTube), substitute some simple craft paint that coordinates with your fabric label instead. Once the lids have dried, wrap jute cord around the neck of both jars before adding a few beads, feathers, or other small embellishments to both ends of a basic bow.
Corral your matching containers in a tray made from cardboard, skewers, and twine
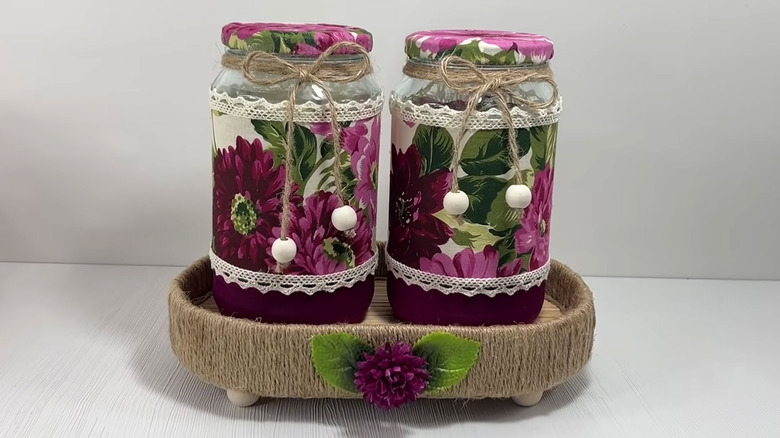
Creating a tray for your matching storage containers elevates the look. Start by setting both of your jars on a piece of thick cardboard. Trace the outer edges before using sharp scissors to cut out a pill-shaped oval slightly bigger than the marks you've just made so there's plenty of room for both jars. Then, cut another identical piece of cardboard. This will serve as the base of your tray.
Next, draw a thin line of hot glue along the center of your first cardboard shape before pressing a long wooden skewer into it. Align the skewer's flat side with one edge of the cardboard. Continue gluing skewers until the cardboard is completely covered, then use a pair of wire cutters to trim off the points of each skewer until flush with the cardboard. Flip the base over, apply more hot glue, and press the second oval cardboard piece into place. Cover it with more skewers, another piece of fabric, or leave it exposed.
To create the sides of your tray, cut a 2-inch tall strip of cardboard to the same length as the diameter of your tray. Wrap jute twine around the strip, securing it on both ends. Finally, attach the strip around the base of your tray with additional hot glue. Adding embellishments is optional, but using a few plastic beads as feet to raise your new storage container set is smart, especially if you plan to use it on a bathroom vanity or kitchen countertop where it could be exposed to moisture.