Transform Old Pickle Jars Into High-End Countertop Storage In A Few Easy Steps
Whether in your bathroom, bedroom, or kitchen, little odds and ends tend to pile up. It may be a collection of makeup brushes cluttering your vanity or various cooking utensils rattling around a drawer. While you can always buy pretty storage containers to organize your space and make your countertops look appealing, a much more affordable solution is probably lurking in the back of your fridge — a pickle jar.
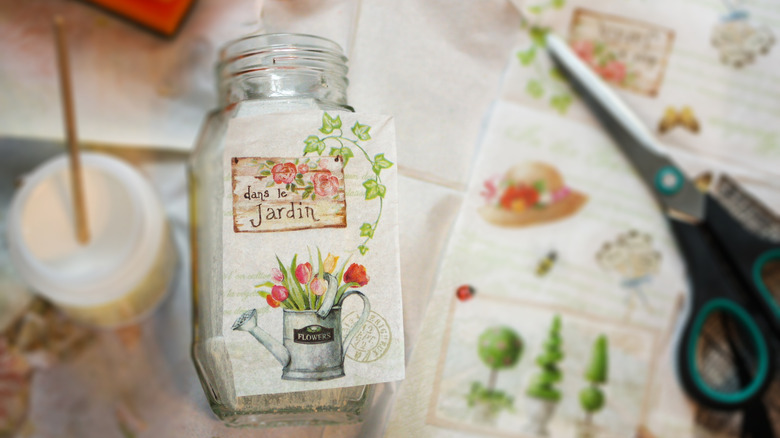
Once you've eaten the last pickle and have drained out the brine (don't toss it — it can double as a natural de-icer in the winter), save the jar. With a bit of decoupage glue, some craft paint, and a patterned paper napkin, you can transform an empty pickle jar into a pretty countertop storage container.
The wide mouth of a pickle jar makes it an ideal option for countertop storage. Just make sure to give the jar a good cleaning, to get the pickle smell out, and to remove the paper label from the outside. While you won't need the lid to store brushes or utensils in the jar, it can come in handy if you want to place smaller objects, such as rubber bands or coins, inside. You can either paint or decoupage the lid to match the jar. A pickle jar might be the most fun, but you can use other jar types as well, such as empty glass peanut butter jars, large jam jars, or pasta sauce jars.
How to give a pickle jar a glow-up
After you've cleaned and dried the pickle jar, use a paper towel to wipe it with white vinegar or rubbing alcohol to thoroughly remove any lingering soap or other residues. Let it dry for 15 minutes, then paint the jar with white craft paint. While the paint dries, prepare your napkin (decoupage is a great way to upcycle unused party napkins and transform them into beautiful home decor). Separate the napkin layers, keeping only the layer with the pattern on it, and cut it so that it's the same height as the jar.
@amberfashion Girly Tingz to do when bored 🩷💗✨ #girlythings #thingstodowhenyourbored #picklejar #diy #modpodge #emptyjar #summercrafts #roomdecor #diyroomdecor #girlytok #girlytok #girlytips #painting #emptyjar #girlytok #coastalgrandmother #coquetteaesthetic #coquetteroomdecor #easydiy #diydecoration #diyhomedeco #diydecor #diyvase #diycrafts #diyideas #diyhome #homedecor
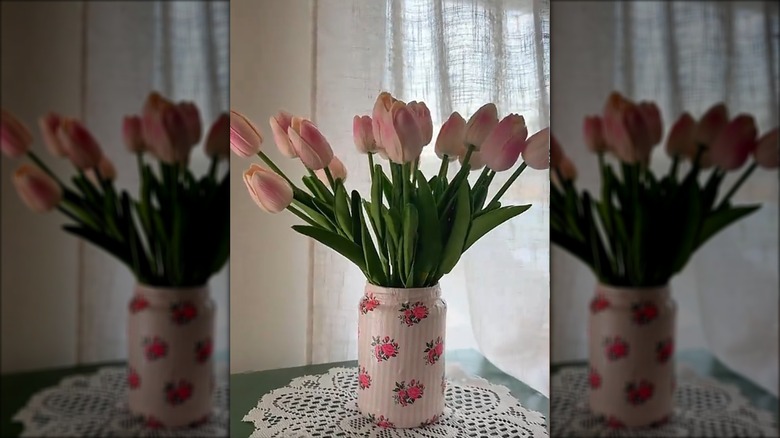
Use a sponge brush to apply a thick coat of decoupage glue to the outside of the pickle jar, over top of the white paint. It's okay to use a lot of glue — you can wipe it away later, and it's better to have too much rather than too little, as a thin coat of glue is likely to cause wrinkles. Smooth the napkin onto the jar, starting from the middle and working your way out to the ends, using either your fingers or a roller if you have one. Let the glue dry for about 15 minutes, then apply a top coat using the sponge brush. Trim away any excess paper and confirm that everything is smooth and adhered to the jar, and you're done. What you do with your transformed pickle jar is up to you: It can be a utensil holder, a knick-knack container, a vase, or a gift.