

Skip Traditional Pots And Planters: Upcycle An Old Milk Carton With An Easy DIY
We may receive a commission on purchases made from links.
So you want to start your dream garden but feel overwhelmed by all the materials you need? While gardening can save you money in the long run, acquiring pots and planters can be costly. We've got the perfect solution to get you started that doesn't require a trip to the garden center. This project is a great way to create a customizable alternative to plastic seed-starting trays. The best part is that you probably already have the main material sitting in your refrigerator or recycling bin (and no, it's not an egg carton). For this DIY, TikTok user @wilson_thewhale used an empty milk carton and an X-Acto knife to create the planter. Just add soil, a tray to catch drips, and the plant (or seed) of your choice.
By placing your chosen carton on its side and cutting out the long top panel, it becomes a small rectangular planter. The empty container gives you enough room to germinate several seeds or cuttings at once. When your plants grow out of their temporary home, they can be transferred directly into the garden or into a larger planter. And while they're growing, you can take your time finding pots at the thrift store, or discover a budget-friendly way to ditch expensive concrete planters and make your own larger containers.
How to turn a milk carton into a planter
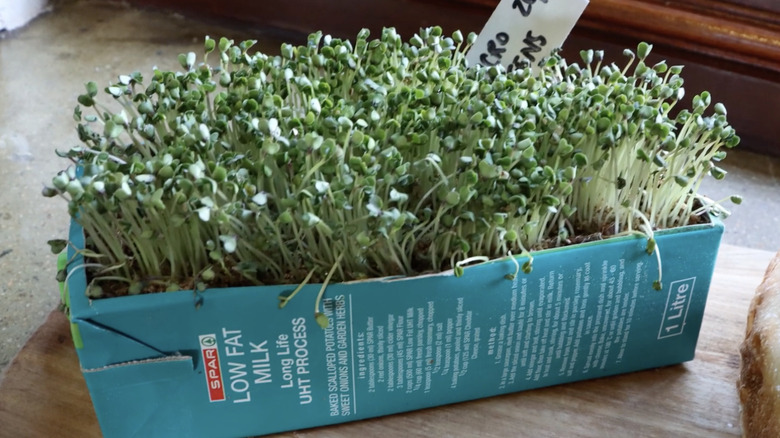
One of the most important tips for using upcycled containers as planters is to clean them thoroughly. Rinse the carton and let it dry completely, since leftover milk is not only sure to be stinky, but also encourages mold growth. Choose a carton designed to hold liquid rather than an uncoated paper container; most beverage cartons contain polyurethane layers that protect the paper from moisture, which is what you want so your planter doesn't disintegrate when water hits it. Start by laying your carton horizontally and cutting out most of the upper panel with an X-Acto knife, leaving a narrow border around the opening so the carton stays sturdy. All plants need proper drainage, so make sure you puncture a few holes around the bottom and place the planter on a tray. Fill the carton with your growing medium of choice and plant seeds according to the instructions on its packet.
If you're one of those people who has a million cuttings from larger plants, this DIY is a great temporary home for them once they've grown roots. To consolidate a few plants, use a half-gallon carton, separating them by cutting up a piece of the leftover material to use as a divider. A creamer carton makes a good starter pot for a single plant. To make the carton a little prettier, paint the outside with acrylic paint and seal it with something like Krylon Crystal Clear Acrylic Coating. Transplant everything before the roots become too crowded as this can stall plant growth.