

Turn A Round Box And Dowels Into A DIY Countertop Storage Shelf That Looks So Stylish
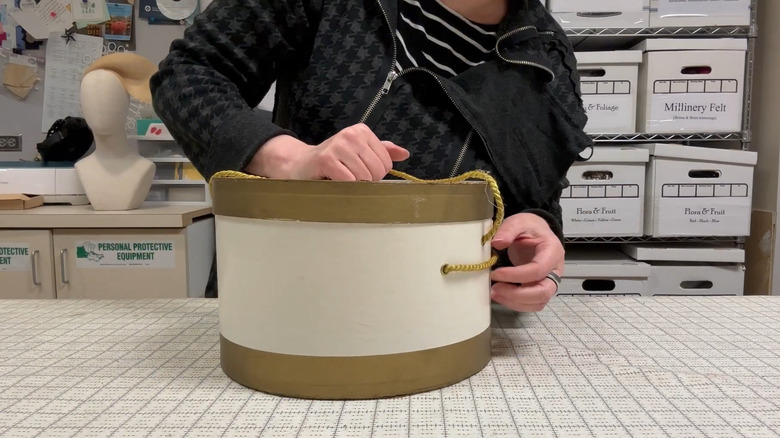
Going round and round about organizing your space and making it look stylish? Stop spending hours browsing online when Factory Direct Crafts has a simple, inexpensive DIY option that will definitely earn you compliments. The two materials for this project are a round gift box with a lid and wooden dowels — the dowels suspend the box portion above the lid to create a two-tiered storage shelf for your kitchen or bathroom countertop. Two levels provide more storage space without taking up additional counter space. And the round shape creates a sleek, modern design.
Since you're making a shelf, you want the round gift box to be sturdy, so the bottom doesn't bend when you put items on it. Choose a box with a lift-off lid, as it becomes the base of your tray. You can also use hat boxes (which happen to be a thrift store find that's better than baskets for organizing closets) or paper mache boxes. Dollar Tree has small paper mache boxes with lids in various shapes, but you can find larger ones at craft stores.
The wooden dowels are the other major part of the project. You'll glue them partially around the boxes, so you'll need at least 10 to 12 dowels (but possibly more), depending on the size. Common lengths for dowels are 12 and 18 inches — decide how much space you want between the shelves to choose. Have lots of hot glue sticks on hand, or you can use Gorilla Glue to secure the dowels to the box. Finally, you may want additional embellishments to decorate the shelf when you're done. And that's all you need for this DIY that sneaks extra storage into your home at little cost.
Create dowel supports for your round box shelf
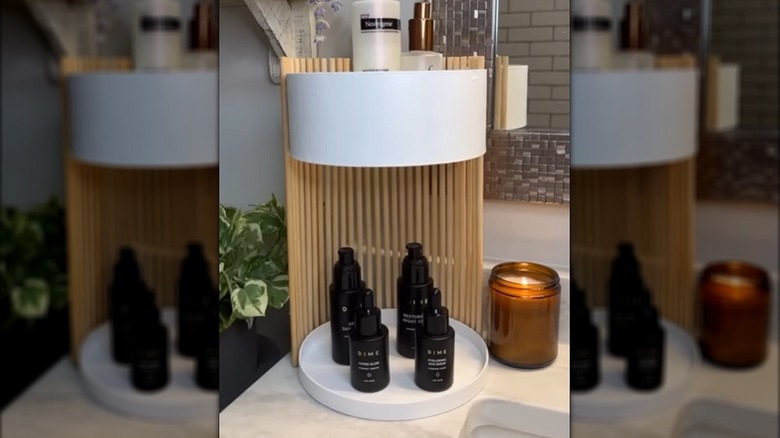
Painting the round box and lid gives your shelf a fresh, clean look. You can also paint the dowels to change up the aesthetic. The inspiration project features white paint on the boxes and the natural wood color on the dowels — it's a neutral, spa-like look with an elegant touch. However, a gold metallic finish lends a glam touch to your shelf. Or, incorporate patterning through vinyl cutouts, stenciled designs, or decoupaged images.
Assemble the shelf with the box lid on a flat surface — that helps you line up the dowels evenly. Find a small canister or something similar to hold the box portion in place at the desired height. In the original, the dowels stick up above the box slightly for an extra little detail, but you can decide where you want the upper shelf to sit. Start gluing the dowels vertically to the lid and the upper shelf. Once the upper part is secure enough, you can remove the support, so it doesn't get stuck. In the original, the dowels go almost halfway around and have a slight gap between them. You can adapt the project with thicker or thinner dowels. Place them side-by-side if you want a solid ribbed look, or create bigger gaps if desired. Using a spacer makes your placement consistent.
Little adjustments can make the shelf more functional. Add thicker dowels horizontally inside the lid or box to make little dividers, or add fabric or nonslip lining inside to help with organization. Including a small puck light to the bottom of the upper shelf helps illuminate the items on the bottom and adds an upscale vibe. Use the shelf for extra kitchen storage ideas or to save space in the bathroom.