

Woman Uses A Thrifted Rolling Pin To Make A High-End Light Feature On A Budget

We may receive a commission on purchases made from links.
When it comes to exuding high-end yet earthy vibes, there's hardly a material quite like marble to get the job done, making it an attractive choice for elevating your home design and decor. Unfortunately, with this luxe material comes an equally luxe price tag — a gorgeous marble pillar table lamp can cost hundreds (let alone if you wanted a pair!). Thankfully, the internet strikes again with a clever way to DIY a chic design using an unexpected source for the real marble: a rolling pin. After scoring a broken marble rolling pin for only $6 at the thrift store, YouTube user Cozy DIY Home shared how she transformed it into an elegant, expensive-looking table lamp by using a light kit to wire through the center of the rolling pin, a lamp base to support the stone, and a shade to finish the look for only about $60.
To create your own upscale table lamp, you'll need those same supplies. When it comes to the marble rolling pin, you can certainly treasure hunt through secondhand shops or online marketplaces, but you'll likely have more success shopping for one with the right look and structure at an in-person or online retailer. It may cost you a little more upfront versus thrifting, but you'll have more control over the rolling pin's type, size, and finish (why not try black, burgundy, or a popular color like green marble?). However, choosing the correct items to work with can be difficult, so we'll break down all the specifics to help you accomplish some DIY magic.
Gathering supplies for your DIY marble rolling pin lamp project
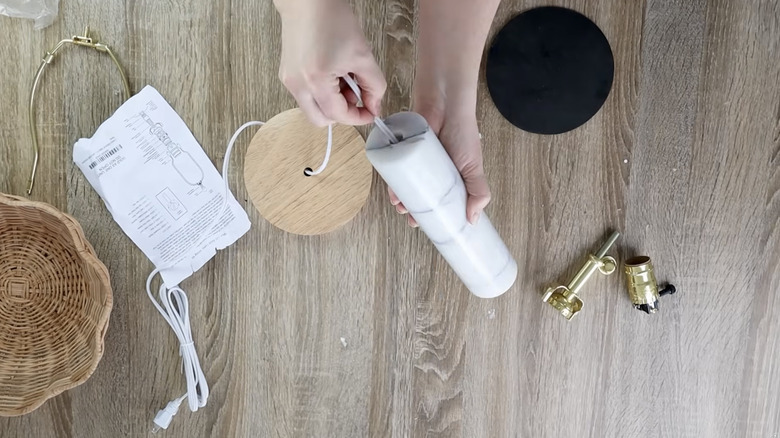
First things first, the rolling pin must have a hollow core with a hole that runs through the entire length so that you can insert the wires. This eliminates solid handleless rolling pins from the mix, so choose one with separate attached handles, like Amazon's Fox Run Polished Marble Rolling Pin, and then remove them. Secondly, while the final height is up to your aesthetic preference, anything too tall may become top-heavy once the lamp kit and shade are installed, so one in the 10- to 16-inch range will likely work best.
You'll also need a table lamp kit with a harp (such as the EMNOOTI Lamp Making Kit), a lamp base with a hole for threading the wires through (like the PATIKIL 5.5-inch Wooden Lamp Base), and a somewhat smaller-scale lamp shade. Harps come in various sizes, so be sure to choose one that works with your shade, typically the same height or 1-2 inches smaller than the shade height. Lamp shades can be purchased at retailers like Target or IKEA, but there's usually a great selection of inexpensive options at your local thrift store as well. The YouTuber used a fabric drum shade, but you could opt for a wicker or tapered pleated shade if you want more texture, pattern, and/or color. If you're feeling ambitious, you could even make your own custom lamp shade from scratch. Depending on your shade choice, purchasing the materials new will set you back about $50-$60 in total.
Building your marble rolling pin table lamp
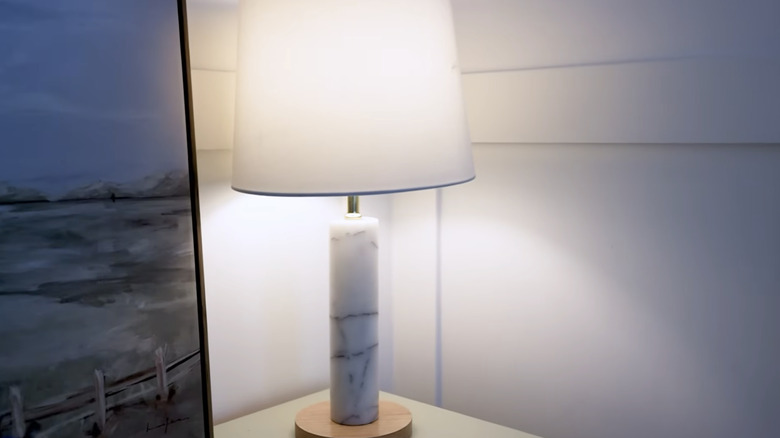
To assemble the lamp, follow the lamp kit instructions to put together the threaded pipe and tube to create the neck for your light fixture. Next, you'll have to thread the wires through the rolling pin. Using the cut end, start by threading the wires through the lamp base hole(s), go up and through the center of the marble rolling pin, then through the neck of the fixture, ensuring you have enough excess to allow for wiring at the top.
Using construction adhesive, bond the lamp base to the bottom of the rolling pin and the neck to the top to secure your lamp structure. Unlike the YouTuber, who ran a bead of adhesive around the outer ends of the rolling pin, hiding the glue between materials instead is likely to result in a cleaner, more refined finish. Finish assembling and wiring the lamp socket, saddle, and harp above the neck per the instructions, then use the threaded finial at the very top to attach your lamp shade. The lamp shade should be tall enough to cover the entire socket and saddle hardware portion of the lamp, but leave an inch or so of the decorative neck revealed for balance. If the shade feels too low or high, use a different size harp to correct the shade placement. Once you're done, you should be left with a gorgeous, high-end-looking marble table lamp that looks perfect in any room of your house.