

Skip Baskets And Bins: A Scrap Wood DIY That Organizes Toilet Paper In Small Spaces

We may receive a commission on purchases made from links.
Small spaces can present big challenges, particularly when you're trying to stay organized. Bathrooms are famously difficult to maneuver, especially when you have more toiletries than square footage. Instead of resorting to baskets that crowd the floors or overstuffing linen closets, one woodworker decided to reimagine a pallet into a clever bathroom storage idea that keeps toilet paper tucked away and removes the need for bulky bins (a win-win).
Showing a practical way to use wood pallets for budget home storage, Steve Ramsey of Woodworking for Mere Mortals cut up the lumber and created a unit that makes a valuable addition to any W.C. It includes a shelf, storage space behind small doors, and a dowel. The accessory utilizes vertical space in the bathroom that might've gone unnoticed and frees up room on the floor. Plus, the DIYer touts the "rustic" touch that the project adds to any space, which homeowners can appreciate. Do note that in order to recreate this shelving DIY, you'll need to saw wood and use protective gear such as gloves and goggles.
Turn a wood pallet into space-saving toilet paper storage
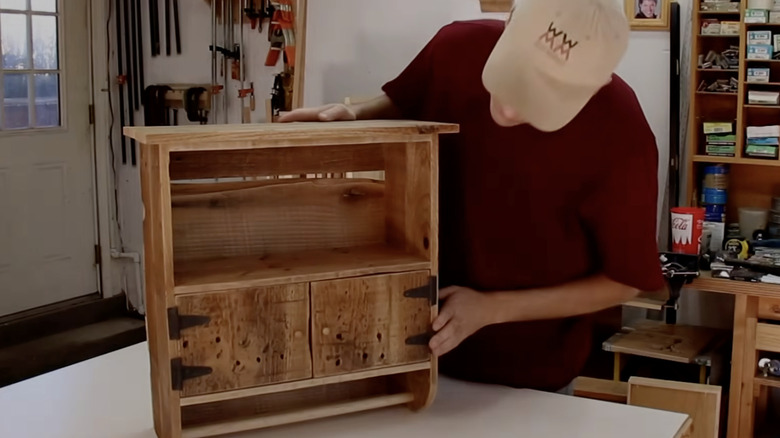
Once you determine where to find free pallets for DIY projects, begin by taking them apart, using a jigsaw to shorten slats and a hammer and crowbar to remove the nails. Once you've deconstructed the unit, Steve notes it's important to sort through the wood to determine which pieces will be better suited for structural purposes and which sport a rustic flair you'll want to show off.
Next, focus on creating side panels, cutting the wood to size, straightening the edges with a router if necessary, and placing the evenly cut pieces within a bar clamp to glue together with Gorilla Max Strength Construction Adhesive, or something similar. Once the pieces have dried and you're left with your sides, you can round out the bottom edges for style purposes. Then, drill two ¾-inch holes for the towel rack on each piece, but make sure to line everything up evenly and measure accordingly before drilling.
Now, take three pieces of wood that will serve as shelves, cutting them the same size. Measure where you'd like your shelves to be along the sides and glue the pieces together. The back of the project is where that rustic charm comes into play; mix and match different widths and shades of wood together to create a natural-looking surface, then glue and drill them into place. As things begin to dry and the structure takes shape, Steve cuts three top boards that extend one inch on each side (minus the front of the shelving unit) and adheres them to the piece. Lastly, he cuts the doors to size, adding a latch and steel strap hinges. When all is said and done, slap on a coat of spa urethane to help your new accessory fight moisture.