

Upcycle Old Pans And Turn Them Into Useful Storage Shelves

Once old kitchen pans become chipped and worn, what do you do with them? Throwing them away takes up space in the landfill, which isn't very environmentally friendly. The solution? Turn them into something useful instead. Reusing old household items is a great way to protect both the environment and your pocketbook — and it's a lot of fun, too. A DIY by YouTuber CanterburyCottage uses an old porcelain-enamel cake pan for this project. Instead of tossing it, she gives the pan new life by turning it into a sweet little shelf that is both functional and beautiful.
To complete the DIY, you will need an old enamel pan, a rub-on transfer, a strip (or two) of scrap wood, a bit of paint, a couple of screws, and glue. This DIY is perfect for holding small items and trinkets. You could use it to add kitchen storage space as a hanging spice rack, or even as an open cabinet in your bathroom to hold medicine, skincare bottles, or makeup. In the original DIY, one shelf is added to the pan, but you can easily install more to suit your unique storage needs.
How to turn an old pan into a cute and functional shelf
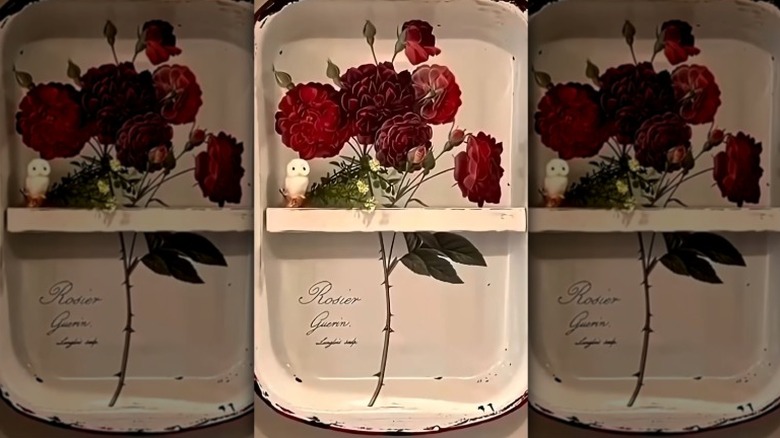
CanterburyCottage starts with a white enamel cake pan that is significantly chipped and worn. Because her pan is white, she states that it doesn't need to be painted prior to beginning the DIY. The chips and wear marks on her pan actually add to the appeal, creating a perfectly shabby-chic vibe. If you don't like the shabby-chic look, or you'd prefer another base color, consider lightly sanding the pan and adding a couple of coats of acrylic paint before starting the project. If you painted your pan, wait for it to dry before applying the rub-on transfer.
If not, step one involves putting the transfer on right away. Place your rub-on transfer on the inside bottom of the pan. Then, use the plastic tool that comes with the transfer to rub it onto the pan's surface, pulling the backing off as you go. In the video, a floral transfer is used that works well with the color and size of the pan, but you can choose any design you like. If you'd prefer not to use a transfer, you can use stencils and paint to add a decorative touch.
Once the transfer is applied, it's time to add the shelves. Cut a piece of scrap wood (or several if you want more than one shelf) to fit the inside of the pan. Paint the cut scrap wood to match the pan. Then, put glue on the back of the wood and place it across the inside of the pan. Use a screwdriver to screw the shelf to the pan. Make sure to screw from the back of the pan, through the enamel, and into the wood so that the screws won't be visible from the front. Your pan may already have a hole in the handle. If not, drill one through one of the handles to mount it to the wall.