

The Affordable Dollar Tree DIY That Makes Pantry Organization Look High-End
We may receive a commission on purchases made from links.
No matter how much you organize your pantry, untidy packaging can affect the look. You know, those twist-tied bags and boxes that were opened haphazardly? Definitely not magazine-worthy. Luckily, it's easy to give a pantry a high-end makeover by transferring food items into glass jars. Best of all, you can do so on a shoestring budget (or Dollar Tree budget, that is). Instead of purchasing a bunch of glass jars from a home store, which could get expensive, Dollar Tree carries 20-ounce Square Glass Jars with Clasp Lids for $1.50 each. You can also upgrade them with beautiful labels that are affordable, too.
Using airtight jars is a great way to help food stay fresh and keep insects out. Plus, it makes everything look uniform when creating a no-fail pantry. For added organization, content creator Liz Fenwick shared how to decoupage labels onto Dollar Tree's glass jars — which makes them appear more upscale as well. Her supply list included Mod Podge (the dishwasher-safe version), a sponge brush, and printouts from Etsy, similar to these YumPOPsvg Primitive Pantry Labels. Downloading labels to print can cost just a few dollars. However, as an alternative option, you can buy inexpensive ones online, or make them yourself out of scrapbook paper. It all depends on your tastes.
Use beautifully-labeled glass jars in your pantry to boost the look
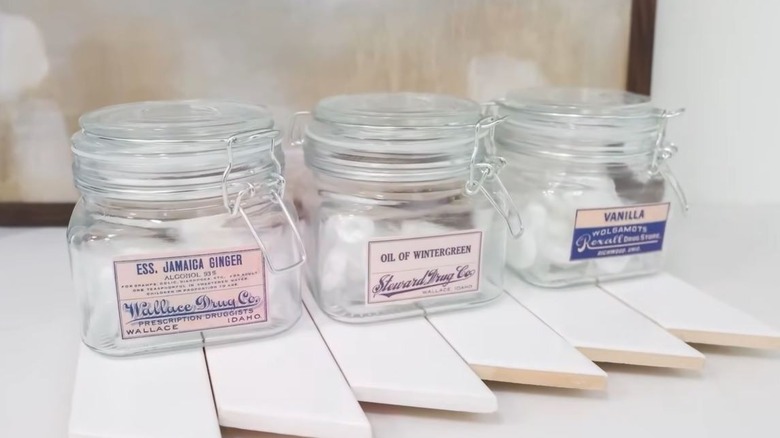
If you're wanting to make the most of your small pantry closet or even a large one, labeled jars will help. They reduce the amount of visual clutter packaging can create, all while keeping things tidy. You'll be able to see the food items inside of the glass jars. One benefit of labels, though, is that they make it crystal clear — allowing you to quickly find what you need. All you have to do is paint a thin coat of Mod Podge onto the front of the jar, then stick on the paper label. Cover it with an additional layer to seal it on. Let the jar dry completely before using.
After all of your jars are clean and labeled, fill them with dry pantry items. They can hold foods like rice, beans, and small pasta and noodles. Put aside a few for baking supplies like flour, sugar, and oats. Don't forget the candy and snacks, too. If you can't find labels that match the foods you want to store, consider attaching write-on versions, like these JIEHENG Waterproof Chalkboard Labels. Just make sure to plan everything out beforehand so you're prepared with the kind you need. Using the same label design will add to the high-end, organized look.
Group your food jars into categories. Finally, place them neatly on the pantry shelves with their labels facing outwards. Want to make the space even lovelier? Elevate the look of your pantry shelves with a contact paper DIY prior to putting the jars in their new home. You could also swap out dull bins for cloth ones from Dollar Tree, such as their Essentials Assorted Fabric Storage Baskets. Don't be surprised if your pantry ends up being a spot in the house you're proud to show off.