Not Too Orange Or Red: A Better Way To Update Bright Oak Cabinets

We may receive a commission on purchases made from links.
As a professional woodworker who has been in the craft for decades, I know only too well that color and finish trends in cabinetry are an ever-moving target. What was the bomb-diggity in the 1990s is now so 20th century. A significant challenge that these transitory trends raise is what to do when you've become unhappy with a cabinet's outdated color and style? For example, how do you subdue the look of your bright oak cabinets? Especially controlling the red and orange highlights that are so prevalent these days. The good news is you can turn down the bright and even darken oak cabinets by creating your own custom stain. It is easy to do, and very satisfying. And you can even do it without stripping the wood.
Premade stains — whether oil or water-borne — come in a variety of hues tagged with creative, if not particularly helpful, names (what color is a colonial oak?). The colors presented on the outside of the cans are helpful but are not accurate in every situation. For example, the color of stain applied to a prefinished surface will look different from that applied to raw wood. In the same way, the existing hue of your bright oak cabinets will impact how a specific stain presents.
But the fact is, you are not limited to predetermined, store-bought colors: You can mix stains together to get the color you want and that works best in your specific situation. By mixing different colored stains. you can experiment to create a recipe that will give you exactly what you are looking for. One hint I can give you, dark cabinets that used to be out of style are now coming back into favor. Just saying.
How to properly mix stains
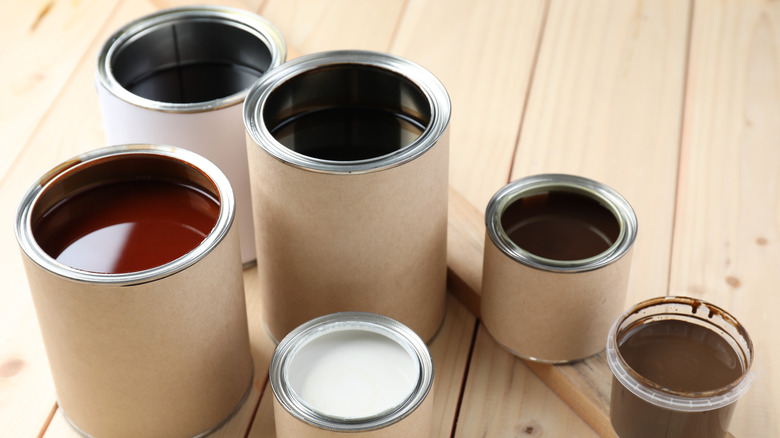
Mixing stains is not exactly rocket science, but you do need to follow a few rules. First only mix like stains. Oil stain with oil stain for example. In the same vein, I like to stay within the same brand for best results. They will have the same base with the pigments being the only difference between the mixtures. Another detail to be aware of is the color wheel. If you remember color wheels from grade school, you may also remember if you mix colors from the exact opposite spoke of the wheel (deep yellow and blue for example) they will often create a muddy gray. Avoid that. Finally, as you start mixing your own custom colors, keep an accurate record of how much of each color you've included in your formula.
You can use small amounts of stain to develop your custom color. Tablespoons-worth for example. Three tablespoons of dark walnut with one of light brown can be converted to two pint cans of dark walnut and one pint of light brown once you're ready. With a formula in hand, test a small area of the cabinetry you want to re-stain. If it is immediately clear the color won't work, wipe it off while still wet with either water or mineral spirits, depending on the type of stain. I prefer oil-based stain for this work (often called glazing), so mineral spirits is the best option. If it looks okay, allow it to dry to get confirmation it is doing the job you want it to do. Make sure it achieves your goal of eliminating the existing orange or red highlights. If it satisfies all those data points, you are ready to move onto the next step — application.
Applying the stain and clear finish
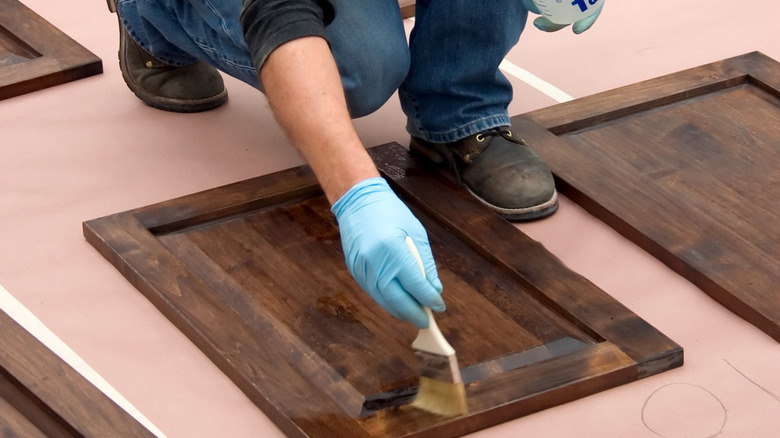
With your custom formula in hand (expanded to a sufficient amount to cover the whole project) it's time to prepare the cabinets. Start by cleaning them completely to remove residual buildup from use. A product like Savogran TSP cleaner is a good idea. When you've scrubbed them thoroughly, wipe them down with a clean cloth saturated with clear water, allowing them to dry. Next, remove all the hardware and take the doors off the cabinets. Use a synthetic abrasive pad to finely abrade their surfaces, so the new stain applies more evenly. Wipe away the swarf (abraded dust) with a damp cloth. The surfaces are now ready to receive your custom stain.
I prefer to apply the stain with a paintbrush, then remove excess stain with a different dry brush, taking care to leave behind even, consistent coverage. However you apply the stain on and wipe it off, the most important detail is to create that uniform coverage of stain and color. I like to keep the finished doors close at hand while working to compare them as I go. Allow the stain to cure for at least 24 hours if you are using oil stain. Then apply at least two thin coats of clear, waterborne polyurethane. I apply it with a foam paint pad in very thin coats. Reattach the hardware (you may wish to change it out for an even more dramatic upgrade), hang the doors, and you are done. The red and orange hues of your oak cabinets are a thing of the past, and your kitchen has a fresh, new look.