

Ditch Baskets And Basic Shelves: There's A Smarter Thrift Store Find For Storage

Sometimes it's the thrift store items that you don't think you need that make the best DIY projects. Such is the case with a simple step ladder. That's right, we want you to walk right past the basket aisle and ignore the shelving section. Maybe you have all the ladders you need for inspecting your roof and hanging your latest large wall decor idea. And perhaps that dusty A-frame ladder in the corner of the thrift store, surrounded by discarded tools and random DIY supplies, seems too old. But there could be a renewed purpose as a unique display shelf — and it's a lot more interesting than basic shelves.
For this DIY shelving unit, you'll cut boards to span across the rungs on the open ladder to create the shelves. Using scrap wood for the shelves and thrifting the ladder makes this a much more cost-effective option than buying a new bookshelf from the store. If you don't have luck finding a ladder at your usual secondhand shops, check out Habitat for Humanity ReStore, which resells donated tools, building supplies, furniture, and other home items. You can also build your own A-frame, similar to the one used in this stylish ladder-like entryway shoe storage idea.
Test out the ladder to make sure it sits level. You can add shims or cut down the legs if necessary to fix any rocking. Since you're using the ladder as the framework for your shelf, it needs to be sturdy enough to support the wood and the items you want to display. However, it's okay if it's an older vintage ladder that wouldn't necessarily be the safest option for climbing. An older wood option gives the finished product a rustic, homey, worn look that's full of character.
Build a shelf from an A-frame ladder
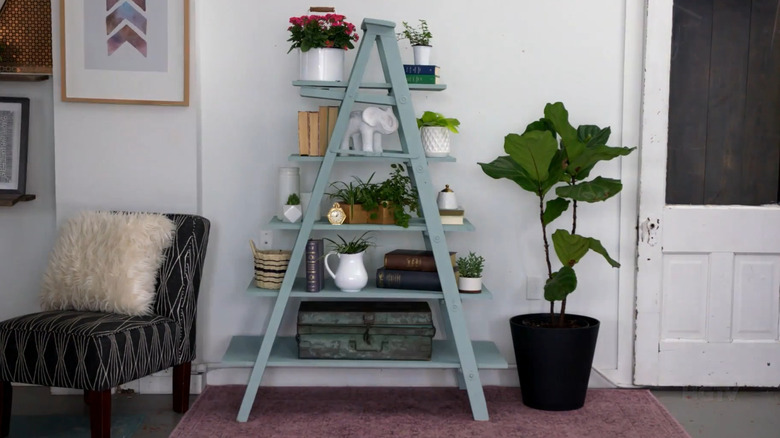
To create shelving, set the ladder so that the "A" shape is visible from the front. That way, the side rails can sit flush against the wall. Your wood shelves will run horizontally, resting on the rungs for support. If your ladder doesn't have rungs on both sides, cut wood pieces and screw them into place as makeshift rungs where they are missing. Paint or stain the ladder.
To cut the wood for the shelves, measure the dimensions at each set of rungs. Since you're using an A-frame ladder, the bottom shelves will be wider than the top ones. The distance between the ladder side rails might also narrow near the top. For a balanced look, cut each board a few inches wider than the distance between the rungs, so that each shelf is a little longer than the one above it. This helps maintain the A shape. Or alternate with one shelf sticking out farther to the left and the next sticking out farther to the right. Cut the boards, paint or stain them, and attach them to the rungs with brackets.
While the DIY ladder shelf is ready for use, you can also add more details, like wood trim around the edges to create a decorative lip that prevents items from sliding off. Use it to display family photos in the living room, sculptures you love, or houseplants that take the edge off. And if you're still in love with baskets, add some to the shelves for contained storage. Adding LED strip lights under each shelf creates an illuminated look that makes your displayed items look like museum exhibits.