DIYer Turns IKEA Metal Trivets Into A Stylish Side Table On A Budget
We may receive a commission on purchases made from links.
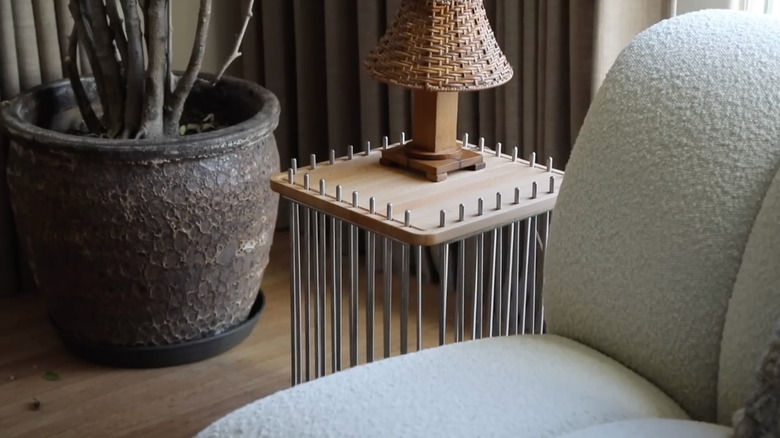
If you're inspired by all the new IKEA finds in 2026, you're not alone. According to YouGov data, the Swedish retail chain was the top-ranked furniture and home improvement retailer among younger generations and affluent consumers when it comes to perceived value. And it's not just the cost-effective furniture that attracts attention — the chance to get creative with simple IKEA items to fashion all-new customized pieces makes it a mecca for many a DIYer. That's how we get such inspirational and downright genius builds like the stylish side table from YouTube creator Drew Michael Scott (aka Lone Fox). To make it, he combines a basic wooden cutting board with four metallic trivets using nothing more than a pencil, a power drill, and a little elbow grease.
IKEA's kitchen section has several basic items you can turn into an elegant, modern side table on a budget. For this one, you'll need a $20 SÅPÖRTMAL cutting board for the table surface and four LÄMPLIG trivets, which are $10 each, to use as the four supports. If you need to save a little money, consider using a cheaper cutting board as long as it has the same 14-by-14 size, a square shape, and a grooved border as the IKEA version.
Scott avoided using any adhesives by reaching for a drill bit that was just a little larger than the ends of the trivets. Taking this approach should create a snug pressure fit that keeps your side table sturdy enough for everyday use. However, if you anticipate using it to hold a pile of books or other heavy items, you may want to add a heavy-duty adhesive like Clear Loctite Super Glue to your supply list.
Mark and drill your cutting board for a quick, easy DIY
The first step to building this space-saving side table is the most important. Lay your cutting board on a flat surface before centering a trivet along each side. Line the ends over the grooved border so you can mark your drill holes, the points where the rods will push through the board. Use a marker or pencil to mark the position of the center of each rod on the cutting board. Although you could do this on a board without a groove (or just a square piece of wood), the channel helps ensure your drill marks are in a perfectly straight line. Being off just a small amount can make your table wobbly, so take your time.
Once you've made all 32 marks evenly around your entire cutting board, use a straight up-and-down motion to drill completely through each one (or try a homemade jig, an easy drilling hack for perfect accuracy). Use sandpaper to smooth out any rough spots after you drill your holes. If the silver trend actually isn't for you, this is also the moment to customize the look by painting the trivet legs, using an appropriate paint for metal surfaces.
The final step is to carefully insert the trivet ends into the holes you've just drilled. Each metal trivet has two cross bars. Make sure they're facing the center of your cutting board for the most professional finish. Add a small amount of super glue inside each hole in the cutting board for extra hold if desired. Lastly, push the ends into the holes until the cutting board is resting on the crossbars of each trivet, using a little elbow grease and, if needed, a rubber mallet.