This Genius Pool Noodle DIY Takes A Worn-Down Thrifted Chair From Trash To Treasure
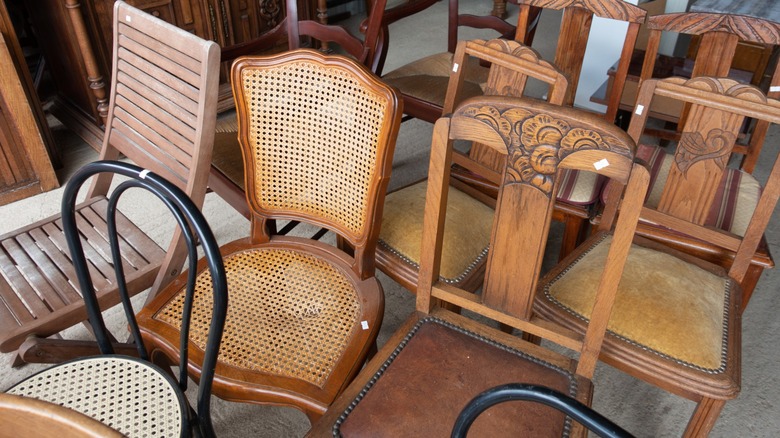
That old chair you just saw in the back corner of the thrift store may be worn out, but you've got just the place for it, and you can have it for a song. When a sweet deal like this is staring you in the face, it's a great time to take a tip from TikToker ericadoesitherself and put your DIY skills to work, and with some upholstery fabric, hot-melt glue, staples, scissors, a knife or saw, and pool noodles, you can turn this lemon into lemonade. Light and spongy pool noodles have many alternative uses around the home and garden, and they're perfect for making an old chair more cushy and comfortable.
This hack can work for a dining or accent chair with a hard back — the back can be solid or open, and it can be curved or straight. If the chair has a hard seat, you can also use pool noodles to add cushioning to that to make it more comfortable. It's a great way to salvage a broken wicker seat without having to make a whole new one.
Besides the pool noodles themselves, you'll need a backing to which you can stick them. A piece of hardboard is ideal for a straight-back chair or a seat, while thin foam padding underneath works well for a chair with a curved back. Hot glue works on both of these materials as well as many others.
Making a cushy chair backing with pool noodles
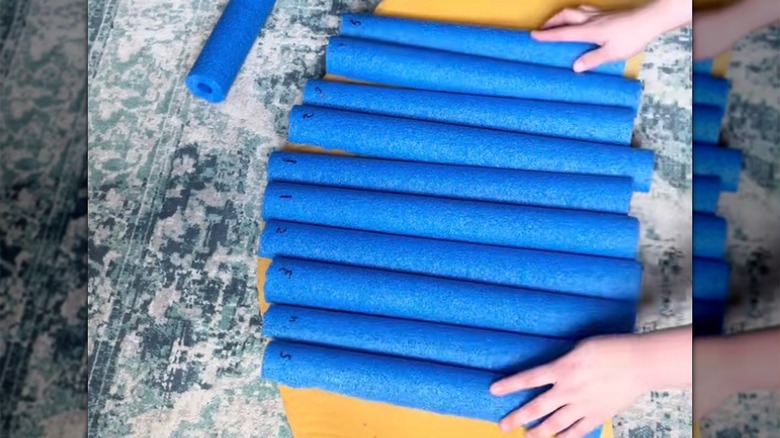
Start this project by cutting a piece of foam or hardboard to fit the back of the chair and another one for the seat, if desired. Then, prepare the pool noodles by cutting them in half lengthwise. The easiest way to do this is with a bandsaw, if you have one, but a keyhole saw, or long utility knife will also work. Fit them onto the hardboard or foam backing with the flat sides down, cutting them to length as you go. Number the pieces so you can remember where they go. Remove them, spread hot glue on the flat side of each one, and stick them back in their correct position.
@erikadoesitherself Pool noodle chair DIY part 1 #diy #diyproject #furnitureflip #furnituremakeover #vintagefurniture #diychair #poolnoodlediy #AmazonVirtualTryOn #MakeASplash
Now, it's time to cut the upholstery for the backing. Lay the fabric over it and stretch it around to the other side. Using scissors, cut a piece large enough to allow you to extend the edges over the back of the chair and fold them under to create clean edges.
When you're done, affix the backing to the chair. Hot glue works well for foam backing, but you'll probably want to use coarse-thread drywall screws to fasten a hardboard backing. If you're redoing the seat, prepare it the same way as the back of the chair and fasten it using glue or screws as needed.
Upholstering the chair

Use a staple gun to upholster the chair after you've affixed the back and seat. Lay the fabric in place, center it, then begin stapling along the edge on one side. You can fold the edges under before you staple, or you can cut them after you staple them and finish them off with fabric trim, as erikadoesitherself did. Fabric trim creates a classier look, and you can choose a different color if you want to add a border effect.
When you're done with one side, stretch the fabric over the rest of the chair and continue stapling the other sides. Leave the fabric trim for last. Use hot glue to attach it, and make sure it hides all the staples. Don't worry if you get glue drips on the fabric, because you can usually remove dried hot glue with ice or rubbing alcohol.
If you're also upholstering the seat, staple the fabric to the underside. You can leave the edges rough, because no one will see them when the seat is in place. When you're done, you will have turned a trashy chair into a brand-new one that's much more comfortable.