

Easily Transform A Thrifted Shelf Into A Quaint Kitchen Herb Garden On A Budget

Do you long for a kitchen herb garden but don't have the space? One TikToker figured out a budget-friendly solution that requires little more than a quaint thrifted shelf and enough wall space to mount it. To keep basil, mint, and rosemary right at her fingertips, haleypasz drilled large holes in the top of an old shelf that were the perfect size for holding mini terracotta pots. After planting her herbs inside them, she simply hung the shelf on the wall right above her kitchen countertop.
If you're always on the lookout for small kitchen organization ideas that are basically life-changing, this is one DIY project you'll want to try even if you're an inexperienced crafter who's on a tight budget. Any wall-mounted wooden shelf will work, whether you already have one that needs updating or you score a bargain at your local thrift store. You'll also need at least three small terracotta pots, which you can pick up at a home improvement store for under $1.50 each. (If your shelf is tiered or super long, it could accommodate even more of them!) Along with a little potting mix, you'll want to pick up a few of the easiest herbs to grow in your kitchen for an endless supply year-round.
Although this isn't a major woodworking project, a few other supplies are also necessary. In addition to a measuring tape and pencil, you'll need either a Dremel tool fitted with a cutting bit or a jigsaw. A sanding bit or heavy-grit sandpaper block will help keep your new kitchen herb garden splinter-free.
Use terracotta pots that fit snuggly inside holes in your shelf
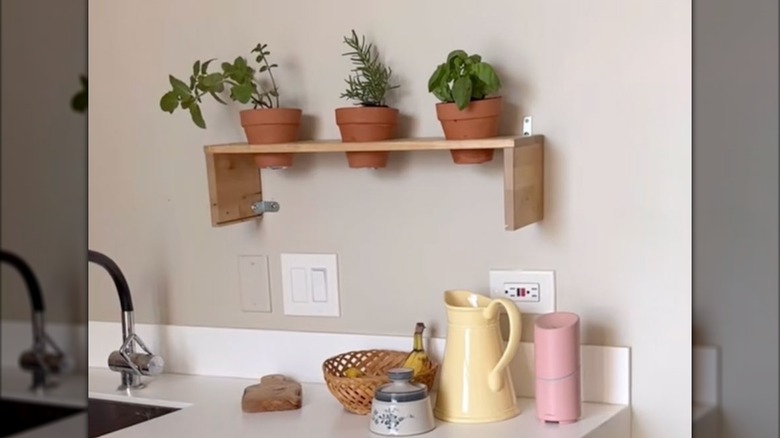
Prepping your shelf is the first step in transforming your quaint thrifted find into a DIY kitchen herb garden. Start by removing any screws or slats except for the two on either end of your shelf. Then, using the bottom of your terracotta pots as a guide, trace three equidistant circles onto the top of your shelf. Repeat the tracing process using the top of your pots. You'll want to cut in between these two ringed lines to create enough space to securely set your pots inside the holes.
@haleypasz little earth day project🌱🌎 giddy to have my own herbs to cook with❤️ #earthday #thriftflip #diyherbgarden #diyproject
Cutting is the most complicated step. The internet is full of bad woodworking advice, and you'll only get one shot at cutting the perfect holes in your shelf, so make sure you watch a few tutorial videos if you've never used a Dremel tool or jigsaw before getting started. Slowly and carefully cut out the first hole, using one of your terracotta pots to check that the opening size is adequate. After cutting the remaining holes, use a sanding bit or heavy-duty sandpaper to smooth any rough spots. If you want to stain or paint your shelf, do it before mounting it securely to the wall.
Finally, plant your kitchen herbs before setting each pot into place. Not all terracotta pots have a small drainage hole in the bottom, but many do. To avoid a mess all over your kitchen every time you water them, consider adding a plastic liner, silicone caulk, or sticky tack before filling them with potting soil and your herbs of choice.