Turn The Top Of An Old Plastic Bucket Into Cute Countertop Decor
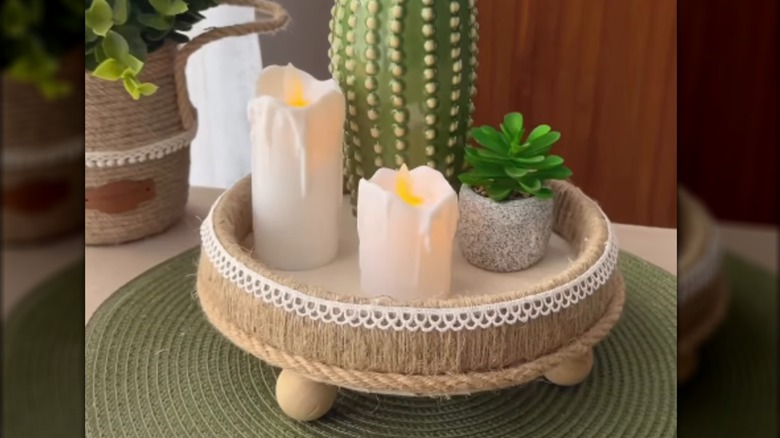
Plain plastic buckets come in handy for cleaning, mixing materials, and storing items, but they also work well for a variety of crafts and home decor pieces. Instagram creator cameliadiycraft proves that with a beautiful decorative tray that starts with the rim of a plastic bucket. She covers it with jute twine, builds a bottom, and adds legs to craft an inexpensive decorative tray that looks like it belongs on display at Pottery Barn.
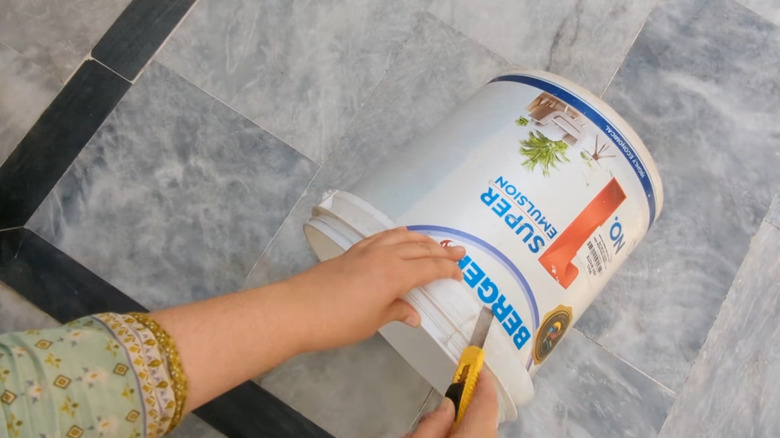
Using the rim of a bucket as the tray's sides gives you a perfectly round shape, and it's extra sturdy thanks to its tough plastic construction. When choosing a bucket, pay attention to the top edge, including the height and shape, as that will determine what the sides of your tray look like. If you don't have any buckets, check with friends and neighbors. Habitat for Humanity ReStore might have inexpensive options available, as well. You can also buy buckets in various sizes at home improvement stores.
To replicate the original, you'll need jute rope, cardboard, fabric, thicker rope, lacy trim, and large wooden beads for the feet. You can adjust the embellishments to change the tray's style however you like. Grab hot glue, a pencil, and scissors to complete the job. When you're done, you'll have a farmhouse table centerpiece that's Instagram-worthy!
How to make a sturdy tray from a bucket top
Start by carefully cutting the rim off the bucket. Don't toss the bottom portion — you can give an old bucket new life by turning it into a basket-style home storage solution. Then, wrap twine around the rim, using hot glue as needed to hold it in place. Make sure you cover the plastic completely. To change the look, use ribbon, wider twine, leather strips, fabric, or another material to cover the piece. To make the base, trace the ring onto cardboard, cut it out, and cover it with fabric. Hot glue the two pieces together. You could also use a round piece of wood to fit the ring for a sturdier base.
Now you can embellish the tray however you want. Adding trim along the top edge makes it look a little more finished. A simple crocheted or lacy trim offers a classic look, or use thicker twine, small wood beads, or braided leather for a different style tray. Adding a thick rope along the base helps cover where the sides meet the bottom. You can also add drawer pulls along the sides as decorative handles. All that's left to do at this point is glue the large wood beads to the bottom if you want to elevate it a bit.
This decorative tray looks great on kitchen countertops or shelves filled with decor pieces. Or, if you want to transform your bathroom with decorative accents, use this elevated tray on a shelf or countertop. You can swap out the pieces displayed on the tray as the seasons change to keep it fresh.