The Adorable DIY That Makes Watering Hanging Plants So Much Easier

We may receive a commission on purchases made from links.
Do you love decorating with plants? Tucking a little snake plant (Dracaena trifasciata) into a corner or a tiny air plant (Tillandsia) on a bathroom shelf is one way to do it, but hanging plants are in a class all their own. From pothos (Epipremnum aureum) to string of pearls (Senecio rowleyanus), the delicate trailing varieties can liven up a window like nothing else when placed in hanging planters... until you have to deal with the complexity of watering them. But there's no reason keeping your hanging plants watered needs to become a slippery mess on the floor underneath. Attaching a DIY hanging drip tray will catch all the water runoff. Dana Carpenter, aka @fancyplantsclub on Instagram, uses a few inexpensive materials to make them. She starts by melting a few holes into the lip of a simple plastic bowl before adding a thin chain and hooks that easily attach to her hanging plant containers.
This is a simple project for everyone, even if you spend way more time in the garden than you do at the craft store. Most of the supplies you'll need are available for just a few dollars. A lightweight tray or bowl that's as large as the base of your hanging plant container will form the bulk of this DIY. Dollar Tree's popular home items aisle is a good place to look for colorful plastic pieces that will work perfectly and not blow your whole budget. Look for thin metal hanging chains with hooks while you're there. If you can't find them, the EBOOT Hanging Chain for Planters from Amazon can keep the price in check while offering a few different color options and lengths so you can customize the look and height of your drip tray.
How to make a DIY hanging plant drip tray
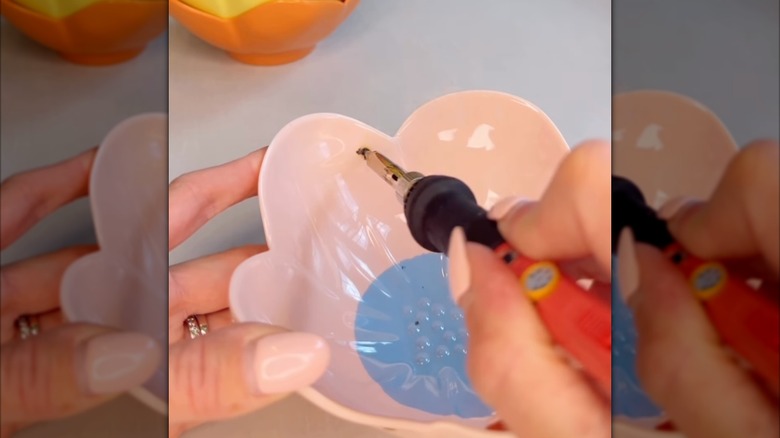
This drip tray is one of the best plant DIYs because the construction is extremely simple. You'll start by using a soldering iron to melt three evenly-spaced holes close to the rim of your bowl. If you've never used one before, don't be intimidated. You'll simply plug the tool in and wait for the tip to get hot before quickly touching it to the spot on the plastic bowl where you want each of your holes.
Once the melted plastic holes have cooled to the touch, it's time to attach your chain. Using three equal lengths, attach each chain to the holes using a hook. Then, using an additional hook on each end, hang your drip tray from the lip of your hanging plant container. It's important to use a long enough chain to create space between your drip tray and trailing plants, but don't make it so long that water trickling out drops so far that it's likely to splash out of the tray.
There are several ways you can customize your drip tray to ensure it looks just right with your hanging plants. If you're looking for a utilitarian option that doesn't distract from the beauty of your plants, opt for a clear bowl with very thin chains that will blend into trailing elements. For a bolder look, choose a brightly colored or fluted bowl and thicker chain that stands out. You can use paint, glitter, or even decoupage on the outside of your plastic bowl to add even more visual interest.