Upgrade Your Dull-Looking Cabinet Doors With An Affordable DIY Anyone Can Do
We may receive a commission on purchases made from links.
The look of our kitchens is one of the most important design elements of our home. If you are unhappy with that look, the challenge is that changing your cabinet's appearance tends to be a very big job. I'm a professional woodworker with decades of experience, and I find the idea daunting. New cabinets are a huge investment. Painting your cabinets, while less expensive, is still a significant undertaking from a DIY perspective — with results depending on your skill level. One particular technique that is often overlooked when looking to upgrade your cabinets is one called glazing.
Glazing is the process of adding color to an already finished cabinet door (regardless of the cabinet door style) or other furniture. By applying an oil-based stain you can modify the look of the piece in a huge variety of ways. I will often change the whole piece by glazing it, highlighting open grain and adding a new, uniform tone to the whole item. But by using a bit of imagination and adjusting your application, with glazing, you can add shadows, highlight shapes and shadow lines, and even imitate an aging process. It's quite versatile.
Never heard of glazing? Don't feel bad, it is not widely practiced. One reason for that might be because it has so many variations that the process isn't thought of as just one thing. But its versatile nature is also why it can be a great method to affordably upgrade your dull cabinets. It's one of many cabinet-related easy and affordable kitchen upgrades. The technique is not difficult to master, and the results can be stunning.
Getting started on glazing your cabinets
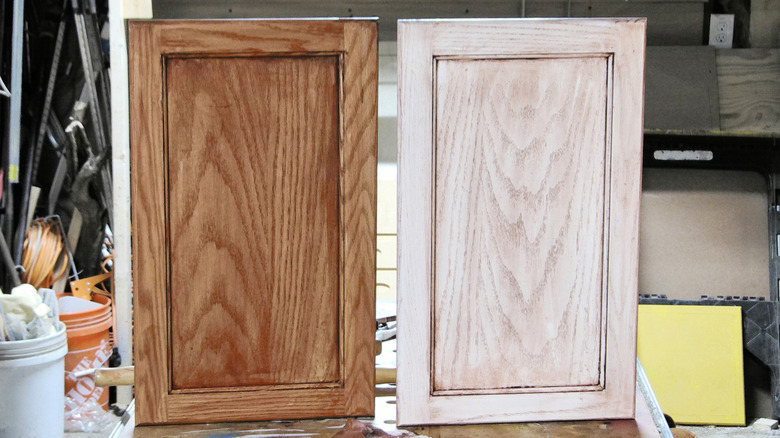
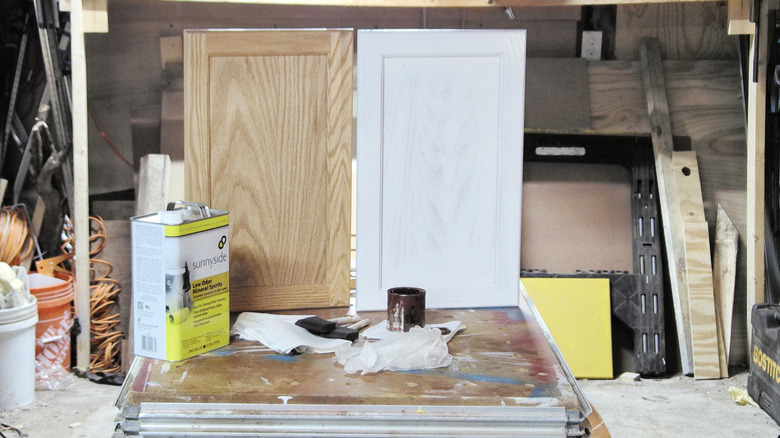
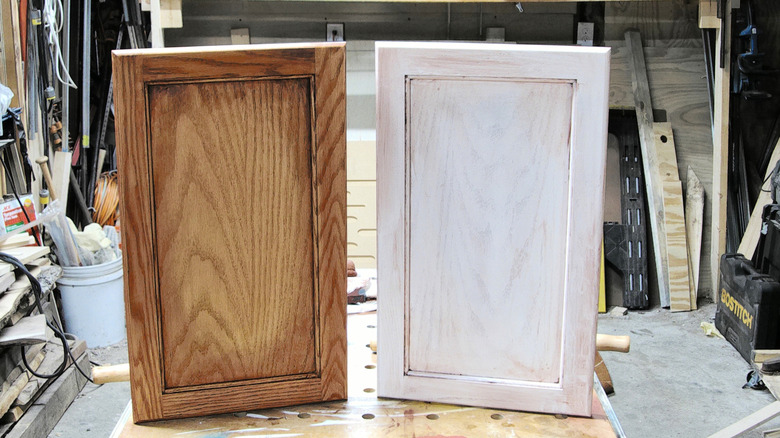
To begin, you'll need to select a stain color and a brush. I like to use those inexpensive foam brushes to apply the stain. You'll also need a supply of gloves and wiping cloths, as well as a can of mineral spirits. Take the doors off the cabinet and remove the hardware. The most basic glazing technique is simply applying the stain uniformly over the entire cabinet door and then wiping it off evenly, as shown above (using red mahogany stain). The color will accentuate grain patterns and shapes molded into the door.
Other options might be darkening the door's frame and leaving the flat panel alone, or imitating an aged look by leaving the corners darker and areas of the stiles and rails a lighter color. The options are only limited by your imagination. On painted cabinets and doors, you can accent the transitions from the panel to the frame or create a sunburst effect. They are your cabinet doors; you make the rules.
Whatever you decide, if you are doing a whole kitchen's worth of doors, you will need to take steps to uniformly apply the glazing, making sure that everything ends up in the same hue. I like to keep each door I complete nearby so I can look at them and compare them as I go. If your application goes astray (too dark or too light), the good news is that you can wipe the wet stain off completely with a cloth saturated with mineral spirits. Let the cleaned door dry and try again.
Final details
To complete the task, start by allowing the oil stain to dry completely. That will require at least 24 hours. When using oil stain to glaze cabinet doors, the color you seen when applying the stain will be the same as when it is cured and after you apply a coat of clear finish. If you apply the same stain to raw wood, though, those three stages of the process can produce three different hues.
Once the stain has cured, you will need to apply a clear finish over the top to seal and protect the glazing. I recommend water-born polyurethane for this job. It does not smell bad and it cures very quickly. Its water-clear nature also doesn't darken or add any amber color to the glazed doors as oil-based poly would do.
For best results, I apply it with a foam painter's pad in an extremely thin coat. As mentioned, it will dry quickly, allowing you to apply a second coat before much time has passed. Follow the directions on the can for recoating. With the poly coat completed, rehang the doors and remount the hardware. With all of that complete, you've got yourself an upgraded kitchen for a very reasonable price.