Save Empty Tuna Cans And Turn Them Into Adorable Mini Desktop Planters
We may receive a commission on purchases made from links.
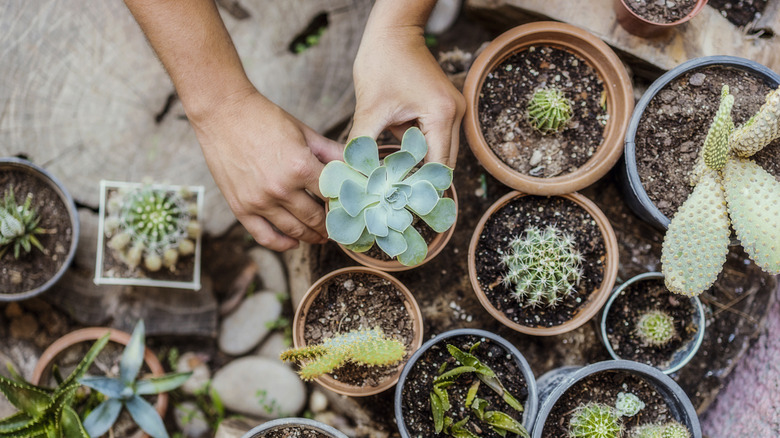
Tuna cans are one of those things most people rinse out and toss into recycling without a second thought. However, the shallow cylinders are more useful than you might realize. They're just wide and deep enough to work as miniature planters, especially if you apply a little DIY and dress them up.
There's a hack that turns tuna cans into the cutest DIY decor for artificial plants, but you may not realize they're suitable for some living plants, too. There are simply strict limitations to what you can grow. The best options are very young succulents that haven't yet spread their roots. Stemless succulents like the Haworthia or Echeveria varieties can thrive in a shallow receptacle. They, and many other succulents, are slow growers, so they may not outgrow their containers for years. In fact, the Echeveria might sprout other plants, but they can easily be separated and transported into a new tuna can of their own.
There are some factors to keep in mind before you start decorating the metal cylinder. Your tuna can should have holes for drainage, especially since succulents need less water than other plants. You should also have a place to put the can that gets adequate sunlight, such as a windowsill. If you're planting succulent offsets with their own roots, stick to a specific potting mix like Miracle-Gro Cactus Palm Citrus Potting Mix. If planting cuttings, place them upright on a sheet of moss tucked in the can.
How to transform tuna cans into cute desktop planters
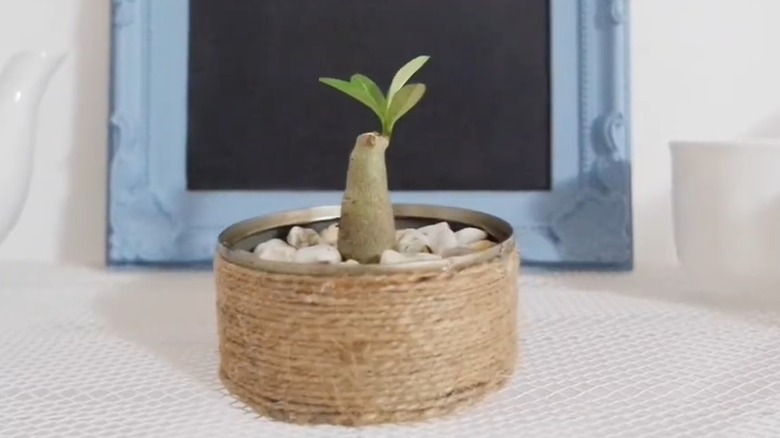
The beauty of this hack is that you only need one tuna can per planter. It's not like the chic tuna can countertop storage idea that requires at least three empty receptacles. Therefore, you can start the project with just one tin piece saved. To begin, you'll need to scrub it clean with dish soap and water, and hammer three tiny holes in the bottom with a nail. In order to emulate the YouTuber Mart Lester Vlog's rustic design, you'll also need a spoon, twine, small rocks, and a hot glue gun.
Wrap the can with twine, starting with the bottom edge of the can and wrapping around it. If you want a more elegant or eccentric look, you can swap out the twine for rhinestone or velvet ribbon instead. Scoop out the succulent and its soil with a spoon, and tuck it into the tuna can, adding the small rocks around it. If you have a cutting that's being propagated on moss, skip the rock step for now.
This DIY project doesn't take long to complete, but since it's so tiny, styling it well can be tricky. You may want to add more to your collection and find unique ways to display a whole batch. For example, you could set multiple tuna can planters on a decorative tray, like the Sapphire USA Decorative Rectangular Tray, which matches a farmhouse aesthetic. This idea is especially genius, because it'll also catch any excess water that drips from the homemade plant pot. Another option is to look into clever ways to hang plants, and find a unique method that displays a succulent collection above a brightly lit window.