No More Tripping Over Shoes: This Stylish Entryway Shoe Storage DIY Clears Clutter
We may receive a commission on purchases made from links.
The most practical place to drop shoes off is at the front door. It's one of the only ways to avoid tracking dirt and mud into the house, and keep shoes exactly where they're most needed. However, without a designated spot, shoes can quickly clutter a foyer and become both an eyesore and a tripping hazard for household members and guests. Many people opt for a standard shoe shelf, but there are other DIY entryway shoe storage ideas to save space. One brilliant DIY idea comes from several online influencers. This idea is a ladder-style shelf unit that can ultimately store anything from home decor to houseplants to a diverse shoe collection.
This is one of the many farmhouse entryway ideas bursting with charm. Ladder shelves have a minimalist design befitting any style interior, depending on the shelf's material, color, finish, and decor. The style traditionally features all straight edges, making it a doable DIY project for those with a penchant for woodworking.
This project is ideal when there's significant empty floor and wall space in the hallway or room leading up to a front door. Simply slide this multipurpose shelf up against the wall, creating plenty of side-by-side shoe storage. Designate a different shelf rack for each house member, or separate each shelf by shoe type, making it easy to sort through footwear pairs as needed. The setup is also convenient for tucking shoes away at the end of a long day, keeping matching pairs together and off the floor.
What it takes to make a stylish, ladder-style shoe shelf
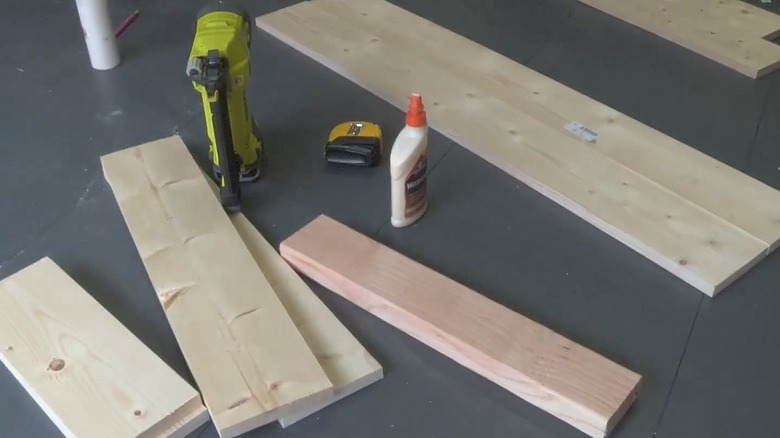
Above all else, you'll need enough wood for the ladder frame, rungs, and shelves. The exact dimensions will vary depending on how large you intend the build to be. There are several videos and written tutorials worth following, and one of them is the five-shelf ladder design in Modern Builds' YouTube tutorial. This tutorial requires two 2 by 12-foot plywood boards and two 2 by 4-foot plywood slabs. Aside from these primary materials, hinges, a miter saw, wood glue, and a drill and angle brackets are also necessary. If you have a table saw on hand, consider using it in place of the miter saw, since table saws are better for making long, straight cuts.
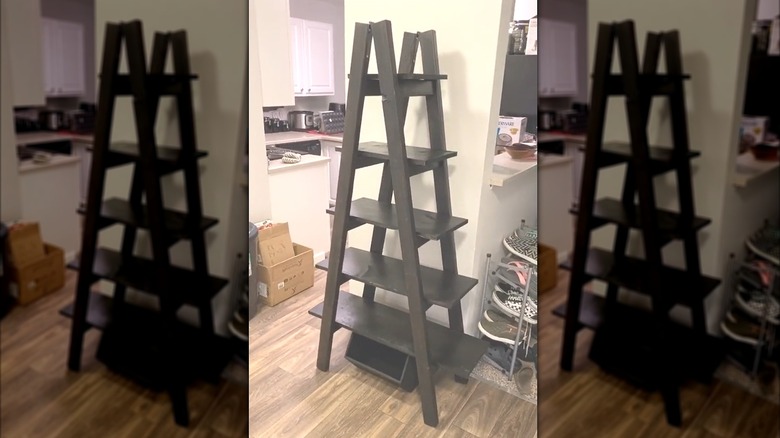
The shelves should slowly get smaller as you go up, and Modern Builds creates an even triangle shape by reducing the shelf overhang by 1 inch per side as they go up. For reference, the bottom-most shelf has 5 inches of overhang on each side, and the one above it has 4 inches. However, once they get to the top two shelves, they only lower the overhang by ¾ of an inch. Each shelf is secured in place with wood glue and angle brackets.
How to finish the DIY shoe storage shelf and style it in an entryway
Once the ladder is finished, use the Minwax Polycrylic Topcoat to fill the nail holes and give the wood a clear, protective top coat. This won't alter the color much. To completely recolor the shoe shelf, use Minwax Wood Stain. This specific wood stain brand is affordable, widely available, and has a variety of options, including light and dark tones.
Don't just pick your favorite color. Ensure the undertone meshes well with other colors in the room. For example, when an entryway door or other wood furniture has a warm tone, stick to a reddish-colored stain too. On that note, if you struggle with style, opt for a walnut wood stain, since walnut has neutral undertones that complement a wide range, including warm and cool shades.
For a more rustic look, leave the wood bare and tidy up shoe clutter with a simple wooden storage rack. When premade embellishments or colors aren't your style, a little decor goes a long way. Accessorize the shelving with more than shoes, and add other charming features like houseplants, string lights, artificial vines, a catch-all tray, or other knick-knacks. Another option is to buy a premade A-frame style shelf, such as the Recaceik Industrial Bookshelf with Metal Frame.