14 Genius Ideas To Repurpose Empty Soup Cans To Use Around The House
We may receive a commission on purchases made from links.
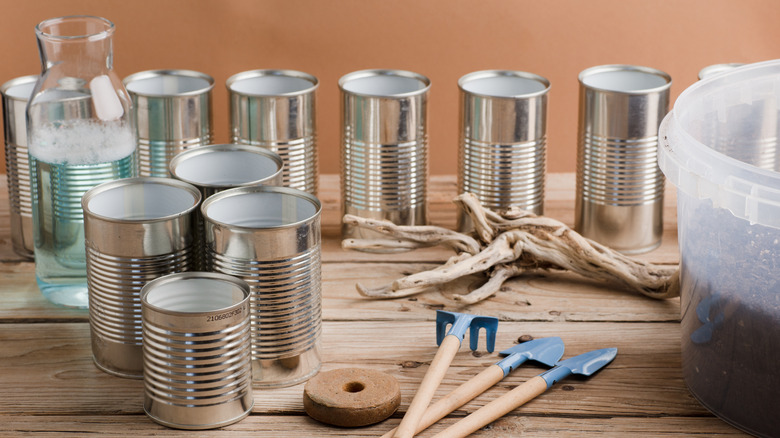
Soup cans are often made of tin-lined steel or aluminum. If fully rinsed after being emptied, they're often fully recyclable. Tossing them in a recycling bin may be the easiest route, but you could be missing out on an ingenious DIY project. There are many ways to reuse metal cans to add whimsical decor, storage solutions, and even lighting to a yard and home.
Once a bowl of soup is finished, the empty can has massive amounts of potential. The sturdy metal is great for both indoor and outdoor projects. These containers can be repurposed into vases, desk organizers, plant holders, and even eclectic garden accents like unique bird feeders. Although the cans are made of durable metal, they're still thin and malleable enough to DIY without heavy-duty tools. In fact, most of these projects utilize common crafting tools like paint, hot glue, Mod Podge, and scissors. The most niche tool in this list is a table saw, and there's a way to work around it if you don't have one.
On another positive note, most of these unique upcycle ideas are very budget-friendly. All of the crafting supplies are cheap and sold at major retailers and online marketplaces. Some of these ideas can even be completed with thrift store finds. In the end, you'll be impressed by the many ways you can use soup cans, which also supports the theory of how you can recycle just about everything in a house.
Repurpose a soup can into an adorable planter
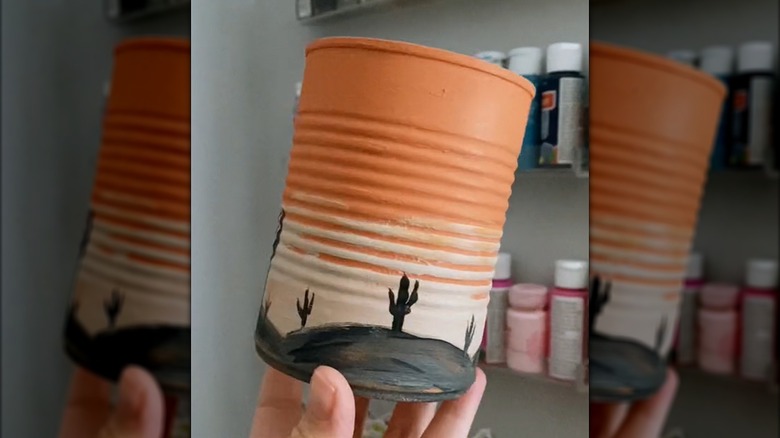
Soup cans are the perfect size for herbs, succulents, and starter plants. Turn these empty cans into garden decor by drilling three drainage holes in the metal bottom. Paint the outside of the can in a base coat to begin (ideally something like Plaid FolkArt Acrylic Paint in a terracotta color to emulate a natural vase). Once the base coat is dry, paint on additional patterns or scenes, such as TikToker @bluefircrafts' desert landscape idea. Don't forget to set this planter on a catch tray, so water doesn't leak from the bottom.
Craft metal luminaries from empty soup cans
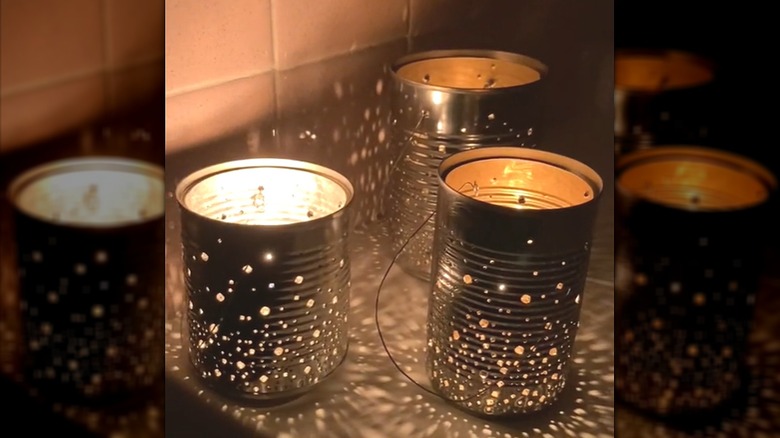
Create a set of shining luminaries to reflect a starry sky across any room. This idea is easier than it looks. You'll need a hammer and a large nail. Carefully hammer holes all over the metal tin, making them denser on the bottom and more sporadic at the top. The DIYer behind this hack uses real candles; however, be warned that a wax-burning candle will make the soup container very hot. A much easier and safer option is to use battery-powered candles, such as the Amagic Flameless LED Tea Lights.
Transform a metal can into a unique bathroom vase
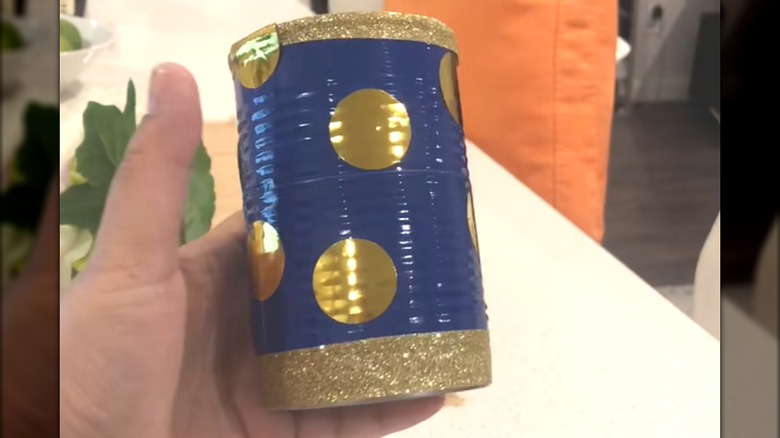
Elevate a bathroom design by upcycling a soup can into a countertop vase. Recreate DIYer @revivalspaces' idea with blue duct tape, Hybsk's Gold Circle Dots, and Sidazon's Gold Washi Tape. Wrap the vase in the duct tape before embellishing the exterior with polka dots and gold rims. Set up the finished product on a countertop to hold artificial foliage, toothbrushes, or any other bathroom products. Feel free to use different colors if your bathroom has an alternative aesthetic.
Make soup cans into chic, vintage-inspired desk organizers
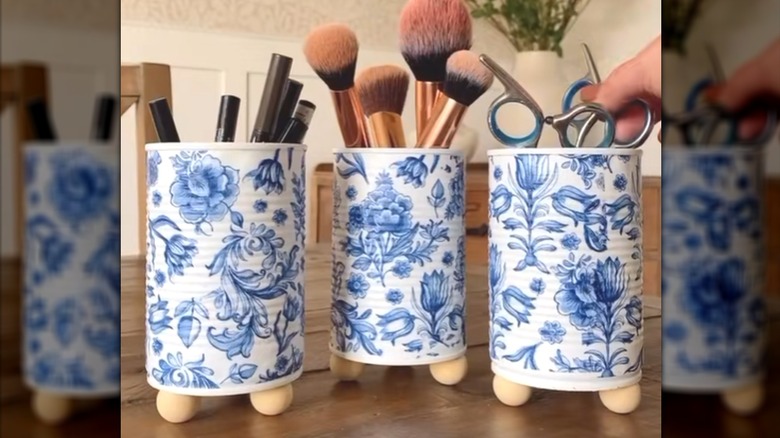
Turn these empty cans into vintage-inspired organizers. You'll need Mod Podge Matte Sealer, NatNarr Floral Paper Napkins, and Darice Unfinished Wood Round Beads. Brush the paper napkins around the can exterior, and wait a few hours for it to dry. Hot glue three evenly spaced wood beads at the bottom for balance, then fill it with pens, pencils, markers, and any other desk supplies. If making a trio of cans with different patterns, try styling them beyond a desk, such as on a mantle or console table.
Design a shabby chic carrying caddy from soup containers
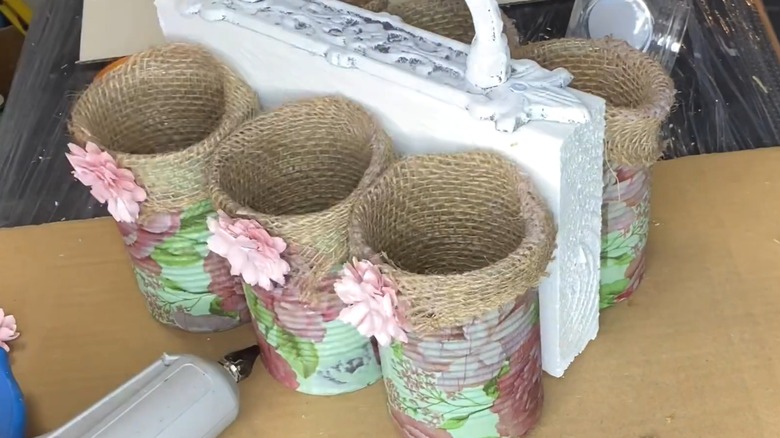
This durable carrying caddy requires a wood block and six empty soup containers. Brush over the wood with stain, and paint the metal to preference. YouTuber Chalk It Up Fancy also adds a layer of one-hour enamel for extra durability. They recommend going to Hobby Lobby, where vintage-esque handle pulls go on sale regularly. You can find pulls for under $5 to screw into the wood, or you can thrift vintage pulls. Continue by screwing the cans into the board and adding embellishments, like burlap and decoupage paper, to enhance the shabby chic appearance.
Turn a ribbed can into a utensil crock
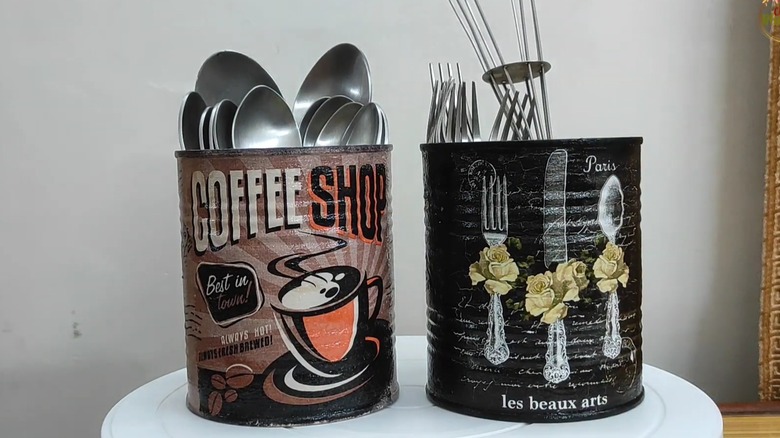
Put an empty family-size soup container to use as a modern farmhouse-style utensil crock. Start by coating the cans in Bluebird Heavy Gesso Primer, then Mod Podge them with Avever's Coffee Napkins. Blend the decal with the rest of the can by painting the backside with a driftwood colored chalk paint like Country Chic All-in-One Chalk Paint. If you want to add extra embellishments or emulate a well-worn look, follow the additional steps in Craft Blooms' YouTube video. Coat the finished design in a final layer of glossy varnish for moisture protection.
Decoupage metal cans into labeled pencil holders

Create pastel canisters for a desk or bookshelf by again using paint and decoupage. Start with a white paint base layer to make the decoupaged design pop. Mod Podge several cans with Fairooth Floral Paper Napkins and stick TQQBUU's Pastel Name Tags in the center. Label each can accordingly, and seal them with Mod Podge. The beauty of these canisters is that they can be used beyond an office space. With different labels, they'll work as makeup brush storage, toothbrush holders, or for other home purposes.
Collect cans to make a wind chime
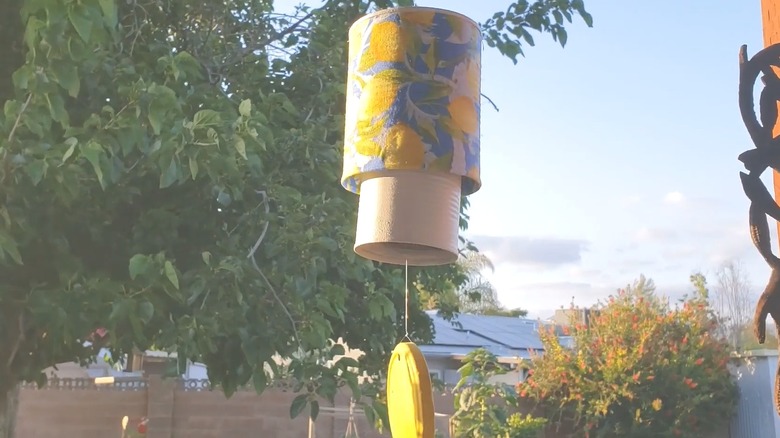
Add a homemade, bohemian accent to your windows with this hack. Drill holes in the can bottoms, so there's room to thread twine or yarn through. Sand the edges of the soup containers with 400-grit sandpaper so you don't scratch yourself, and also rough up the exterior to make it easier to paint. Coat the cans in two to three layers of paint. String the wind chimes so the larger one goes over the smaller one.
Hang a soup can as a basic bird feeder
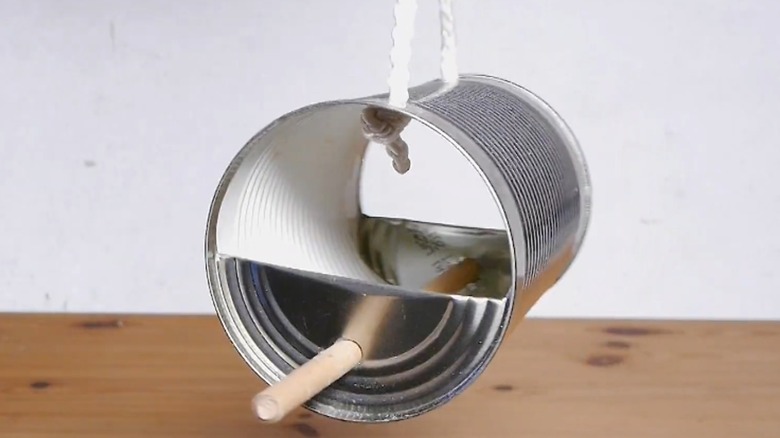
Turn any soup can into an easy bird feeder using very few materials. Carve open both sides of a soup can halfway with a can opener. Snip off a small part of each side, so the bottom can curve inward. Drill a hole through the center of the half-circle all the way through, and maneuver a wooden stick through, whether it's a chopstick, wood dowel, or other narrow cylinder. Leave the can as is for a simple, industrial appearance, or paint the outside in bright colors that attract birds.
Craft farmhouse decor with a smashed soup can
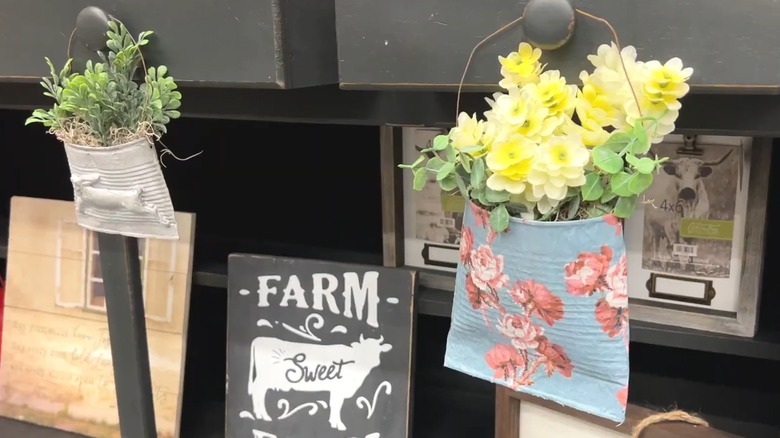
One of the most fun ideas on this list are the pocket planters. Begin by removing the bottom of an empty soup can. Release all of your frustration on the bottom end by (responsibly) mashing it with a hammer or mallet. The style of these pocket planters complements cozy, farmhouse interiors, and they can be styled with vintage or floral decoupage materials. You can embrace a pastel aesthetic with Crtiin Blue Floral Decoupage Napkins, or stick to a more rustic, traditional look with Amelia Wentworth's Grandma's Kitchen Scrapbook Paper.
Transform a tin can into a nautical vase for coastal decor
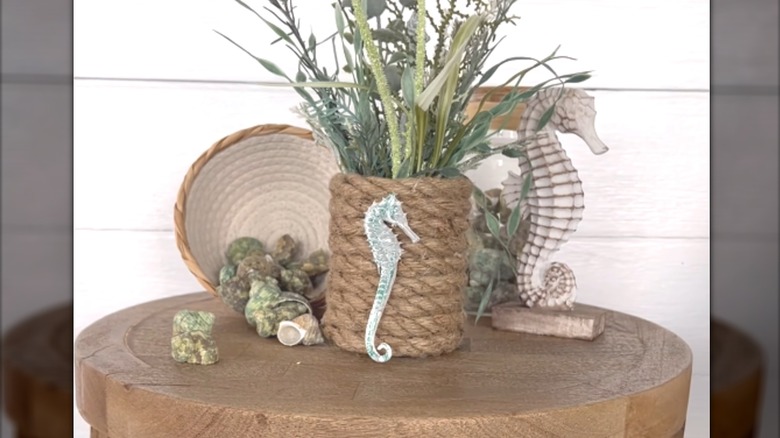
Most soup can DIYs lean toward a more rustic look. This unique idea veers toward a coastal vibe instead. Hide all visible metal by hot gluing a Dollar Tree Floral Garden Decorative Nautical Rope to the bottom and coiling it all the way up. Hot glue beach-inspired elements, like one of the Thyle Seahorse Christmas Ornaments or other embellishments from Dress It Up's Seaside Collection. Fill the finished piece with artificial coastal plants, such as seagrass or mini tropical palms.
Build a portable tool case out of metal cans
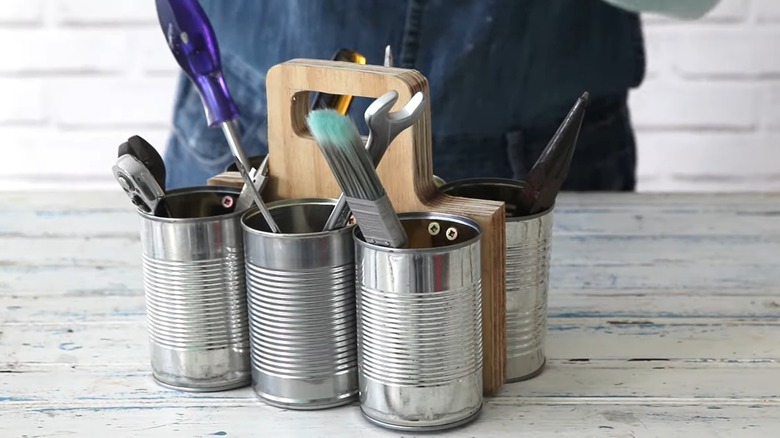
Make yourself a sturdy and reliable toolbox using six empty soup cans and a slab of wood. Carve the wood with a table saw, like in BuildersSA's YouTube video. If you aren't good at woodworking, substitute a square, wood cutting board with a handle. Drill three cans on either side of the wood to ensure they're affixed as tightly as possible. Since it's a toolbox, decorating is completely optional. Leave the design as is for a straightforward, industrial look, or spray paint and decoupage the cans for a prettier aesthetic.
DIY an industrial wine rack from tin cylinders
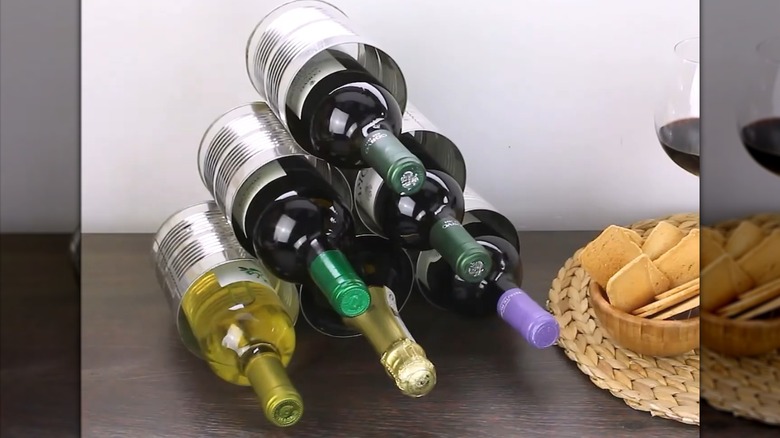
Store your wine in style using only a pile of soup cans, hot glue, and a can opener. Cut out both ends of each can, and remove all of the sticker residue. Lay them horizontally on top of one another in a pyramid formation, and keep in mind that you'll need at least six cans to make a proper shape. Hot-glue them into place, and the metal wine rack is ready for use. If you're not a fan of undecorated metal, upgrade the look with vinyl peel-and-stick.
Create festive tin can streamers
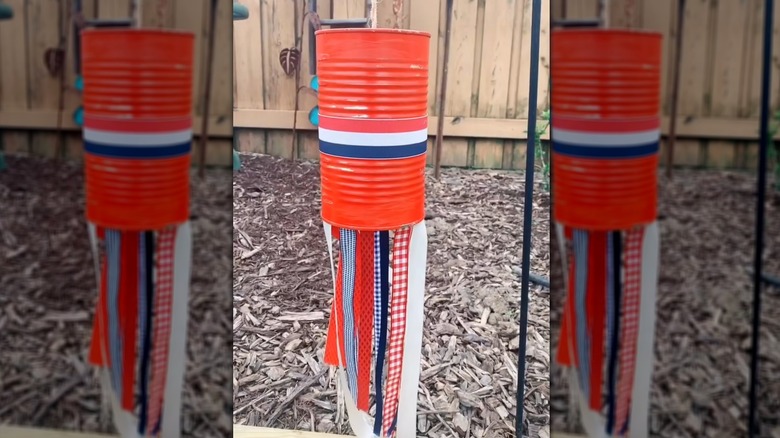
After Christmas, break out the stockpiles of leftover ribbon. Begin by spray painting an assortment of paint cans with two to three coats of Krylon COLORmaxx Spray Paint and Primer. Also apply a layer of Krylon Clear Gloss for extra UV protection. Hot glue ribbons around the interior rim of the can, and drill a hole in the closed side to string twine or fishing line. The finished product is a durable, hanging streamer for outdoor spaces.