That Old Tree Stump In Your Yard Has A Genius Use You've Never Tried
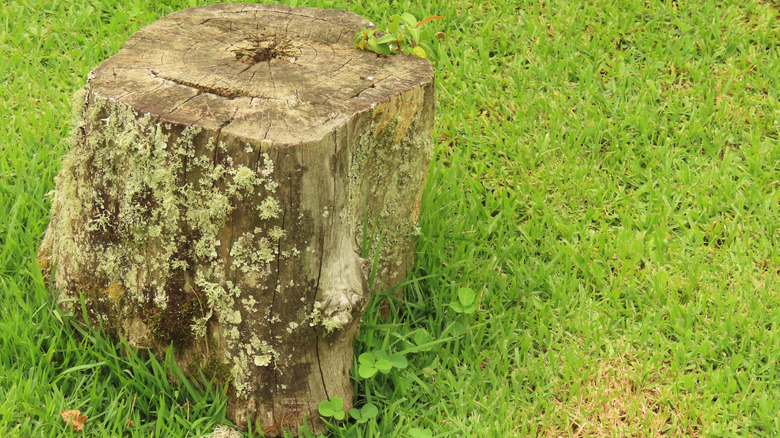
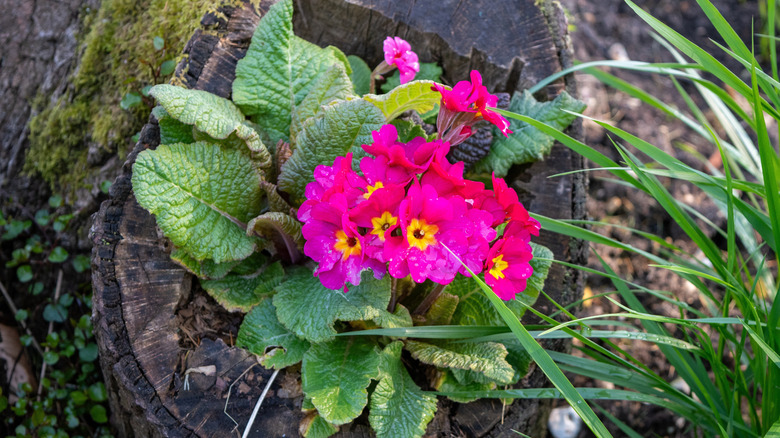
Trees are a staple of eye-catching landscaping, but sometimes one gets damaged, or too close to the home, and it's got to go. Removing it results in an unsightly stump, sometimes smack dab in the middle of the yard. Rather than spending on professional removal, or trying to dig it out yourself, you could make the most of this natural resource by repurposing it into an attractive landscaping feature: a planter. By hollowing out the upper part of the trunk and adding potting soil and your favorite bloom, you can avoid having to look up the fastest way to remove an old tree stump in your yard, and enjoy it instead.
This is a great project for families hoping to increase curb appeal, which is especially important when trying to sell a home, or ensure the value remains high. Curb appeal is pretty much exactly what it sounds like — making your home appealing from the outside, as well as from within. If you were standing on the curb, would you want to see a big ugly stump in the middle of the yard? Probably not. But fill it with flowers, and suddenly you've got a farmhouse planter, giving the space a rustic vibe many buyers are looking for these days. So, if you've got a similar predicament on your hands, read this before you remove a tree stump from your yard, and give yourself an affordable new lawn feature instead.
Crafting your tree stump planter
To bring your DIY planter dreams to life, you need a drill with a 2 inch forstner bit, gardening gloves, potting soil, a bucket for wood shavings, and plants or flowers of your choice. To repurpose an old tree stump into a cool backyard feature you'll actually use, the only other things you'll need are some elbow grease and a positive attitude. Don't have a drill at home? No problem: Check out the power tool rentals at hardware shops like Home Depot. You can also add elements to your list if you want to decorate the stump. Some options include ribbon to tie around the trunk, painted designs on the rim, a small birdhouse, or fairy door on the side. With supplies gathered, it's time to get drilling.
@happyhomesteading1 #gardeninghacks #gardening #flowers #treestump #treestumpremoval #spring #farm #homesteading #planter
Some people use an auger bit to start this project, but the forstner bit is larger, and eats up more of the unwanted wood at a time. Starting about 2 inches from the edge of the trunk, begin drilling a large circle into the wood. Once the perimeter is made, empty the center the same way and scoop out the shavings into the bucket. Drill two holes with a smaller drill bit into the side of the stump, so they connect with the bottom of the hollow you've created, for drainage. Add soil and flowers and enjoy. With plants added, this DIY planter totally transforms an old eyesore into curb appeal gold, and you made it without breaking the bank.