Sewer Drain Clogged? Here's How To Clear It Yourself
We may receive a commission on purchases made from links.
The national average cost to have a sewer line cleaned by a pro is about $300. When my home's sewer line gets clogged, which happens every one to two years due to tree roots, I rent a 100-foot sewer snake from my local Home Depot. This costs about $75 (for a four-hour rental), and the whole job, including travel, takes about two to three hours.
Granted, most homeowners would gladly pay almost any amount of money to avoid working on a sewer system, but if you've got some DIY chops, and especially if you need drain cleaning done frequently, as in my case, this is a reasonable and doable job to tackle yourself. The learning curve is minimal, and you can easily save over $200 for a couple hours of work.
Can I Clean My Own Sewer Drain?
Can I Clean My Own Sewer Drain?
Before you decide to take the plunge and rent a sewer snake (a.k.a. sewer auger, roto-rooter), there are a few things to be aware of. If you can't meet these requirements, you're better off having a clogged drain cleared by a plumber or drain service.
- Transport. You need a suitable vehicle for getting the snake machine to and from the rental store. A truck or trailer is ideal, but you can use a minivan or an SUV. I always use my minivan, which is nice because it's low to the ground.
- Lifting. Sewer snakes are heavy. You'll need one strong person to help you lift it into and out of your vehicle, unless you have a ramp. The staff at the rental store will help on their end.
- Cleanout. You'll need an accessible cleanout (see below) to get into your sewer drain. An outdoor cleanout is best and easiest to work with. If your only cleanout is in the basement, that'll work if you can get the snake down there.
- Optimism. Be aware that this might not work. Even plumbers with years of experience have trouble with sewer drains sometimes. That said, most sewer line clogs are caused by fine tree roots or junk that got flushed (like "flushable" baby wipes; don't flush them, by the way) and can be cleared with a few passes of the snake. If you're not making progress after several attempts, or the snake is repeatedly binding up, you may have something serious like a really big root or a broken drain pipe — that means you need professional drain services.
- City sewer. Don't try to snake your own sewer pipe if you have a septic plumbing system. You can damage the septic tank if you don't know what you're doing.
What and Where Is a Sewer Cleanout?
What and Where Is a Sewer Cleanout?
A sewer cleanout is an access point or inlet into your sewer drain, or main drain. The cleanout has a threaded cap with a four-sided nut that you unscrew with pliers or a wrench. The cap covers the cleanout opening, and that's where you insert your snake to clear the clog. Some cleanouts are just fittings on the drain pipe; others include a short pipe that branches off of the drain, and the cleanout cap is at the end of this branch pipe.
Sewer cleanouts are most commonly located outdoors and/or on the main drain pipe in a basement or crawlspace. Outdoor cleanouts might be near the home's foundation or somewhere in the yard, and are usually directly above the buried drain line. They may have a metal cover (sort of like a mini manhole cover) instead of a threaded cap.
Some houses don't have a sewer cleanout, or the cleanout they have is not accessible with a sewer snake. In this case, you can remove a toilet in a ground-floor bathroom and snake the drain through the toilet drain pipe (which is usually the same size as the sewer drain). However, it's best to leave this to a pro.
How to Clean Your Own Sewer Drain
How to Clean Your Own Sewer Drain
Most rental outlets carry 100-foot sewer snakes, and some have both manual and auto-feed versions. For DIYers, it's best to stick with a manual snake, which is a lighter machine and easier to work with for beginners. You're more likely to do damage with an auto-feed if you're new to this.
The rental should include a few different snake heads — typically 3-inch and 4-inch double-blade cutters (with two curved blades) and a pointed root cutter head. Some also include a single-blade cutter or even a spiraling saw-like cutter for troublesome roots. Usually, you start with the double-blade head that fits your drain (3-inch or 4-inch), and switch to another type if the double-blade can't clear a blockage. In any case, you should make final passes with the double-blade to get the drain as clean as possible.
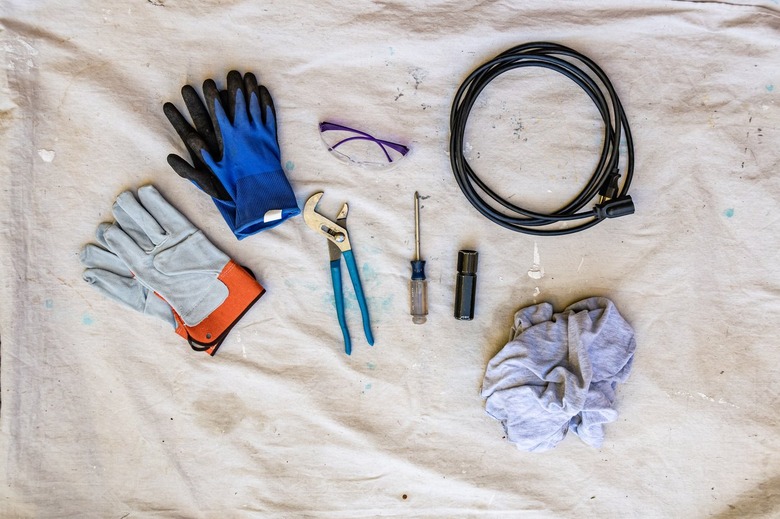
1. Gather Your Supplies
The tools required depend on your situation. You'll need a pair of tongue-and-groove pliers, a pipe wrench, or a screwdriver to open the cleanout, and a heavy-duty grounded extension cord if there isn't an electrical outlet nearby. It's also a good idea to wear safety glasses and have some sanitizing wipes for cleaning tools and hands (you don't think your cell phone will stop ringing, do you?). A flashlight is handy for peering into the drain.
The one thing everyone needs is a pair of leather gloves. You definitely do not want to do this barehanded, and you don't want rubber gloves, which can get twisted up in the rotating cable. If desired, you can wear rubber gloves under the leather ones, which will get soaked after a while. You'll throw out the leather gloves when you're done, so use a cheap pair — Home Depot actually gives you a pair with the snake rental.
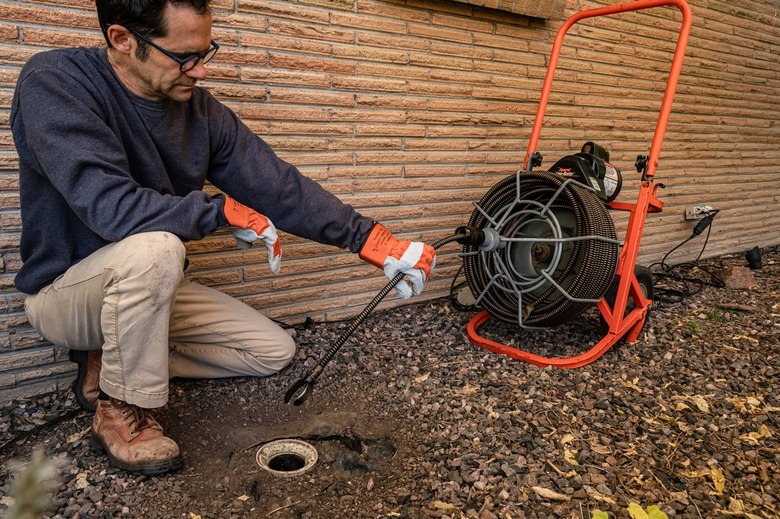
2. Clear the Area
 Leigh Schmidt for Hunker
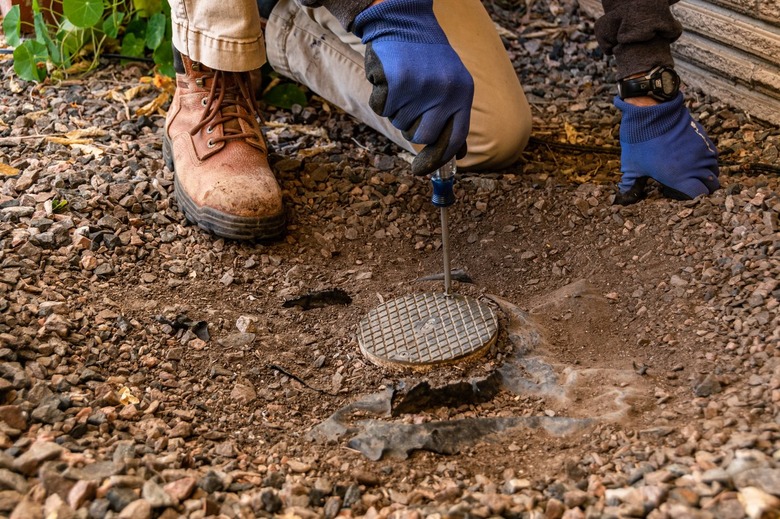
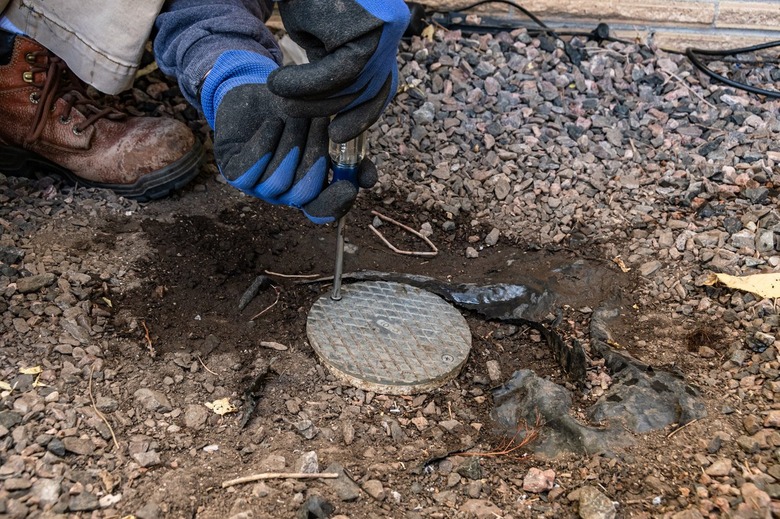
If your cleanout is at ground level, clear away mulch, rocks, or any other loose material that could fall into the drain pipe; you don't want this adding to the clog. Also, make sure you have a flat area for the sewer snake. Loosen the screws on the cleanout cover, or begin unscrewing the cleanout cap with pliers or a wrench.
3. Remove the Cleanout Cap
 Leigh Schmidt for Hunker
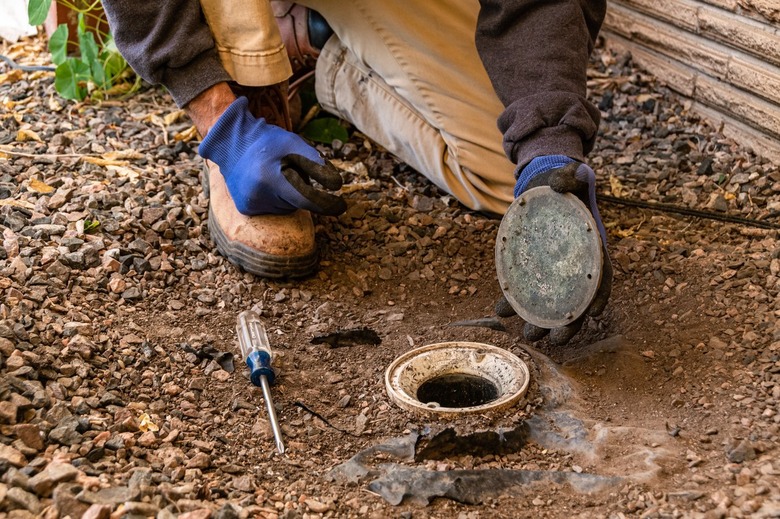
Lift off the cleanout cover or cap to expose the drain opening. If you're working in a basement or crawlspace, stand to the side of the pipe so you're not facing the opening when you remove the cap. If the drain pipe above the cleanout is filled with sewage, it'll come out of the cleanout when you take off the cap; you don't want to be in its path.
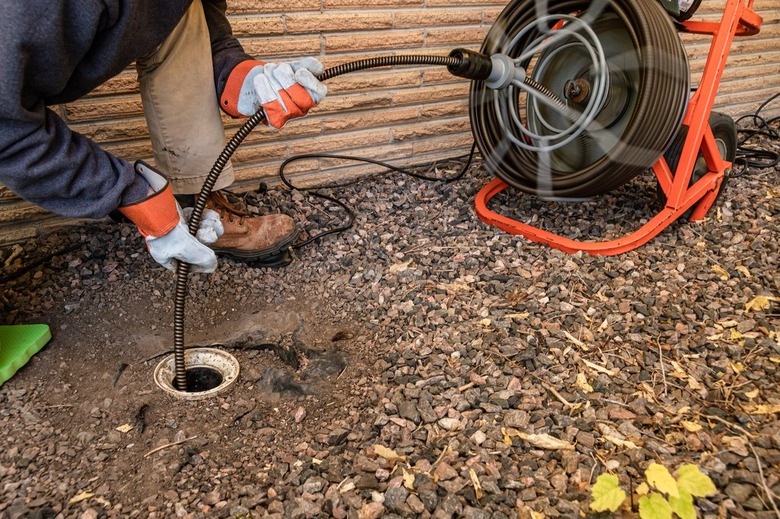
4. Set Up the Snake
 Leigh Schmidt for Hunker
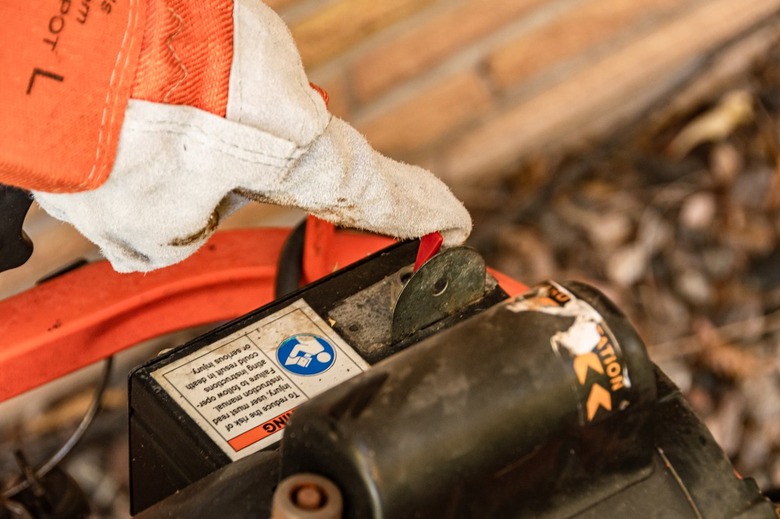
Position the snake machine a few feet away from the cleanout, with the cable end (the business end) facing the cleanout. The cable should make a smooth arc into the drain pipe. Install a cutter head onto the cable, if one isn't installed already. Heads are usually held in place with a screw; make sure to get this tight so the head doesn't come off inside the pipe — it'll contribute to clogging, and the rental outlet will charge you for it.
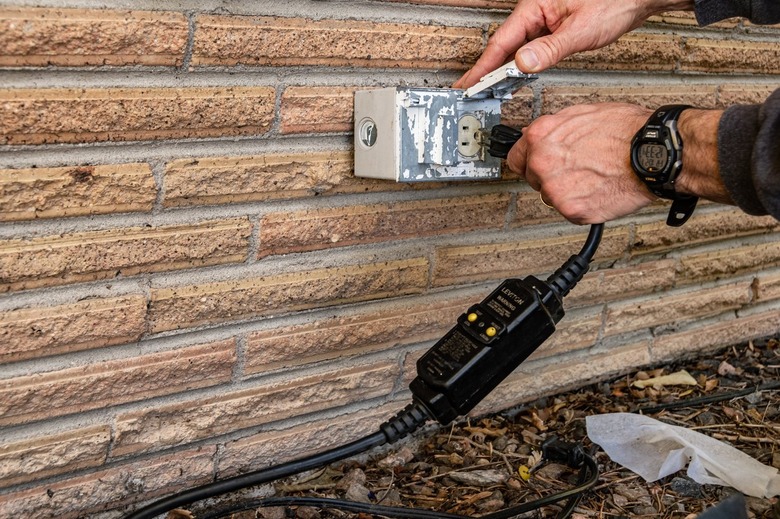
5. Plug In the Snake
 Leigh Schmidt for Hunker
Plug the snake's power cord into a grounded electrical outlet. The cord should have its own GFCI (ground-fault circuit-interrupter) device to protect against shock. If your snake doesn't have this, be sure to plug it into a GFCI-protected outlet. If you need to use an extension cord, use a heavy-duty grounded cord to ensure the snake gets enough power.
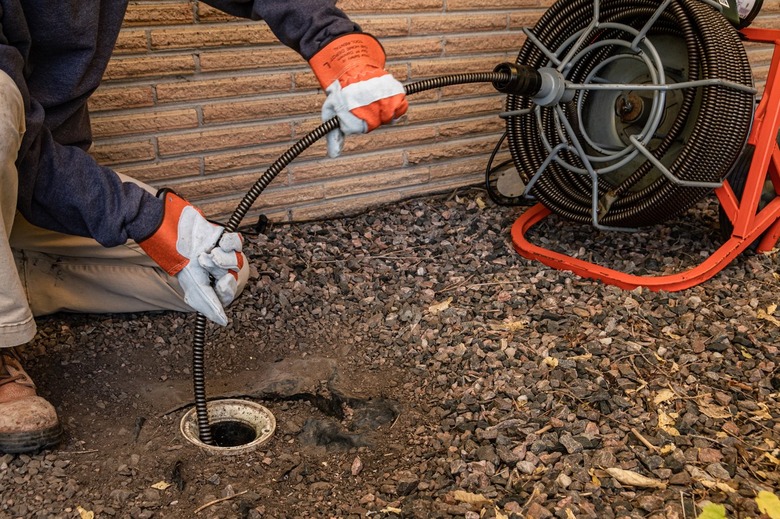
6. Feed In the Cable
 Leigh Schmidt for Hunker
Pull out the cable from the machine's spool and feed the cutter end into the drain. Note: Some cleanouts direct the cable down the drain toward the city main (away from the house); others let the cable go either way — in this case, make sure the cable is going away from the house.
Tip
The snake's cable moves in and out of the spool independently of the motor; the motor just turns the spool to rotate the cable — either clockwise or counterclockwise. Turning the spool does not advance or retract the cable with a manual machine.
7. Set the Foot Pedal and Switch
 Leigh Schmidt for Hunker
Unwrap the foot pedal cord and position the foot pedal (for controlling the snake motor) in a convenient location. Confirm that the switch on the motor is in the forward (clockwise) position. On many machines, the switch won't stay in the reverse position; you have to hold it there to make the spool go in reverse.
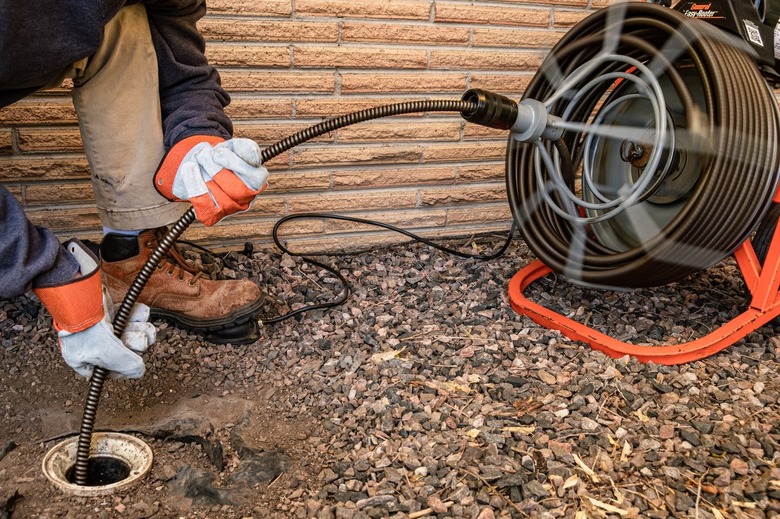
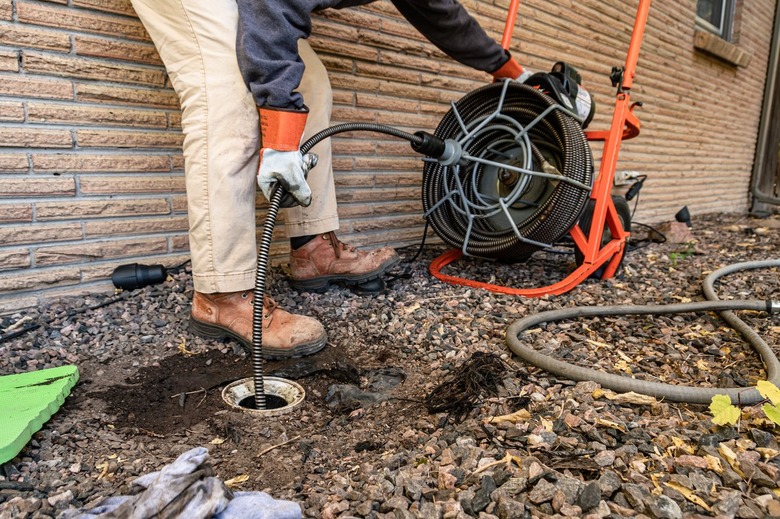
8. Begin Snaking the Drain
 Leigh Schmidt for Hunker
Hold the cable with two hands, and press the foot pedal to turn the spool clockwise — this rotates the cable clockwise. Pull about two more feet of cable from the spool, then slowly advance the cable farther into the drain while keeping the cable rotating. Don't hold the cable tightly; just let it spin in your hands. When you first pull out more cable, it'll make a sharper bend, then it gradually flattens out as you let the cable advance in the drain pipe. Repeat this process, pulling out a couple feet at a time and slowly feeding it into the drain.
9. Reverse as Needed
 Leigh Schmidt for Hunker
At some point, the cutter end of the cable will meet with resistance when it reaches the clog or tree roots (or a bend or break; see tip below). You'll hear and feel the cable working harder, and it'll flop around as the cutter engages with the obstruction and the cable tension increases. The cutter will eventually break free, and the cable itself (not the spool) will spin back to a relaxed position — the cable is actually a long, super-tight torsion spring, not a bunch of thin metal strands like a regular cable.
If the snake gets stuck for too long — more than a few seconds — it can wrap itself up and get stuck in the pipe; you don't want this to happen. If you feel the cable winding up and it's not releasing, take your foot off the pedal to stop the spool, then pull back on the cable to retract it a couple feet so the cutter is free from the obstruction. Restart the spool and slowly feed the cable back in. Repeat this as needed until you get through the clog. If you're not making progress after a few attempts, it's probably time to try a different cutter head.
Tip
Sometimes the cable meets resistance at a pipe bend. It takes experience to know the different feel of a bend vs. a clog, but there is a difference. In any case, retracting the cable and gradually going back in, as you do with a clog, usually gets you past the bend.
However, if you reach a point that you just can't get through with the cable, it could be a break in the pipe. This is far more likely with an old clay or concrete pipe than with a modern PVC pipe, but any type can break. When this happens, you have to call a pro for a camera inspection to assess the damage.
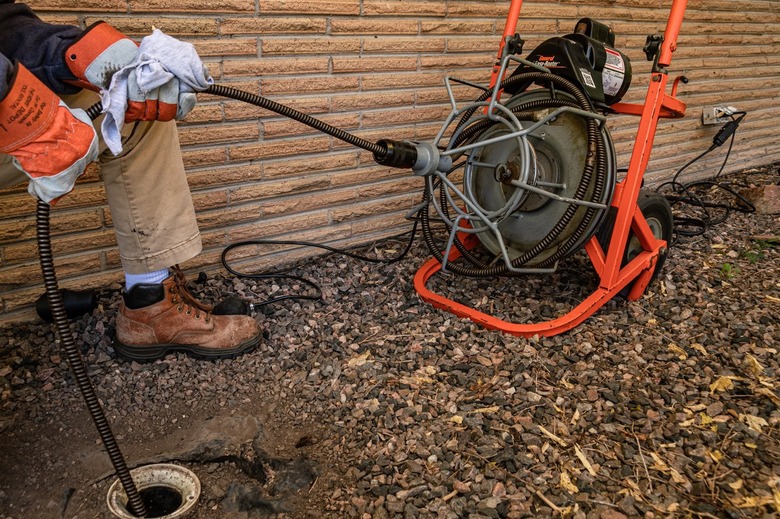
10. Retract the Cable
 Leigh Schmidt for Hunker
After you've reached the clog and worked on it some, or if you've made it through, retract the cable all the way and clean the cutter head for the next pass. Retracting is basically the reverse of advancing, except you don't run the spool. Pull the cable out of the drain a few feet, and shove it straight into the spool; it'll wind itself inside the spool.
If the cable gets stuck in the drain, run the spool in reverse as you pull on the cable; this should free it, then you can resume retracting without the spool going. If desired, you can keep a rag in one hand to wipe off the cable as you go.
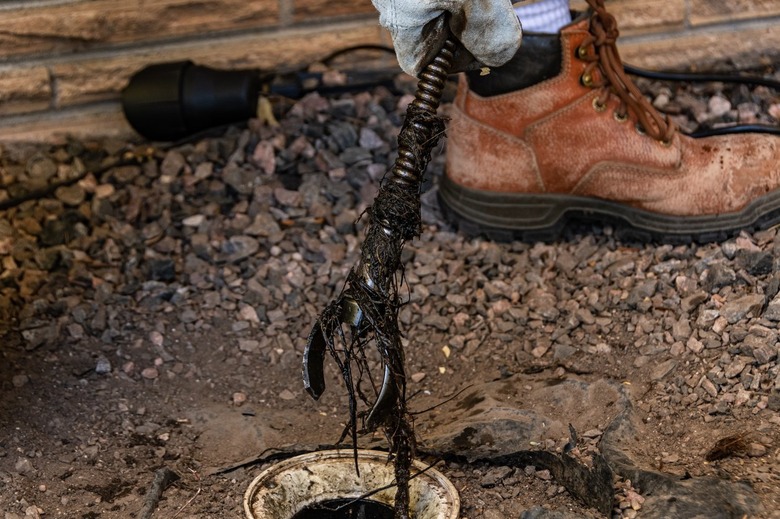
11. Clean the Cable and Cutter
 Leigh Schmidt for Hunker
Remove any debris that comes out with the cable. It's actually really satisfying (and gross) to do this because the debris tells you you're getting somewhere. Things like roots and baby wipes usually wind themselves around the cable clockwise, so just unwrap them counterclockwise. You can also cut off roots with a utility knife. When the cable and cutter head are clean, check the screw on the cutter head to make sure it's secure.
12. Clean the Drain Some More
 Leigh Schmidt for Hunker
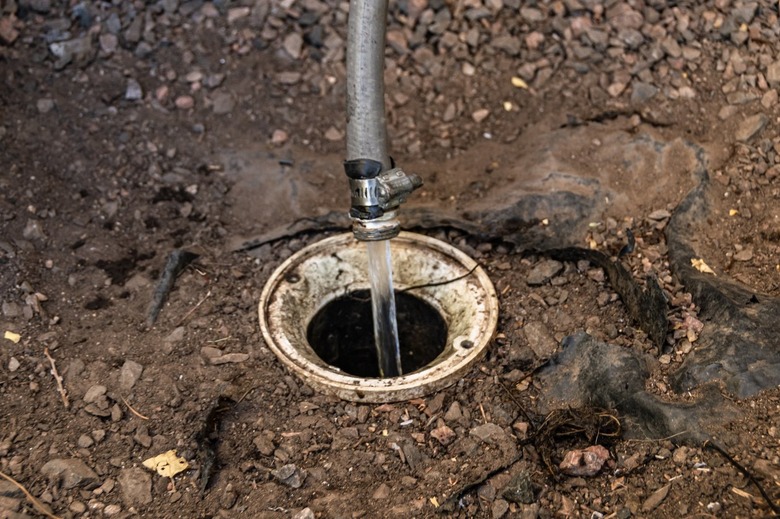
The initial process of getting through the clog (or clogs) may take several passes, including retracting and cleaning the cable each time. Once you're confident the clog is gone, snake the pipe at least one more time to clean it as much as possible.
When I do a final pass or two, I start by flushing the toilet (just water), then I turn on the tub faucet and let it run while I do the final snaking. This helps to clean the drain pipe as well as the cable. It's also a good way to confirm that the drain is working normally. Alternatively, you can run a garden hose (instead of the tub faucet) into the drain.
13. Reinstall the Cleanout Cap
 Leigh Schmidt for Hunker
Fit the cleanout cap or cover over the hole and thread it in or secure it with screws, as applicable. If you have a threaded cap, clean off the threads first, and start turning the cap by hand to make sure it's not cross-threaded, then tighten it with your pliers or wrench.
14. Clean the Snake
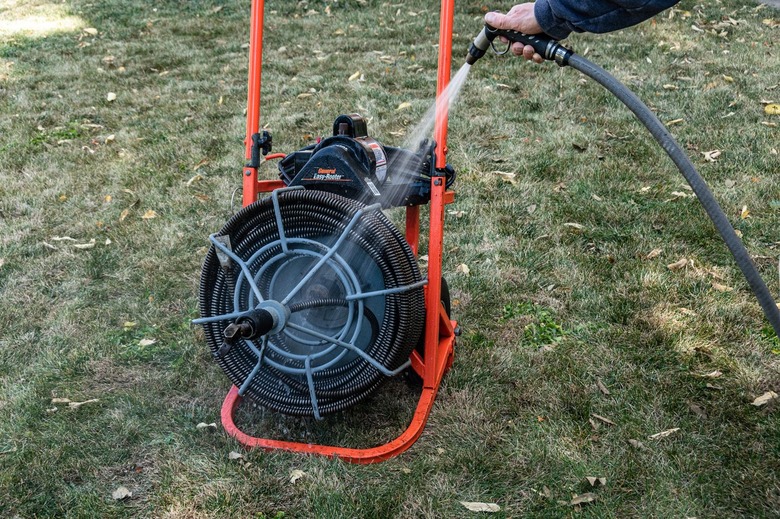 Leigh Schmidt for Hunker
Unplug the snake, wrap up the cords, and wheel the machine into your yard or driveway. Spray the cable and spool structure with a garden hose, turning the spool as needed to clean from all angles.
Cleaning the machine makes it less stinky for the drive back to the rental outlet, and some places hit you with an extra charge if you bring it back dirty. Let the cable drip dry for a while before loading it into your vehicle (and put it on a tarp if you have one).