How To Remove A Toilet

We may receive a commission on purchases made from links.
You may want to remove your toilet for one of several reasons. Perhaps you've decided it's time to upgrade your old water-hog toilet with a more efficient model. It's also possible you're redoing the floor in your bathroom or completing some other remodel that requires temporary removal of the toilet. Whatever your motivation, don't be daunted by the task. It may be a bit messy, and you may encounter glitches, but it's easier to accomplish than you might expect. In fact, it shouldn't take any longer than about 15 minutes.
One of the most common glitches when removing a toilet is rusted bolts. Years of bathroom humidity can fuse the nuts, and because there is limited room, you sometimes can't get enough purchase on your wrench to persuade them to turn. Rust also sometimes creates another glitch: It may freeze up the water shutoff valve, making it impossible to turn off the water. These glitches might give you headaches, but they shouldn't. They aren't that difficult to deal with.
Does the Toilet Model Make a Difference?
Does the Toilet Model Make a Difference?
Toilets can have different flush and fill mechanisms, they can be of different sizes, and the bowl and tank may be separate or fused. None of that makes a difference when you're removing one. No matter what model you have, it is bolted to the floor with standard toilet bolts, and it is hooked up to the water supply with a standard supply tube, which is always connected to the underside of the tank, where the tailpiece of the fill valve extends through the bottom of the tank. Toilet removal is one of those rare procedures for which a set of generic instructions works for virtually every model—wall-mount models excluded.
Procedure for Removing a Toilet
Procedure for Removing a Toilet
Things Needed
-
Spray lubricant
-
Sponge
-
Sponge or turkey baster
-
Bucket
-
Rubber gloves
-
Utility knife
-
Tongue-and-groove pliers
-
Flat-head screwdriver
-
Hacksaw or reciprocating saw
-
Putty knife
-
Adjustable wrench
1. Turn Off the Water
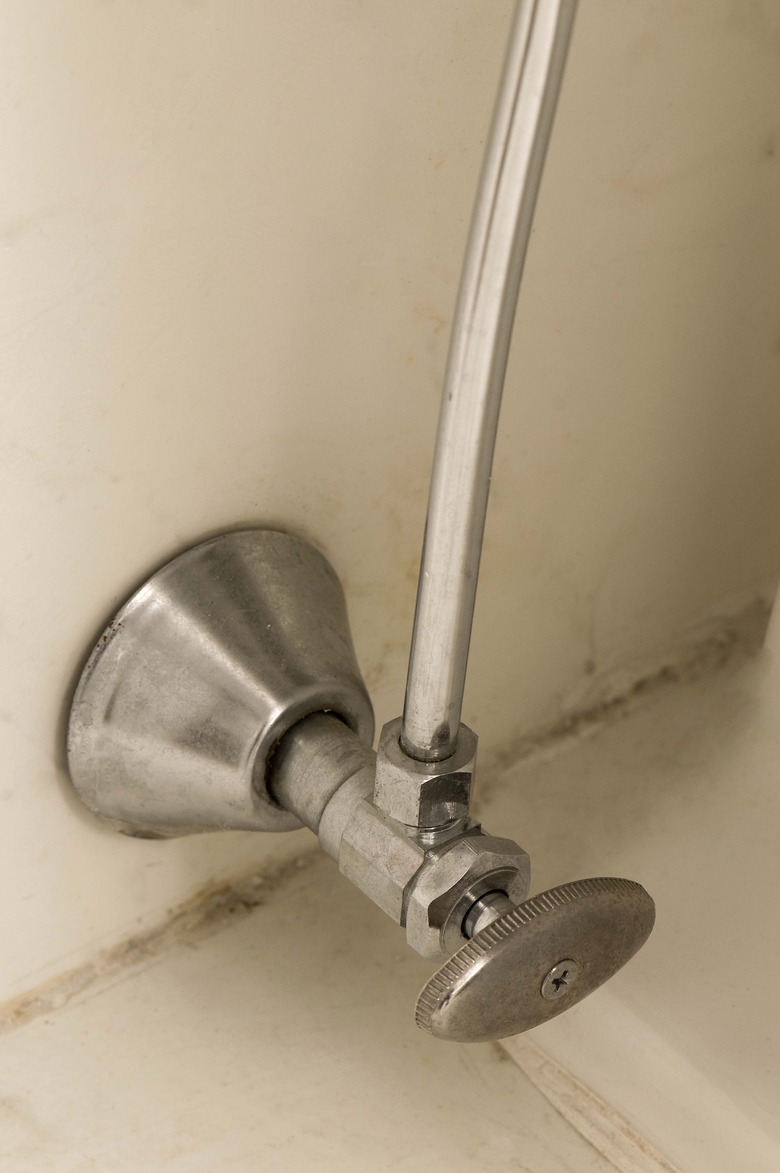
Locate the shutoff valve, which stubs out of the wall just under the toilet tank. Turn the handle clockwise as far as it will go. If you can't get it to turn, spray it with lubricant, wait for 10 minutes and try again. Still no luck? You may have to turn off the water to the bathroom or, if you can't find a dedicated valve, to the entire house.
2. Empty the Tank and the Bowl
Flush the toilet to empty the tank and bowl as much as possible. Use a sponge or a turkey baster (which you've now dedicated to bathroom repair) to extract the remaining water in both the tank and the bowl, transferring the water into a bucket. The water in the tank is clean; the water in the bowl is not. Be sure to wear rubber gloves and to discard the water outside.
3. Cut the Caulk Around the Base of the Toilet
Use a sharp utility knife to cut the any caulk sealing the base of the toilet to the floor. Not every toilet is caulked, and if you're isn't, you can skip this step.
4. Disconnect the Water Supply
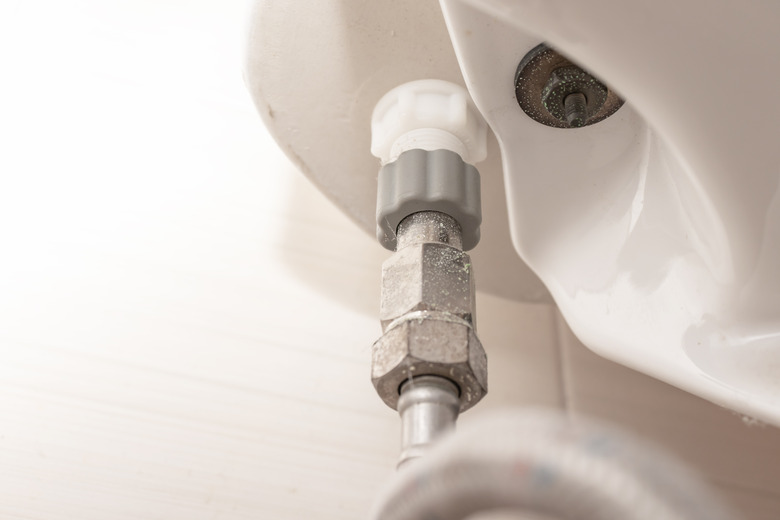 Iuliia Mikhalitskaia/iStock/GettyImages
Locate the supply tube connector on the bottom of the tank. Turn it counterclockwise (as viewed from below) with a pair of tongue-and-groove pliers to loosen it, then remove it by hand. The connector is usually plastic, and it's designed to be hand-tightened, but it's rare for one to be loose enough to unscrew by hand, so you'll probably need the pliers.
5. Loosen and Remove the Toilet Bolts
Pop the decorative caps off the two bolts holding the toilet to the floor, using a flat-head screwdriver. Grip each nut with the pliers and turn it counterclockwise to loosen and remove it.
Tip
Two problems can make this step more difficult. One is when the nut is fused to the bolt; the other is when the bolt isn't properly seated on the toilet flange and spins along with the nut. In either case, you'll probably have to cut the bolt with a hacksaw or reciprocating saw. If you use a power tool, be careful to keep the blade pointed away from the toilet to avoid cracking the porcelain.
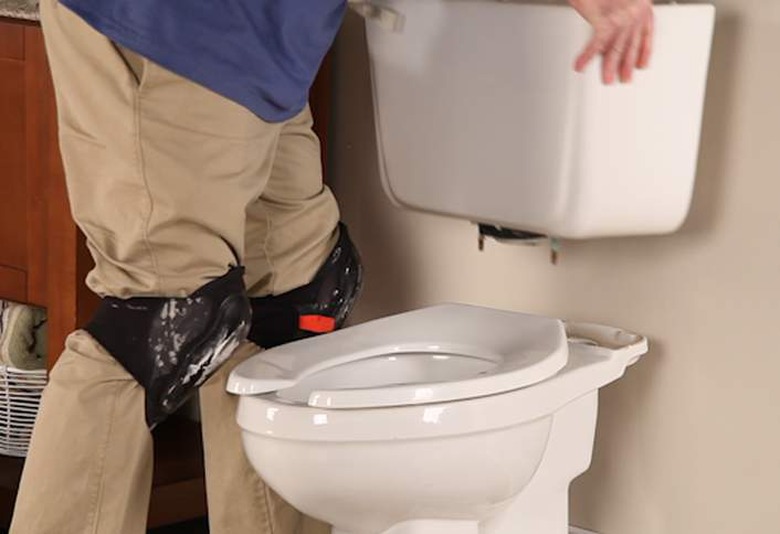
6. Lift Out the Toilet
Lift the toilet straight up until it clears the bolts, then move it toward you until it's completely clear of the flange (the ring on the floor surrounding the drain opening). At this point, you'll probably want to set it down and enlist someone to help you carry it.
7. Clean Up
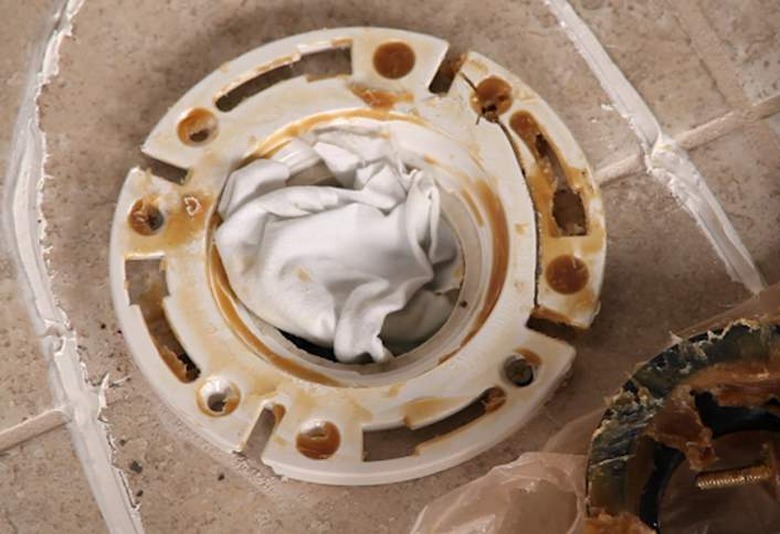 The Home Depot
Scrape the old wax from the waste opening, using a stiff putty knife. Wrap the wax in newspaper or paper towels for disposal (remember, it's contaminated). When you're done, it's a good idea to stuff a rag in the waste opening to block sewer gases until you have a chance to install a new toilet. Finish up by wiping up any water that spilled from the toilet, using a rag.
Separating the Tank from the Bowl
Separating the Tank from the Bowl
Most toilets comes in two pieces that have to be bolted together when the toilet is installed. You'll probably want to separate them if you're moving the toilet to another location or discarding it. It's usually easiest to separate the tank from the bowl before you loosen the toilet bolts and lift out the toilet, but it depends on how much working space there is in the toilet alcove. If space is limited, you may find it preferable to lift out the toilet first, then disassemble it. Either way, here's what you'll have to do:
- Locate the nuts on the underside of the bowl that are holding the tank to the bowl. Grip one with a pair of pliers or a wrench. If you're working alone, clamp vise-grip pliers onto the nut.
- Turn the screw inside the tank, using a large flat-head screwdriver. If a helper is available, ask that person to do it while you hold the nut with the pliers. If you're working alone, the vise-grips will help. They will wedge against the bowl and keep the nut from turning while you turn the bolt.
- Remove both screws, then lift the tank off of the bowl. There's no need to remove the flush valve or fill valve from inside the tank unless you plan on replacing them.