How To Install A Doorknob On A New Front Door
We may receive a commission on purchases made from links.
You've just purchased a new front door, and it came with no predrilled holes for a doorknob or deadbolt. Although it might be intimidating to risk ruining a new slab door by drilling the holes yourself, there's no need to worry because the process is pretty straightforward. That doesn't mean you can proceed with abandon, though, because the risk of damage is real if you slip or misjudge your measurements.
You will need to drill two holes for the doorknob: a 2 1/8-inch hole in the door face and a smaller 7/8- or 1-inch one in the edge. Positioning these holes is crucial because if you're off by even a small amount, the doorknob won't work, and while there are ways to correct mistakes like this, you don't want to go there. Fortunately, the doorknob manufacturer has your back. You'll find a template in the box with your new lockset to help you make these measurements accurately.
There is one more important measurement you have to make that the manufacturer can't do for you, however, and that's the position of the new strike plate on the door jamb. You can alter this a little if you don't get it right the first time, but the results can be messy. A simple DIY trick will help you do it yourself and avoid any messy finagling.
Choosing the Backset
Choosing the Backset
The backset is the distance between the center of the large hole you drill in the face of the door and the edge of the door. There are three standard backsets: 2 3/8 inches, 2 3/4 inches, and 5 inches (although the 5-inch backset is seldom used anymore). You might come across a 5-inch backset when replacing a knob or deadbolt on an older door but not when installing a new doorknob.
The general rule is to use a 2 3/4-inch backset on an exterior door, like a front door, because that puts the handle farther away from the jamb and makes it easier to use. However, the backset also depends on the design of the door. Paneled doors sometimes have narrow stiles (the vertical frame pieces on a panel door), and to center the knob on the stile, it may be preferable to use a 2 3/8-inch backset. The template that comes with the doorknob gives you both options so you can choose the one you need.
Things Needed
 Ja'Crispy/iStock/GettyImages
How to Install a Doorknob on a New Front Door
1. Hang the Door
If you haven't done this already, hang the door in the door frame and make sure it opens and closes smoothly. You can install the doorknob without hanging the door, but you won't be able to align the strike plate. In addition, it's easier to drill the holes when the door is supported in a vertical position.
2. Unpack the Doorknob
Unpack the doorknob from the box, make sure everything is there, and check the installation instructions for details that may pertain to that particular model. Unfold the instruction sheet and cut out the marking template using scissors.
3. Mark the Positions for the Holes
Decide on the height of the doorknob. It's typically centered in the middle of the rail. If the door doesn't have rails, it should go 34 to 48 inches from the bottom of the door, according to code, although a more standard height is from 38 to 42 inches. Wrap the template around the edge of the door so the marks on it are at the chosen height. The template usually wraps from the inside of the door to the outside so that the mark for the knob hole is on the outside. Double-check the instructions to make sure. Tape the template to the door.
Locate the mark for the intended backset and punch a scratch awl through that mark and into the door. On the edge of the door, you'll see two marks: one for a 1 3/8-inch-thick door and one for a 1 3/4-inch-thick door. Push the awl through the appropriate mark and into the door. Make deep depressions with the awl to prevent your drill bit from wandering off the mark when you're drilling. Remove the template.
4. Drill the Hole for the Knob
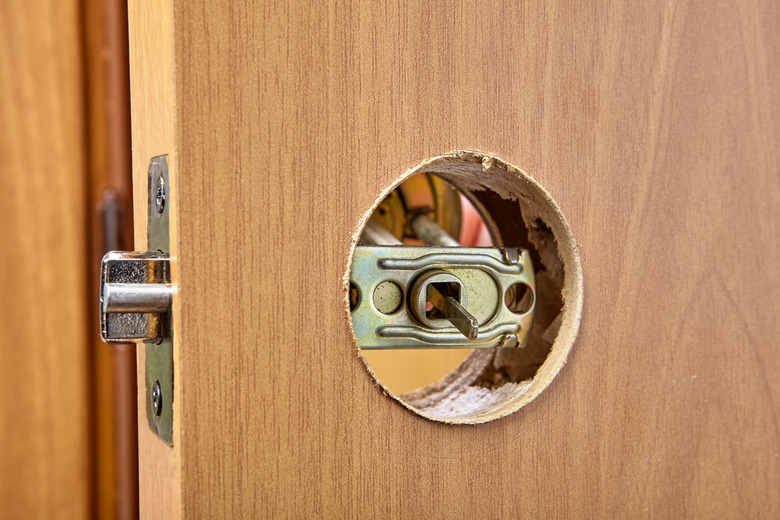
Use a drill and a 2 1/8-inch hole saw to drill the hole for the knob. Center the pilot bit on the mark you made with the awl and start the drill slowly at first until you're sure the bit has dug in far enough to prevent wandering. When the hole saw has cut far enough for the pilot bit to emerge from the other side of the door, stop drilling and switch to the other side of the door to finish the cutout. This prevents the saw from tearing wood from the door face.
5. Drill the Hole for the Latch
Use a 1-inch spade bit to drill the latch hole in the edge of the door on the mark you made. It's important to keep the drill and bit perfectly level as you do this. If your drill has a leveling bubble, keep it centered as you drill. If not, gauge the level by eye.
6. Mortise the Latch Plate
Insert the latch into the latch hole, push the latch plate flush against the edge of the door, and score around the latch plate with a utility knife. Some people like to screw the latch plate in position temporarily to stop it from moving. After drawing the outline, remove the latch and chisel a mortise inside the outline that is deep enough for the latch plate to sit flush with the edge of the door.
You can also make this mortise with a router, and if you do that, use the latch plate with rounded corners supplied by the manufacturer (most doorknob sets come with two latch plates). If you do the mortise with a hammer and chisel, use the plate with square corners.
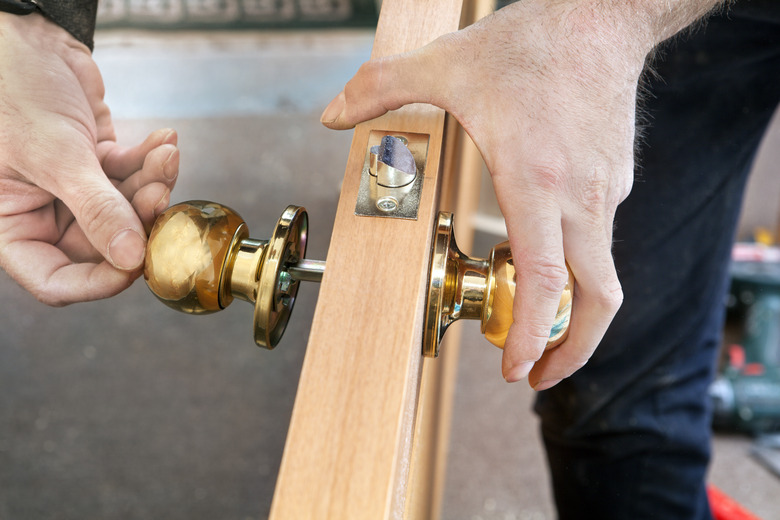
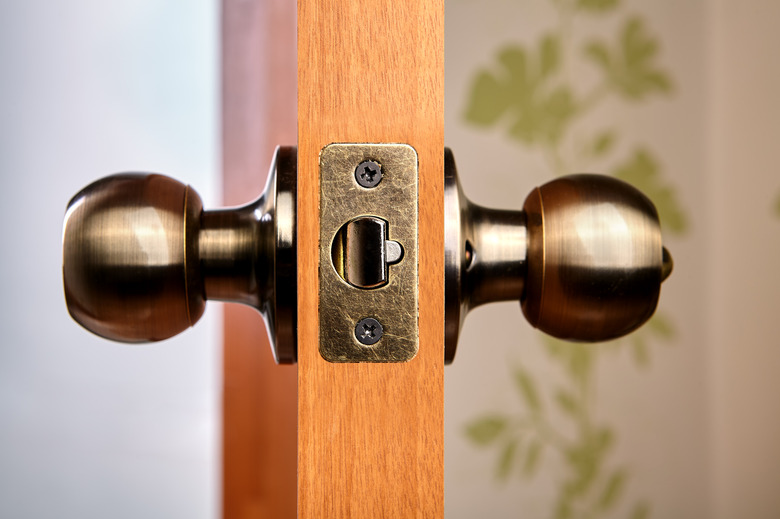
7. Install the Doorknob
Insert the latch into the edge of the door with the slanted side of the latch bolt facing out and screw the latch plate into place using the provided screws. Separate the interior and exterior knobs and position the exterior one on the outside of the door by inserting the pins through the holes in the latch mechanism and pushing it flush against the door. Align the interior knob with the pins, push it into place, and secure the two parts together with the machine screws that come with the kit.
It can be difficult to align the screw holes on the faceplate of the interior knob with the holes on the inside of the exterior one. It's usually easiest to line up one pair of holes by eye, insert the screw, and tighten it partway. Then, use your awl to align the second pair before you insert the screw. Tighten down the screws with a screwdriver — there usually isn't enough clearance for a drill.
8. Mark the Position of the Strike Plate
Close the door and push it tight against the door frame. Insert a combination square between the edge of the door and the door jamb and push it up until it hits the bottom of the latch bolt. Mark that position on the jamb and then find the top of the bolt in the same way and mark it.
To find the depth of the latch bolt, loosen the nut on the combination square and slide the ruler back flush with the anvil (the body of the square). Set the anvil on the door frame, push in the ruler until it touches the bolt, and tighten the nut on the combination square. Open the door, set the combination square back on the door frame, and draw a line along the end of the ruler. That line marks the inside edge of the hole you need to drill for the bolt.
9. Drill a Hole for the Door Bolt
Find the midpoint between the upper and lower marks you made on the door jamb. Using the ruler from the combination square, make a mark and use the square to draw a horizontal line through that mark. Measure 1/2 inch from the depth mark you made toward the outside of the door frame and make an X at that point. Drill a 3/8- to 5/8-inch-deep hole on the X with a 1-inch spade bit. Close the door and make sure the bolt fully seats inside the hole. Widen the hole with a chisel if necessary.
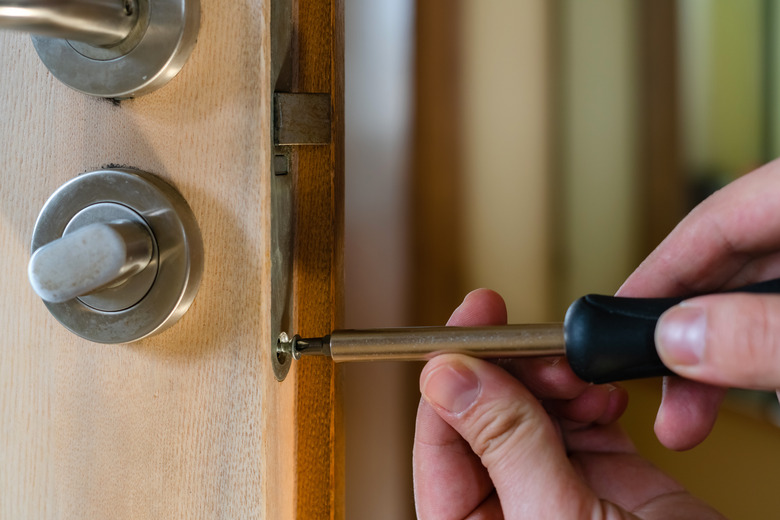
10. Install the Strike Plate
Set the strike plate in position over the hole with the small tab flush against the inside edge of the latch bolt hole. You can temporarily screw it in place if desired. Score around the outer edges of the plate with the utility knife. Set the plate aside and chisel a mortise inside the outline deep enough for the plate to sit flush with the jamb. Set the plate back in position and secure it with its screws.
Installing a Deadbolt Door Lock
Installing a Deadbolt Door Lock
If you want to install a deadbolt above the door handle for extra security, you follow basically the same procedure as the one for installing a new knob. The cross bore, which is the hole for the lock mechanism, is usually 2 1/8 inches — the same as the doorknob hole. The latch bore, which is the hole for the latch containing the deadbolt barrel, is usually 3/4 inch or 1 inch. The standard vertical distance between the center of the cross bore for the knob and the one for the deadbolt is 5 1/2 to 6 inches.
When drilling the barrel hole in the door jamb, you'll probably have to make it a little deeper than the one for the doorknob because a dead bolt extends farther out than a doorknob bolt for security. Check the manufacturer's instructions for specific installation details.
References
- YouTube: finehomebuilding – How to Install an Exterior Door Knob
- YouTube: This Old House – How to Bore for a New Door Knob | Ask This Old House
- REEB Learning Center: Door Backset
- DoorDodo: How High Should A Deadbolt Be On A Door?
- DoorDodo: What Is The Standard Size Of A Deadbolt?
- Pretty Handy Girl: How to Drill New Holes for Door Knobs