How To Clean Your Outdoor Air Conditioner Unit

We may receive a commission on purchases made from links.
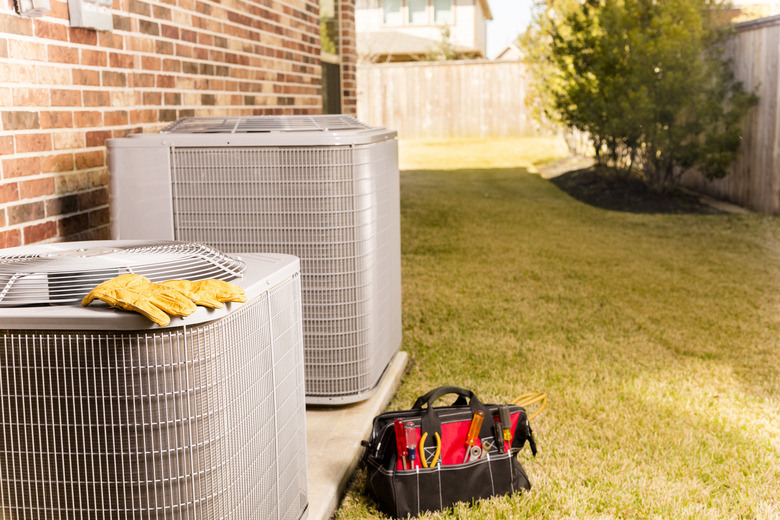
Air conditioning has become indispensable for homeowners in many parts of the country, but for an air conditioner to operate at peak efficiency, regular maintenance is a must. That often means regular service calls by a qualified HVAC technician, but there are a variety of DIY maintenance tasks that you can perform, including making sure the outdoor unit of a central air conditioning system is kept clean.
Looking to keep your A/C unit running at its most efficient? Here's some basic info on how it works — and how to clean the outdoor unit properly.
How an Outdoor Air Conditioning Unit Works
How an Outdoor Air Conditioning Unit Works
Most central air conditioners are part of a home's forced-air system, which is a type of system that relies on ductwork to circulate cooled and heated air throughout the house. These air conditioners are split systems because part of it is located inside the house (the evaporator) and another part is on the outside (the condenser). The evaporator's job is to transfer heat energy from inside the house to a refrigerant that moves through its copper or aluminum tubing. The condenser transfers that heat energy out into the outside air.
Everyone calls the outdoor unit the condenser because that is its main function, but it actually contains a number of parts and is more of what you would consider a condensing system. The unit consists of a fan, compressor, condenser coil, and narrow metal fins. The refrigerant that comes from the evaporator enters the compressor as a low-temperature, low-pressure vapor. True to its name, the compressor turns it into a high-temperature, high-pressure vapor.
The refrigerant flows to the condenser coil that lines the walls of the outdoor unit. Coming off the coil are the thin fins that make up most of the unit's outer wall. The fins provide surface area for the coil. The fan located at the top of the unit pulls air through the fins and expels it through the top of the unit. This process transfers the energy in the refrigerant to the outside air.
Once the refrigerant gives up its energy, it returns to a liquid state and flows back inside to the evaporator. Then, the process repeats itself.
 fstop123/iStock/GettyImages
Air Conditioner Maintenance
Air Conditioner Maintenance
Maintaining an air conditioner will help keep energy bills in line. If your system isn't working as it should, sometimes simple maintenance tasks can solve the condenser unit's problems. It may not get an old clunker up and running like new, but cleaning the outdoor unit at the start of the cooling season and again about halfway through it (and even more often in very hot climates) can help a good unit maintain maximum efficiency.
Outdoor units get dirty because the fan pulls air through the walls of the unit. If you have ever changed the air filter in a window air conditioner, you know the filter can get pretty dirty — and that is air from inside your house. Now, think of a fan pulling outdoor air through the outdoor unit. A lot of stuff can end up inside the unit (like dirt and leaves), and a lot of buildup will attach itself to the fins.
The only specialized equipment you will need to clean your outdoor unit is commercial coil cleaner and a fin comb. Combs are made of plastic or steel, and it is best to use one that matches the number of fins per inch on your unit. You can find this information in the air conditioner owner's manual or use a tape measure and count the number of fins per inch. To clean, follow the air conditioner manufacturer's instructions as most follow the same routine.
Things Needed
How to Clean an Outdoor Air Conditioner Unit
1. Cut the Power
There should be an electrical disconnect box attached to the wall of the house near the air conditioner's outdoor unit. It will either have a switch that you can switch to the "off" position, or it may have a power plug that you need to pull out of the receptacle. If you are not sure if you disconnected the power, go to the home's electrical service panel and move the circuit breaker to the "off" position.
2. Remove the Outer Cover
Some units have a louvered metal cover that protects the A/C condenser coil and the fins. If yours does, you will need to remove it. These covers consist of individual panels for each side of the unit, and they are held in place by screws located at the top and bottom of each panel. If your air conditioner does not have a cover, move on to the next step.
- Remove any large debris that has become stuck in the panels.
- Unscrew and remove the panels.
- Hose down the panels using a garden hose.
3. Vacuum the Fins
Use a shop vac outfitted with a soft brush attachment to vacuum the fins. The fins are easily damaged, so work gently. Follow the direction of the fins by moving the brush up and down rather than side to side. You can also wipe the fins using a soft-bristle brush.
4. Repair Damaged Fins
Use the fin comb to straighten any bent or damaged fins. Attempt this step only if a few fins are damaged. If there is extensive damage, such as damaged fins in a number of places on the unit, contact an HVAC contractor.
- Place the teeth of the comb between fins just above the damaged area.
- Slowly pull the comb down to straighten the fins.
5. Remove the Fan
The unit's fan is located at the top of the enclosure. Remove the screws that hold it in place and grasp the grille to lift out the fan. It will be hardwired to the unit, but there should be enough slack to allow you to lift the fan out and place it to the side. If there isn't, you may need a helper to hold the fan while you complete the project.
6. Remove Debris From Inside the Unit
Use your hands to scoop out leaves, grass clippings, and the like. You can follow up with the shop vac. The inside will also contain the compressor and other components. They are built and protected to withstand the elements, but it is still best to avoid digging around in there. The capacitors that store an electric charge to start up the system are a shock hazard.
7. Clean the Coil and the Fins
Follow the directions on the can of commercial coil cleaner. Sometimes, one can is enough for the job, but often, more than one is needed, especially for very dirty fins. If you give the unit a thorough cleaning, you probably won't need a commercial cleaner next time, and the stream from a garden hose will do the trick assuming you maintain a regular maintenance schedule.
- Spray the coil cleaner on the interior side of the fins and coil.
- Wait 10 to 15 minutes.
- Use a garden hose — never a power washer because the force will damage the fins — to spray the inside walls of the unit, pushing the dirt to the outside of the unit. Work from the top down rather than side to side.
- Follow up by rinsing the coil and fins from the outside, working from the top down.
8. Reassemble the Unit
Put the fan in place and attach it with the screws you removed earlier. Reattach the side panels if your unit has them.
9. Clear the Area Around the Unit
The condenser needs about 24 inches of open space on all sides to work effectively. Use garden tools to trim back shrubs and rake up leaves and other debris that surround the unit.