How To Build Your Own Elevated Garden Bed
We may receive a commission on purchases made from links.
Raised garden beds offer many advantages even if they simply sit at ground level, but the advantages multiply if you build an elevated garden bed that puts the soil level at waist high or even higher. Especially for older gardeners or others with physical limitations, eliminating the need to stoop makes gardening — whether you're planting for an herb garden, a vegetable garden or a planter filled with perennials — much more fun and rewarding. As with any raised bed, this method of gardening allows you to use a growing medium that is perfectly tailored for growing plants without the weed seeds or pathogens that are often found in ordinary garden soil.
It is, of course, possible to buy a premade elevated garden bed instead of spending time on a DIY project, but these can cost hundreds of dollars. Commercially built elevated planters are often quite attractive, but they are sometimes built with a shocking lack of sturdiness and flimsy "floors" that bow and crash down the first time the soil inside becomes saturated by a heavy rain.
The materials for building your own DIY elevated garden bed cost a fraction of what a commercial elevated planter costs, and you'll end up with a bed that is extremely sturdy and durable.
Understanding the Design
Understanding the Design
This design uses ordinary 2x cedar dimension lumber for most of the construction. These materials can be purchased off the shelf at virtually any big-box home center. The design could not be simpler (perfect for those who are just getting started on woodworking), and the dimensions can be easily adjusted to make a larger or smaller elevated garden bed.
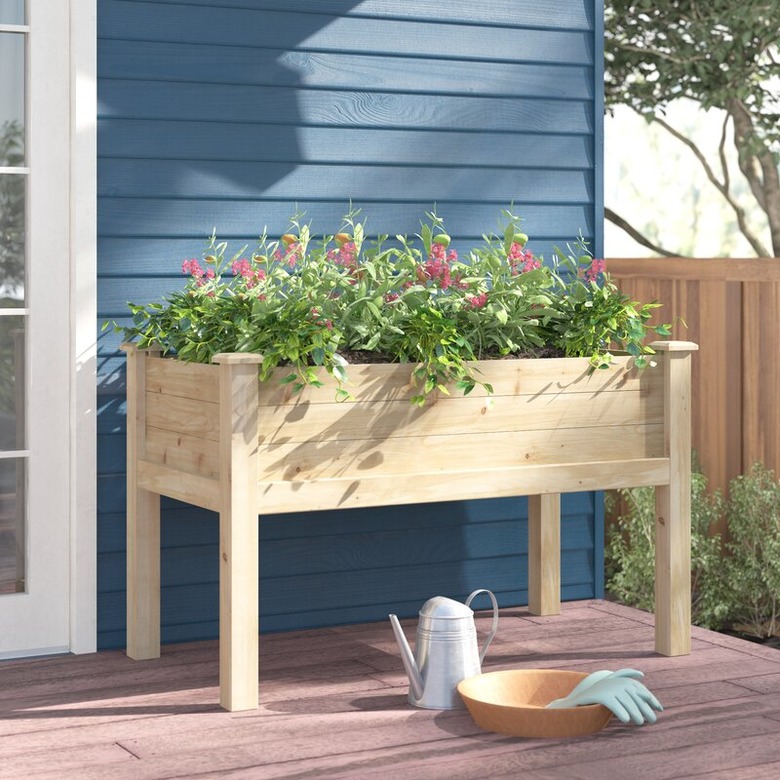
This elevated planter is basically just a simple box made of 2x6 and 2x4 cedar lumber attached horizontally around four vertical 4x4 cedar posts, forming an elevated planter whose top is roughly at waist level. For a more ornamental look, the edges of the cedar side boards can be rounded over with a router before you attach them to the posts.
Across the bottom of the box, three joists made of cedar 2x4 lumber span the width of the box, providing support for a floor of 5/4 x 6 cedar planks. This floor, supported by the joists, will provide plenty of strength for holding the potting mix, even when saturated with water.
This is the biggest advantage this DIY design has over many commercial elevated planters. Commercial planters are often built with narrow cleats attached to the inside surface of the box to hold the floor, a design that's not nearly sturdy enough to hold water-saturated soil, which can weigh well over a hundred pounds. Nothing is more disappointing than spending $400 on a purchased raised planter only to have it collapse under the weight of the soil.
The dimensions used in this tutorial will create an elevated planter bed that is roughly 3 feet wide and 4 feet long with the top of the planter standing about 4 feet above the ground. If you change the dimensions — making it larger, taller or shorter — it's a good idea to make simple sketches of the side, end and top views of the planter so you can accurately determine your own dimensions. For a gardener who is tending plants from a wheelchair, 24 to 30 inches is the ideal height for the elevated bed.
A Note on Lumber
A Note on Lumber
An elevated planter bed is often built from pressure-treated pine lumber, which will be very durable. Many garden experts recommend avoiding lumber treated with pesticides for any planter that will grow edibles, fearing that the toxins may be taken up by the roots of the plants. In truth, modern pressure-treated lumber no longer uses the highly toxic chromate copper arsenate that was once common. Today's pressure-treated lumber is regarded as safe for growing edibles, though it may be a good idea to line the inside of a pressure-treated planter box with heavy-grade plastic sheeting to be utterly safe.
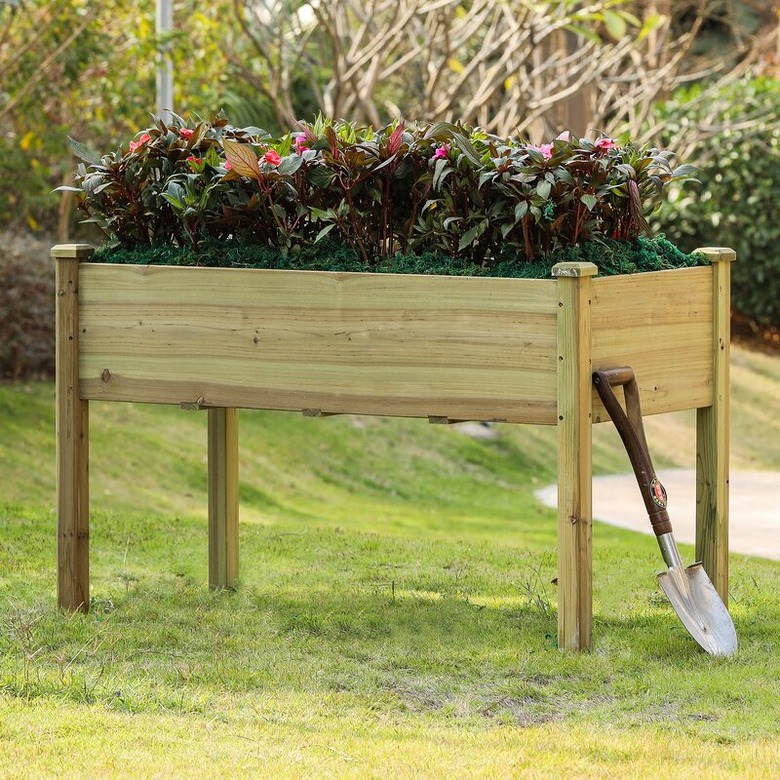
This planter is built from cedar lumber, which has a natural resistance to pests and decay — perfect for a veggie garden or for growing your own food. The inside of the box is coated with an ordinary water-based penetrating sealer, and synthetic landscape fabric is used as an inner liner to prevent soil from seeping out through cracks and drainage holes.
Things Needed
-
(4) cedar 4x4 posts, 4 1/2 feet long
-
(4) cedar 2x6 side boards, 4 feet long
-
(4) cedar 2x6 end boards, 3 feet long
-
(2) cedar 2x4 side boards, 4 feet long
-
(2) cedar 2x4 end boards, 3 feet long
-
(3) cedar 2x4 floor joists, 33 inches long
-
(6) cedar 5/4 x 6 decking boards, 36 inches long
-
1/4 x 3-inch Torx-drive zinc-coated lag screws with washer heads
-
(4) cedar post caps (optional)
-
Synthetic landscape fabric
-
Router (optional)
 Wayfair
How to Build an Elevated Garden Bed
How to Build an Elevated Garden Bed
This list gives finished dimensions for the actual parts that will be used in construction of the elevated garden bed. You will likely want to buy lumber in standard 8- or 12-foot lengths and then cut your pieces from those stock boards. For example, all four 3-foot-long boards can be cut from a single 12-foot-long board, and the four 4-foot-long boards can be cut from two 8-foot boards. If you want, though, most home centers will cut the lumber to the exact sizes you want, though they sometimes charge a small fee to do this.
1. Cut Pieces for the Elevated Planter Box
If you have purchased lumber in stock lengths, measure and cut the posts as well as the side and end boards to the desired length using a circular saw or power miter saw. Do not cut the floor joists or 5/4-inch flooring boards at this time; wait until the rest of the box has been built to measure and cut these pieces to fit.
If you wish, the top and bottom edges of each side and end board can be rounded over (radiused) with a router to give the planter walls a more decorative look.
2. Attach the Side Boards to Posts
Lay two of the 4 1/2-foot posts flat on a working surface and then position and attach a 4-foot-long 2x6 side board, then a 2x4 side board and then another 2x6 board so they butt against one another as they span the posts. The side boards can be flush with the tops of the posts, or they can be set slightly down if you plan to top the posts with decorative caps. The ends of these side boards should be exactly flush with the outside edges of the posts.
Attach each of the side boards to the posts with Torx-drive lag screws driven with a power drill at each end of the board. If you wish, you can first drill counterbore holes in order to recess the screw heads below the surface of the boards. The bottom boards will be supporting a considerable amount of weight, so these boards should be anchored with three lag screws driven into the posts at each end.
Repeat the process with the other two posts and three more side boards. You now have two side assemblies ready to be attached to the end boards to complete the basic box of your planter.
3. Attach the End Boards
Stand the side assemblies upright and 3 feet apart. An assistant can be useful here, or you can tack a brace of scrap wood across the tops of the posts to hold the assemblies upright.
Across each end of the planter, attach a 3-foot-long 2x6, then a 2x4 and then another 2x6 to the front face of the posts so that the ends of the boards cover the end grain of the side boards and are flush at the corners. Join these end boards to the posts with a pair of screws driven into each end in the same fashion that the side boards were attached.
You should now have a basic box elevated by means of corner posts that run through the inside corners of the box.
4. Attach the Joist Hangers
On the inside surfaces of the bottom side boards, attach three evenly spaced joist hangers on each side. The bottom edges of the joist hangers should be flush with the bottom of the side boards. The outside joist hangers should be adjacent to the posts with the third joist hanger positioned in the exact center of the box. Use 1 1/2-inch metal connector nails to attach the hangers to the inside surfaces of the side boards.
5. Install the Joists
Measure and cut three 2x4 cedar joists to span across the width of the box. Slide each joist into a pair of opposite joist hangers and attach them with joist-hanger nails.
If you have built a substantially larger elevated garden bed, you may need to install more joists to offer better support. Ideally, joists should be spaced no more than about 16 to 18 inches apart; for example, a 5- or 6-foot-long box should have at least four joists.
6. Cut and Install the Floor Boards
Cut six 5/4-inch cedar decking planks to span the length of the floor, resting them on the joists, running from one end of the box to the other. (A larger planter box will call for more floor boards.) The outside floor planks will need to be notched with a jigsaw to fit around the corner posts.
Test-fit the flooring boards. If there are small gaps between the boards, this is fine, as it will provide space for excess water to drain through the planter box. If the seams between the boards are very tight, however, you will need to drill two or three 1/2-inch drainage holes in each board.
There is no need to permanently attach the flooring boards to the joists. They can simply rest on the joists, as this will make it easier to remove the boards for future maintenance or replacement.
7. Seal the Wood
Apply a water-based sealer to the wood with a paintbrush. Temporarily removing the floor boards may make this easier. Although not mandatory, sealing the wood will make your elevated garden bed last longer. Many gardeners like to remove the soil from the planter box after each planting season to clean and reseal the wood for the next season, a maintenance routine that can allow a cedar planter to last for decades.
If you wish, you can also stain the exposed outside surfaces of the elevated planter in a color of your choosing. It is best, though, not to stain the inside of the box. Instead, use a nontoxic water-based sealer for the inside surfaces.
8. Add Decorative Post Caps (Optional)
If desired, you can add decorative post caps to the tops of the four corner posts. If you use cedar caps, seal them with a clear wood sealer before attaching them. This look is best suited if your planter has been built so the posts extend above the sides of the box; it's not necessary if the posts are flush with the top edges of the box. Post caps can be nailed in place or secured with an outdoor adhesive.
9. Install a Liner
Cut an oversized piece of synthetic landscape fabric to line the inside of the planter box and attach it to the inside faces of the box with a utility stapler. The corners of the fabric should be folded tight into the corners to conform to the contours of the box, but an exact fit is not essential. This liner will offer some protection to the wood, and it will also prevent the box's potting soil from falling through cracks or drainage holes in the floor of the planter box.
If you have built your planter with pressure-treated lumber, it's best to use heavy plastic to line the planter, as it will guarantee that no chemicals can leach into the soil and be taken up by plant roots. A plastic liner will need to have some drainage holes punched in it, however.
10. Add Growing Mix
Finish your DIY raised garden bed by moving it into the desired location in your yard and filling it with a growing medium of your choosing. An ordinary general-purpose potting mix makes a perfectly suitable growing medium, but you can also save money by making your own potting mix by blending equal parts of peat moss, vermiculite or perlite, compost and sterilized topsoil. If you wish, you can also blend in some granular time-release fertilizer.
As with any container garden, it's best not to fill your elevated garden bed with ordinary garden soil, as this will have weed seeds and pathogens that can be a problem when confined in a planter box. A purchased or DIY potting mix is a much better choice for successfully growing plants in an elevated garden bed.