How To Grow Daylilies
We may receive a commission on purchases made from links.
If you want to feel like a master gardener, easy-to-grow daylilies (Hemerocallis) are the plant for you. As the name suggests, the colorful flowers on the daylily each last for only a day, but that doesn't mean you'll run out of flowers. Each stem of the daylily — called a scape — produces multiple flower buds, so as one flower dies, the next blooms. When planted in groups, daylilies produce a bright burst of color that won't disappoint despite the short life of each flower.
Daylilies are perennials that perform their best when given optimal growing conditions, but they'll survive just about anything you throw at them, making them a great plant for beginners. They're generally pest-free and disease-free and are available in every color but blue. Many hybrid cultivars come in more than one color to create absolutely breathtaking blossoms.
The trumpet-shaped ruffles of daylily blooms sit atop stalks of 1 to 6 feet in length. Below the flowers, clumps of green foliage grow 1 to 3 feet high and spread from 2 to 4 feet across. Daylilies come in early-, mid- and late-blooming varieties that you can plant together for color all summer. Some varieties also rebloom, offering season-long color with just one plant.
Best Uses for Daylilies
Best Uses for Daylilies
Daylilies are gorgeous plants, and as long as you don't plant them in standing water, there really is no wrong way to grow them. They work well when planted along fences and borders but serve just as well when planted in large groups for meadow-like plantings. They pair well with ornamental grasses and shrubs but have enough gusto to hold their own when planted solo.
Because they require so little care, you'll often find daylilies planted alongside country roads. In Pennsylvania's Lancaster County, daylilies appear next to Amish outhouses with such frequency that the locals have given them a charming nickname that is best not used in polite company. When planted along driveways or walkways, daylilies provide a nice appearance and grow densely enough to keep unsightly weeds at bay. They also fill in nicely on inclines and in other areas of the yard that are difficult to mow.
One pro gardening trick is to plant daylilies and daffodils together. Both plants like the same growing conditions and work well together. The daffodils will bloom first, heralding the arrival of spring. As the daffodils start to die back and become ratty looking, the long daylily leaves will come in and cover them, keeping them out of sight.
How to Grow Daylilies
How to Grow Daylilies
- Common Name: Daylilies
- Botanical Name: Hemerocallis
- When to Plant: At any time the soil is workable; a month before the first hard freeze
- USDA Zones: 3-9
- Sun Exposure: Full sun
- Soil Type: Moist, well-drained soil
- When it's in Trouble: Distorted blooms, yellowing foliage
- When it's Thriving: Cheery blossoms sit atop large green clumps of leaves
Starting Daylilies From a Seedling
Daylilies come to gardeners as bare-root plants or as young plants in containers. Both get planted in the same manner. Begin by working 3 inches of compost or potting soil into the top 6 to 8 inches of soil in your planting area. Then, dig your planting hole twice as wide and deep as the roots of your plant.
In the center of your planting hole, make a small mound of dirt. Set your young plant on top of the mound so its crown will sit no deeper than 1 inch below the surface of the soil. Spread the lily's fleshy roots down over the mound, away from the center of the plant.
Backfill the planting hole a little bit at a time and tamp it lightly to eliminate any air pockets as you go. Stop when the hole is 2/3 full and water your plant. Complete the backfilling and water again. Space your daylilies 18 to 24 inches apart.
Your daylilies will establish drought tolerance after they've gotten comfortable in their new surroundings. For the first two to four weeks after planting them, however, make sure you water them two or three times per week if Mother Nature doesn't. Mulch around your young plants to help the soil retain moisture and keep weeds down.
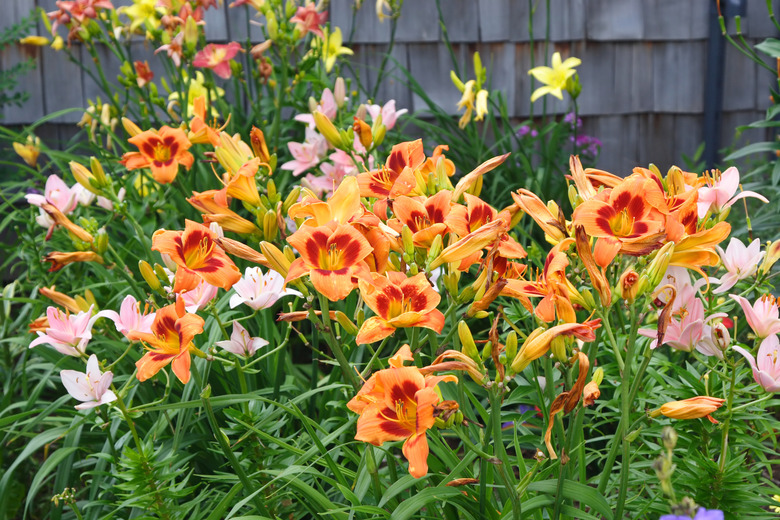
 Jackie Harris/iStock/GettyImages
In What Zone Do Daylilies Grow Best?
In What Zone Do Daylilies Grow Best?
Daylilies grow easily throughout USDA plant hardiness zones 3 through 9. In most areas, daylilies die back in the winter and return in the spring. Some varieties, however, are evergreen in warmer areas. If your plants prove to be evergreen, simply cut back any dead foliage as it appears. If your plant dies back in the fall, leave it alone until spring. You can cut away any dead foliage in spring.
When Should You Plant Daylilies?
When Should You Plant Daylilies?
Daylilies aren't fussy plants, and, in fact, their growing season is fairly long depending on where you live. You can plant them at any time you're able to get a shovel into the ground as long as they have at least one month to establish themselves before the first hard frost.
Ideally, Southern gardeners should plant daylilies in the early spring or in the fall to avoid the hot part of the summer. Northern gardeners should plant in the spring. If you find a daylily you love in the middle of the summer, however, go ahead and plant it. Just make sure you keep a close eye on the soil and water often enough to keep it moist.
Soil, Sunlight and Water Recommendations for Daylilies
Soil, Sunlight and Water Recommendations for Daylilies
In the perfect garden, daylilies would find themselves growing in rich, moist soil. In the real world, they'll grow just about anywhere, happily working their way around rocks and dealing with nutrient-poor soil if they must. The only thing daylilies won't tolerate is wet feet. If you have a heavy clay soil that holds rain puddles for five hours or more, add some sand or peat moss to your soil before planting.
Most daylilies like full sun, but these plants will grow in the shade if they must. In fact, darkly colored lilies sometimes prefer a bit of afternoon shade. Once established, daylilies rarely need supplemental watering except in extreme drought conditions.
Daylilies will grow in poor soil, but in the garden, they don't have to do so. For the lushest plants possible, fertilize your lilies once in the early spring with a 10-10-10 fertilizer. They also like rose fertilizer. Don't fertilize them again until next spring, though, as too much fertilization results in excessive greenery and limited flowers.
Although not strictly necessary, pulling spent blossoms off your daylilies is easy and will keep them looking their best. Spent blooms will pull off the plant easily with a gentle tug. Keep an eye on your plants' individual scapes (stems) as well. When all of the buds on a scape have blossomed and then died away, you can cut the scape off the plant at the base to keep a neat appearance. This also helps encourage more flowers in varieties that rebloom.
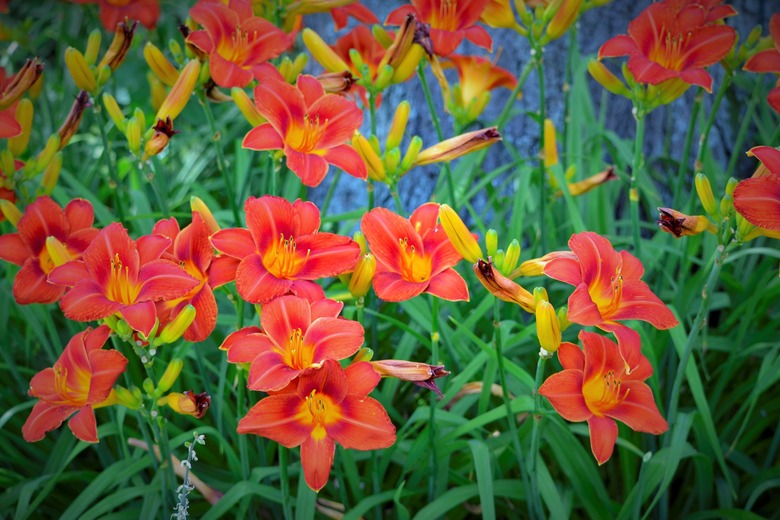
 ananaline/iStock/GettyImages
How to Propagate Daylilies
How to Propagate Daylilies
Daylilies are propagated through division, which is also good for daylily plants that have reached four to five years of age and have begun producing fewer flowers. Most gardeners find that late summer is the best time to divide lilies, but again, the plant isn't super particular. If you divide them later or earlier, they'll do just fine as long as they have at least a month before they need to deal with freezing temperatures.
To divide your daylily, loosen the earth around it with a shovel and gently pull it from the ground. Shake off as much excess dirt as you can and then lay the plant on a tarp. Cut the root clump apart with a sharp knife, making sure each new division has ample roots and leaves. Cut back the foliage to about 5 inches in length but don't remove it from the plant entirely. Once divided, you can plant the divisions you wish to keep and give others to friends and neighbors. Discard any small pieces of plant, rotten roots or diseased portions of the lily.
How to Winterize Daylilies
How to Winterize Daylilies
Daylilies generally don't need much attention to make it through the winter. Simply let them die back naturally and leave the dead stems on them through the winter to serve as extra insulation. If you live in the North, however, you may wish to cover newly planted daylilies with a few inches of mulch for protection. You'll only need to do this for their first winter. After that, your lilies will do fine on their own.
Common Pests and Other Problems for Daylilies
Common Pests and Other Problems for Daylilies
Daylilies tend to be pest-free and rarely need intervention to solve pest problems. You may see aphids, thrips and spider mites on your plants, but they generally don't cause problems. If they bother you, spray them off with your garden hose or apply insecticidal soap to the plant.
Occasionally, slugs and snails also visit daylilies. These are easily picked off the plant by hand or are thwarted by sprinkling a bit of diatomaceous earth around the plants.
When growing daylilies, the pest about which gardeners most often worry is deer. Deer love the taste of daylilies and routinely nibble on them. Apply deer repellent like the oft-recommended natural Tomcat Deer Repellent if deer present a problem for you.
Common Diseases for Daylilies
Common Diseases for Daylilies
Daylilies typically don't struggle with many diseases, but you will want to watch out for daylily rust and crown rot. Daylily rust is caused by a fungus, but the fungus is airborne, so it's hard to prevent. Daylily rust causes raised orange or yellow spots to appear on the underside of the plant's leaves. If you see them, remove diseased leaves and apply a fungicide to the plant.
If you notice a daylily plant quickly turn yellow and drop its flowers, rot is likely to blame. Gently lift the plant from the soil and check the roots. If they're mushy, take a sniff. If it smells unpleasant, you probably have a bacterial issue. If it smells more like earth or compost, you're dealing with a fungus.
Cut away the affected parts of the plant. Treat the roots with a bactericide or fungicide and replant. Reduce your watering schedule or amend your soil with sand or peat moss before replanting to help discourage future issues.
References
- Gardener's Supply Company: How to Grow Daylilies
- Longfield Gardens: 5 Tips for Growing Daylilies
- American Meadows: How to Grow Daylilies
- Garden Gate: Tips for Growing Daylilies
- Miracle-Gro: How to Grow Daylilies
- Gardener's Path: Daylilies in the Garden: Growing a Carefree Perennial
- White Flower Farm: How to Grow Daylilies
- HGTV: How to Grow Daylilies