Hillside Landscaping: Slope Landscaping Ideas
You have a sloping hillside on your property. Perhaps it is in the front yard, where it drops precipitously down to the sidewalk, or maybe deeper in your yard where it is less visible but equally problematic. What do you do with it?
Hills and slopes have built-in negatives when it comes to planting and landscaping. It isn't only the awkward, potentially treacherous maintenance, it is also the soil quality and growing conditions. Hillsides do not retain water well, and even if the rest of your yard is a verdant garden or lawn, the sloped areas will dry out fast and can be subject to a microclimate afflicted by drought conditions. Erosion causes topsoil and nutrients to be washed away every time it rains. Add to that the stress that fast-moving water runoff creates on plant stems and root systems, and it is obvious that a sloped area is a tough landscaping customer. But slopes can be managed.
First, ask yourself is whether you are up for doing some major earthmoving and hardscaping work. If you are, or have plenty of money to spend on a landscape contractor, retaining walls and terraces can be built to break the slope down into manageable, flat planting areas. That is a viable solution for some people. But if you do not want to rent a skid-steer or spend many hours with a shovel, there are also less intensive remedies that can ameliorate your slope issue.
Slope Solutions
Slope Solutions
The best long-term solution for a slope in your yard is to get rid of it. This is not an easy task. But is it one of three options you have when trying to incorporate your landscape into a sloped part of your yard. Hillside landscaping solutions, from easiest to most labor-intensive, are:
- Plant it essentially as is, using the right planting techniques and plants that flourish in a dry, pitched environment.
- Do a minimal amount of trenching and backfilling to create strategic, level planting areas within the slope.
- Excavate broad, deep and level planting areas within the slope and buttress them with permanent retaining walls.
Easy: Choose Slope-friendly plants
Easy: Choose Slope-friendly plants
Drought-tolerant plants with a deep matrix of spreading roots can thrive on a slope and even help prevent future erosion. Perennials, trees, and shrubs are the most-suggested plants for slopes because they will grow long enough to establish deep root systems. Plus, you do not have to venture up and down the slope to replant every year. (See "Plants that Tolerate Slope" below.)
Planting on an unimproved slope does require a little more work than planting on level ground. You'll have better luck transplanting established seedlings or plants than direct-sowing, as seeds are more likely to wash away and the young, emergent plants are too tender to withstand the forces working against them on a slope. Here is the basic planting strategy:
1. Create a Flat Area
Excavate the hillside to create individual flat planting areas that are at least two or three times the diameter of the plant container or root ball. Disturb no more soil than is necessary, as freshly tilled soil is much more susceptible to washing out.
2. Build a Berm
Pile the excavated soil to form a U-shaped berm around the front (downhill) edge of the planting area and the sides. The berm should be at least 3 to 6 inches high, depending on the plant size and the steepness of the slope. Compact the soil berm well, maintaining a buffer of several inches around the planned spot for digging your planting hole. Some landscapers suggest staking strips of landscape fabric over the berm to stabilize it, or even filling an old pair of pantyhose with the soil, and then wrapping it around the planting site and staking it down.
3. Dig the Planting Hole
Dig your planting hole to at least the recommended size and depth. Amend and prepare the soil as you normally would prior to transplanting.
4. Plant
Plant your transplant, making sure that the stem is in a straight, vertical orientation (as opposed to being perpendicular to the slope line). Mound the soil around the plant slightly, packing it well but keeping it clear of the stem.
5. Mulch
Apply a layer of mulch over the entire planting area and berm. Choose a heavy mulch product, such as decorative landscape rock, that will resist washing away. Also keep the mulch well clear of the plant stem. Water.
Moderate: Trench and Terrace
Moderate: Trench and Terrace
A mild slope can be managed with some basic terracing to create usable planting areas within the hillside. Dig an array of flat planting areas by trenching into the hillside. Contour the planting areas so most of the excavated soil is used to build up the front edge of each planting area. These areas should be large enough to support multiple plants.
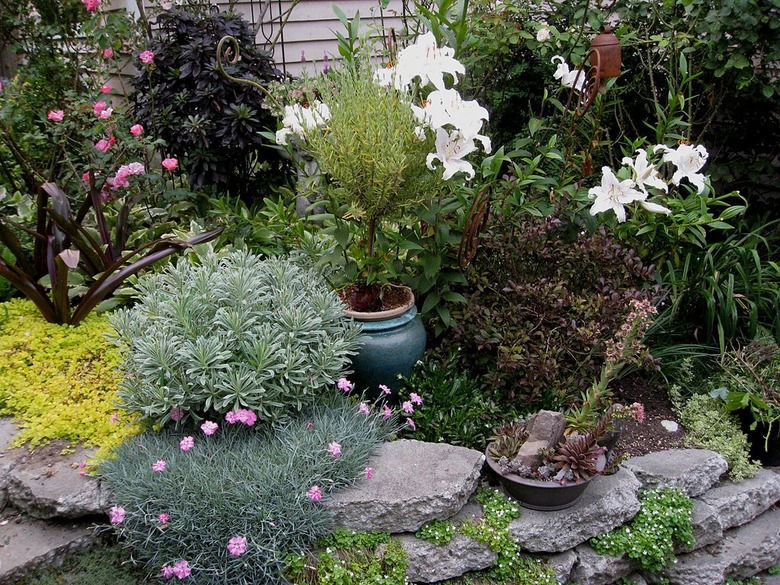 Wikimedia/brewbooks
The trenches should be essentially flat bottomed, but ideally with a slight pitch backward into the slope. The front of the trench should have a berm that is 3 to 6 inches high to slow water runoff down the slopes and cause it to pool in the trenched area, where your plants will be rooted. A row or short stack of medium-size rocks along the back and front edge of the trench will help keep the soil above the trench from washing into it, which preserves the new topography and also helps protect the plants. You can also use landscape timbers, treated posts, a single layer of landscape block, or even pavers at the back of each trench. Use well-selected plants as you normally would on level ground, and use mulch and add groundcover plants to help hold the soil in place.
Tip
Instead of lining the back or front of your terrace trenches with rocks, you can create a tubular buffer by making a long "snake" of landscape fabric filled with drainage rock. Position the snake (it will need to be at least 4 to 8 inches in diameter to be effective, depending on the pitch of the slope behind it) and stake it down with landscape spikes driven every 12 to 24 inches. Cover the trench and the snake with mulch.
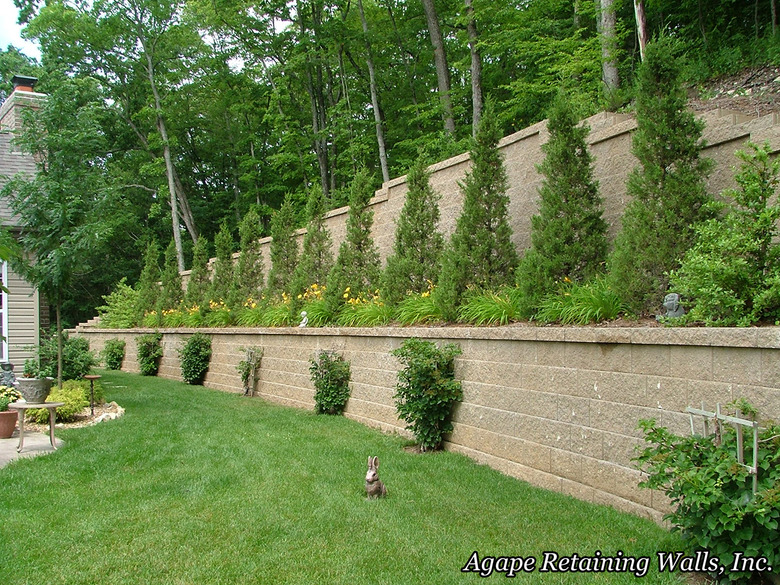
Labor Intensive: Retaining Wall Steps
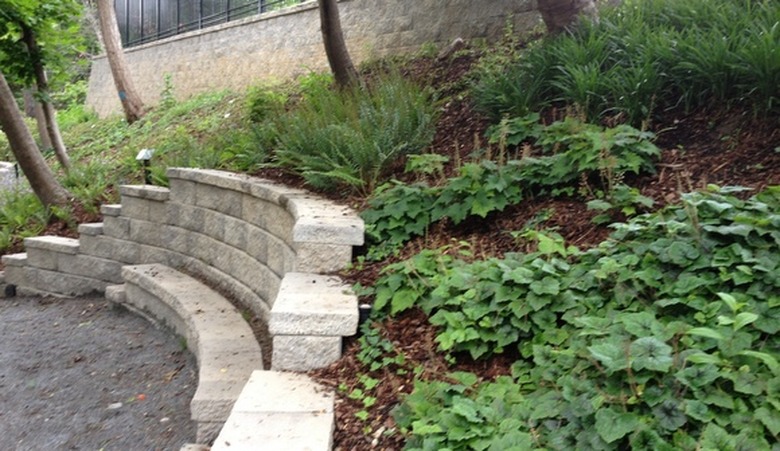
Labor Intensive: Retaining Wall Steps
On larger slopes, you'll need something more permanent to bring some order to the chaos of a hillside. Specifically, retaining walls. Because retaining walls must withstand so much force from the earth behind them and the added pressure from water runoff, they require anchoring in a subbase, good drainage, and a structural design that uses gravity to its advantage.
Interlocking landscape blocks have become very popular for building retaining walls. When correctly installed they have a back-leaning pitch that harnesses gravity to its advantage, and they are also available in a much wider range of colors, surface textures, and sizes than when they first hit the market a generation or two ago. Installation involves installing a subbase of compatible gravel beneath the wall area, including perforated drain tile with a clear outlet for run-off. Most landscapers recommend installing the base over a layer of landscape fabric that extends past the top of the excavation to help minimize weeds and stabilize the structure.
The base course of the landscape block should be laid upside down a few inches below grade. Subsequent courses should be laid with a slight backward pitch—some products recommend using landscape adhesive to bind the blocks together; others use pins. Most blocks have calibration marks so you can easily create a layout that looks symmetrical and staggers vertical seams from course to course. A top course of cap black improves the visuals of the retaining wall. Once the wall is completed, backfill behind it with soil.
Natural materials like fieldstone and landscape timbers may be used to create retaining walls. These also will be most durable and effective if you create a solid subbase with good drainage and weed protection. Stacked fieldstones should be pitched backward slightly and arranged to keep the gaps between stones as small as possible. Timbers, when used to create a small retaining wall, should slant backward slightly and be fastened together with timber screws or pieces of rebar driven into guide holes. Adding a "deadman" or two in each course will help keep the wall from leaning forward over time. A deadman is a timber that is installed perpendicular to the wall so its front end fits into the wall, and it extends backward a couple of feet or more into the hillside.
Tip
Plants that Tolerate Slope
Groundcover:
- Vinca (Periwinkle)
- Rosemary
- Cotoneaster
- Rockrose
- English Ivy
Shrubs:
- Creeping Juniper
- Burning Bush
- Lilac
- Sumac
- Japanese Yew
- Dwarf Forsythia
- Carpet Cypress
Ornamental Grasses:
- Red Fescue
- Bluestem Switchgrass
- Canada Wildrye
Native Wildflowers
- Echanacia (Coneflower)
- Daylilies
- Violets
- Russian Sage