How To Build A Simple Retaining Wall For Your Garden
A retaining wall is a versatile landscaping feature that not only adds a cohesive and structured look to your yard but can also help prevent erosion of a sloping section of your landscaping. Additionally, it can be used to create flat areas for planting beds or hardscapes such as patios. Retaining wall blocks made of concrete are a popular wall material, but landscape timbers and natural stone are also valid choices that are generally DIY-friendly.
A small retaining wall typically doesn't require a permit and is a home improvement project that can easily be done over a weekend.
Retaining Wall Basics
Retaining Wall Basics
Your choice of retaining wall material will determine the look of the wall, and different materials have specific requirements for wall construction. Retaining wall blocks are held together by spikes, or the blocks are designed so that each course, or layer, fits snugly with the one below. Timbers are also held together with long spikes.
Natural stone is dry stacked, meaning the arrangement and placement of the material keeps the wall together. This method requires a deft touch, especially if you are using round stones. Cut stone with flat sides is easier for the novice to dry stack. The Landscaping Network's comparison chart of materials that includes the DIY options of retaining wall blocks, landscape timbers and natural stone provides the differences among the materials.
You might not realize it, but retaining walls are not perfectly vertical; rather, they lean back into the slope behind them. This is called batter, and it helps the wall resist the constant force of the soil and moisture behind the wall. The way retaining wall blocks fit together automatically steps each course back from the one below to ensure the proper batter. This small step back has to be created by the installer when installing landscape timbers and natural stone walls.
Aside from the differences of how one piece of wall material fits with another, overall retaining wall construction is pretty much the same for all materials. The building sequence provides a stable wall that prevents water from undermining the integrity of the structure.
Planning a Retaining Wall
Planning a Retaining Wall
Most DIY retaining walls are no more than 3 or 4 feet high. Higher walls should be installed by a professional because they often require added reinforcement, such as the use of geotextile fabric that ties retaining wall blocks into the slope behind the wall. While your town may not require a building permit for a short wall, many will for a wall height over 4 feet. Check with your local building department for specific permit requirements.
When planning out straight retaining walls, lay out string lines attached to stakes at each end of the wall. Some walls can have gentle curves, such as those made with retaining wall blocks. For these, use marking paint or a garden hose to create a layout.
Plan your retaining wall design so that the area behind the wall is even with the top of the wall. If the wall is a little higher than the area against which it is built, water could puddle behind it. Good retaining wall construction includes an efficient drainage system, but it is best to let runoff after a heavy rain flow over the top of the wall rather than seep behind it.
As for procuring materials, estimating the amount of material needed for a retaining wall can be tricky. Inch Calculator provides the number of blocks needed for a project by imputing the dimensions of the blocks you are considering and the height and width of the wall.
Before you start to dig, call 811, the national "call before you dig" hotline. This will route your call to local utilities so that they can visit your property to mark the locations of buried electric, gas and water lines. This is especially important if you are building a wall that faces the street as that's where most buried utilities originate from.
Things Needed
-
Retaining wall material (retaining wall blocks, landscape timbers, natural stone)
-
Wood preservative (if applicable)
-
Landscape fabric
-
Drain tile (drain pipe, either PVC or corrugated flexible pipe)
-
Cap stones (if applicable)
-
Concrete adhesive (if applicable)
-
Rubber mallet
-
Circular saw with appropriate blades
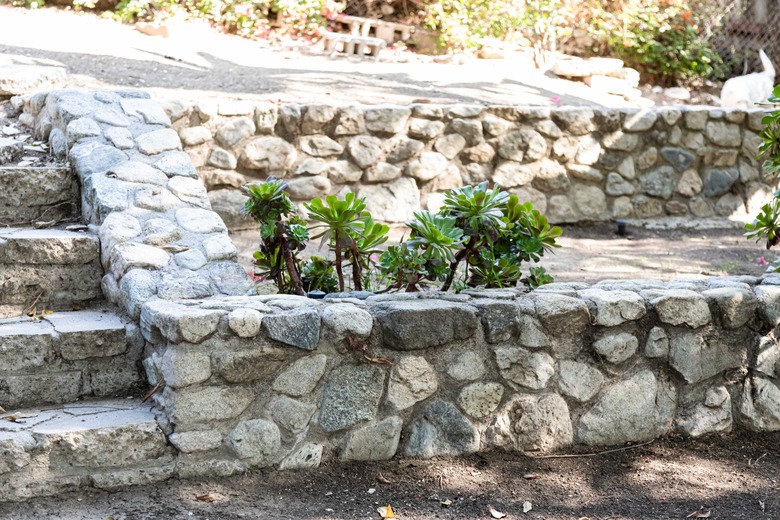
 RiverNorthPhotography/iStock/GettyImages
How to Build a Retaining Wall
1. Create the Anchor Trench
Dig a trench that will hold the first course (or layer) of your retaining wall material. The trench should be twice as wide as the material. The depth of the trench will equal the height of the material plus 6 inches. Tamp the soil in the bottom of the trench to create a firm base for the wall.
2. Prepare the Slope
Excavate the slope about 12 inches behind where the wall will be built. This area will be used to create a drainage system. (Note that landscape timbers require the installation of reinforcement that extends into the slope, which means extra digging.)
3. Provide a Base for the Wall
Pour 6 inches of gravel into the trench. Rake it smooth, tamp it down and make sure it is level. The gravel will aid in drainage under the wall and help with leveling the first course of material.
4. Install the First Course
Lay your chosen wall material in the trench. The first course will be buried to provide stability. Level the material. You may have to adjust the gravel under the material or use a rubber mallet to make the first course level.
5. Install the Second Course
Offset the joints of the material in the second course from those in the first. Seams that align with those in the course above or below weaken the wall. (In other words, make sure the blocks, timber, etc. overlap when you're laying the material down.) To offset joints, start the second course with half a concrete block or timber. For natural stone, you can usually select the right size of stone to offset the joints, eliminating the need to cut the stones. However, if you need to trim a block or timber to size, wear eye protection while you make the cut. For concrete retaining wall blocks, use a circular saw fitted with a concrete blade.
When working with concrete blocks, mark the cut and clamp the block to a stable work surface. You may need to make several passes with the saw to completely break through. Cut timbers with a circular saw fitted with a standard wood-cutting blade. Apply wood preservative to the cut ends of the timbers.
6. Begin Building the Drainage System
Lay the landscape fabric against the part of the slope that you exposed. The fabric should extend from the bottom of the wall to what will be the top of the wall once it is built, plus about 12 inches extra. This material lets ground water through, but it filters out soil and other debris.
7. Install the Drain Tile
Place a 2-inch-deep layer of gravel behind the courses already in place back to the slope. Put the drain tile, which is actually a drainage pipe, in position. The pipe should run the full length of the wall. Slope the pipe so that water that collects in it will move away from the base of the wall. Cover the pipe with gravel.
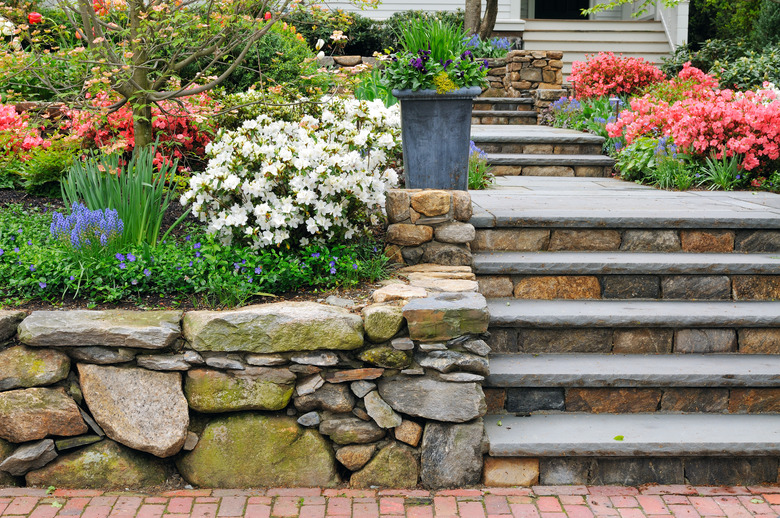 jorgeantonio/iStock/GettyImages
8. Continue Building the Wall
Place each course into position, making sure that the joints are offset and the wall material is level. As you continue with each course, backfill with gravel. In the end, you will have a section of gravel that will drain water away from the wall.
9. Cap the Retaining Wall
Retaining wall blocks are often capped with special cap stones to give them a finished look. These are held in place with concrete adhesive. Timber and natural stone walls, however, usually do not have a capping treatment.
10. Complete the Drainage System
Stop adding gravel about 10 to 12 inches from the top of the wall. Pull the landscape fabric over the top of the gravel to cover it. Cut off any excess fabric. Place slow-draining topsoil on top of the fabric. Put enough in place so that it is even with the top of the wall so that you avoid having a pool of water sitting right behind your blocks or timber. Tamp down the soil, and add more as needed. To fill in a grassy area above the wall, you can also place sod or plant grass seed.