How To Build A Dry-Stack Stone Retaining Wall For Your Garden
We may receive a commission on purchases made from links.
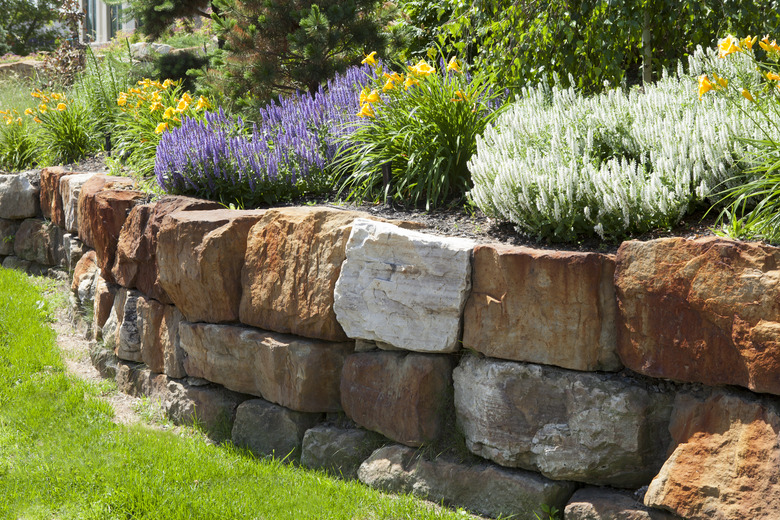
Stacked-stone retaining walls are both functional and attractive, naturally blending into the landscape with ease. If you want to build your retaining wall yourself as a DIY project, a dry-stack wall is your best option. These walls are made by simply stacking stones on top of one another and eliminating the complications that come with mortar and more advanced builds.
Note, however, that despite their simplicity, there is still a correct way to build stone retaining walls. The process isn't difficult, but your wall could fail if you take shortcuts or do not build it properly. The same is true if you build your wall too high. Dry-stacking stones is a method that works well for short walls, but don't use this wall-building method for retaining walls that are taller than 3 feet.
Dry-stack retaining walls are highly customizable and an easy way to implement a sculpture-like structure in your garden or front yard. With a dry-stack wall, it's best to shop for the stones at a local quarry or landscaping store versus a big-box store, as you'll be able to find more variety and less cookie-cutter stones in uniform sizes.
Stone Retaining Wall Tips
Stone Retaining Wall Tips
Before you start the work, consider spreading out your stones so they are easier to see. This will make it easier to find stones in the shapes you need while fitting them together. Leave yourself walkways so you can easily reach the stones you want.
When pulling stones, place your emphasis on shape and choose as randomly as you can. Natural stones have color variations, and you want to make sure you don't clump stones of the same color all in one spot.
It is also important to give yourself plenty of time to work on your wall. The concept of a dry-stack stone retaining wall is simple, but moving stones and lifting them into place is tiring work. Consider recruiting a few friends or family members to make the work go quicker and to help you lift particularly heavy stones. Remember that it is OK if you don't finish your wall in one session—and that it may take some time to rearrange them to get the exact right look that you were envisioning.
Things Needed
-
Marking spray paint, garden hose or twine and wooden stakes
-
Gravel
-
Stones
-
Potting soil (optional)
-
Shovel
-
Level
 TimAbramowitz/E+/GettyImages
How to Build a Dry-Stack Stone Retaining Wall
1. Prepare to Build Your Retaining Wall
Proper planning makes most DIY projects much easier, and building a stone retaining wall is no different. The key to building a dry-stack stone wall is to make sure you have enough material to complete the project. Stacking the stones may seem tricky at first, but eventually, you will find a rhythm. You don't want to break your stride because you ran out of stones. Additionally, you'll need to install a secure base to set the stones on. You will set the base of your retaining wall on a bed of gravel to ensure stability and proper drainage.
- Mark out where you want your wall by tying twine to wooden stakes. If you want your wall to curve or twist, use a garden hose or marking spray paint.
- Calculate how much stone you need. To do so, multiply your wall's height by its width by its length. This formula will tell you how many cubic feet of stone to order. According to Stone Plus, the wall's width should measure half its height, so a wall that stands 3 feet tall needs to be 1 1/2 feet wide.
- Calculate how much gravel you need. Your gravel bed should be a little wider than your retaining wall and 3 to 4 inches deep. Use the same calculations as you did for stone, multiplying your gravel's intended depth by the width and length of the foundation of your wall.
- Order your stone and gravel. The best way to purchase these items is to visit a local stone yard, quarry or landscaping store. Avoid big-box hardware stores when buying your stone. These places tend to sell wall-building systems that use highly manicured blocks that require adhesive rather than true stacking stones. Most quarries and stone yards will deliver, but plan your delivery carefully. The closer your stones are to your wall, the less lugging you will have to do.
Warning
Before you dig, call 811—the national before-you-dig hotline—to ensure you won't be running across and damaging any buried utility lines.
2. Ensure Proper Drainage
Low retaining walls such as dry-stack stone walls generally drain well with just a bit of gravel and the right backfill. In areas with heavy soil where drainage is an issue, however, it is wise to add some extra drainage around your wall—with a trench and a drain pipe—since water pressure is a common failure point for retaining walls.
- Dig a trench 6 inches deep where your wall will go. The trench should be a bit wider than your wall. This first step is necessary whether you are adding additional drainage or not.
- Lay a piece of landscape fabric in the trench if desired. This will keep loose soil from collecting and blocking up your drain pipe. Keep the landscaping fabric long, as you will continue to run it behind your wall as you work.
- Fill the trench with a 3- to 4-inch layer of gravel. Spread the gravel evenly but don't tamp it down. Your foundation stones will settle into looser gravel much more readily.
- Lay a 4-inch drain pipe in your trench, placing it between your new retaining wall and the slope behind it. Route the drain pipe to an area away from your wall.
3. Lay Your Foundation
The foundation for your wall needs to be sturdy, but it does not need to be pretty. Your foundation stone layer will fall below ground level where no one will see it. This makes it a great place to use any rocks that you find unappealing and would rather not use elsewhere. If they are not flat enough to use in your foundation, you can also break the more unattractive rocks into small pieces and add them to your backfill later.
- Lay your first row of stones on top of the gravel. Use the largest, flattest stones you can find.
- Shimmy the stones back and forth and make sure they are nestled firmly in the gravel. Use smaller stones or gravel as necessary to make this foundation layer as level as possible. Your entire wall is going to sit on this base, so take your time here.
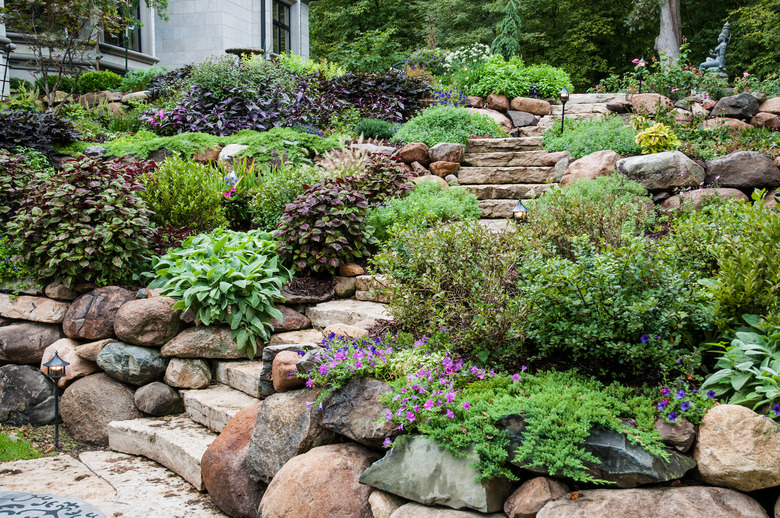
4. Dry Stack Your Stone
Laying stone is a trial-and-error process of choosing a stone, seeing if it will fit, trying different positions and, if you are not satisfied with the fit, modifying the stone or giving up and trying another. When you feel a stone is right but it needs some minor reshaping, use a rock hammer to shape it and make it fit. If it still doesn't fit after a few tries, simply set it aside and try another stone. The time needed for this step will depend on what overall look you want for your dry-stack wall as well as the size and shape of the materials you had available to you from the quarry or landscaping store.
- Lay the first course of stone on top of your foundation layer. As you work, make sure you place your rocks over the top of the seam between the rocks beneath it. This staggers your seams, which strengthens the wall and makes it more attractive. Try to use stones that are about the same height all along your first course of stone. It is OK if you need to use more than one stone to give your wall the proper width.
- Look for any gaps or spaces in your layer of stone and fill them in with small rocks and rock pieces if necessary to fill holes and add stability.
- Every few feet, turn one of your stones perpendicular to the others. This will help add support and will anchor your wall. You are essentially mimicking the same process that bricklayers use when building two brick walls adjacent to each other.
- Continue stacking stones in this manner a course at a time. As you work, offset the front of your wall slightly so that your wall leans back about 2 inches for every foot of wall height.
- Every few courses, stop and backfill the area behind your stones with a mixture of soil and small stones. Tamp down the dirt. If you are using landscaping fabric, your backfill should go between the wall and the fabric.
- Continue stacking your stones and backfilling the area behind it until your wall reaches the desired height.
 Elenathewise/iStock/GettyImages
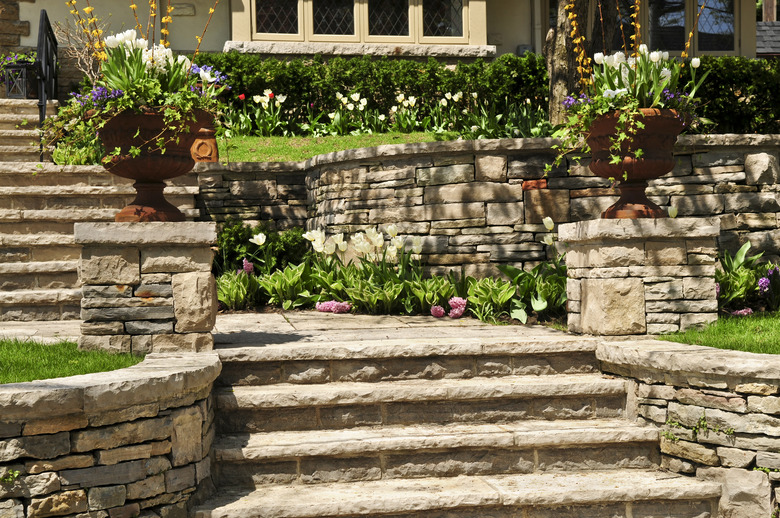
5. Install the Capstones
Capstones add the finishing touch to your dry-stack stone retaining wall. Save your flattest and nicest-looking stones to use as capstones to give your wall a clean, finished look.
- Level your final course of stone as much as possible before you add the capstones. Doing so may involve adding some small rocks or chipping away at protruding stones. You want your capstones as level as possible in case someone sits on your wall or attempts to walk along the top of it.
- Cut your landscaping fabric and fold it over the top of your wall. You will use the capstones to hide the fabric and hold it in place.
- Set your capstones firmly in place, making sure they don't rock or wiggle. If necessary, you can use smaller stones to anchor the capstones in place.
- If you don't want people to walk on or sit on your wall, Fine Gardening suggests filling any gaps in your capstone layer with soil rather than with small rocks. You can then plant small flowers or plants there for an attractive look that politely keeps people off the wall.