How To Build An Easy Gravel Path
We may receive a commission on purchases made from links.
A gravel path is a brilliantly simple DIY yard addition, allowing you to guide foot traffic around your landscaping so people can enjoy your plants without stepping on them. Best of all, a gravel garden path isn't just easy to install — it's also incredibly budget friendly, doesn't need any special drainage, feels soft to walk on (with proper footwear) and is still solid enough for rolling a loaded wheelbarrow. As an extra bonus, gravel paths are fully customizable, and they can easily fit in with any yard—and they just so happen to be on trend right now, popping up in magazine spreads and Pinterest boards.
The Anatomy of a Gravel Path
The Anatomy of a Gravel Path
There are four main parts of a gravel path: the stone pack base, the landscape fabric, the edging and the gravel itself. Of course, you can also choose to add additional decorative features to your garden path, such as concrete pavers or stepping stones to add a little extra visual appeal by creating a stone path inside the gravel path.
The base is what makes a gravel path structurally stable. In areas with hard clay soil, you may be able to bypass this base layer, but most areas have soil that shifts and sinks dramatically over time, so a stone pack made from pea gravel and stone dust is critical to ensuring your path will stand the test of time. This is especially true in areas with sandy soil that shifts particularly quickly.
When looking for landscape fabric, don't get too hung up on the different options, as practically any material made with a permeable membrane will allow proper water drainage. However, be sure to choose a heavy-duty, commercial-grade fabric for durability. Cheap polypropylene liners will tear easily and may not let water through, creating puddles. Never skip the landscape fabric, as it will prevent weeds from growing through your path for at least three to four years and also helps divide the stone pack from the gravel so the base materials don't start showing through the finished path.
The edging can be just as important to the appearance of the walkway as the gravel itself, and it plays a critical role in holding your gravel in place within the path boundaries. While plastic edging is easy to use, generally stays hidden and is inexpensive, it is also the least attractive option when it can be seen. Like plastic, metal edging is usually hidden, but it lasts longer and looks better — it can even be purposefully left visible for a more dramatic look. Other materials are generally always left visible. Wood adds a rustic charm to your garden, but if you're looking for something more upscale, bricks, cobblestones or flagstones are particularly good options.
Choosing Your Gravel
Choosing Your Gravel
Obviously, your choice of gravel or decorative aggregate is important when it comes to the appearance of your path. Gray limestone gravel looks clean and works well with Japanese gardens. For gardens that would benefit from warm hues, like those with vividly colored flower beds, golden, buff, red and pink are good options. For a truly dramatic appearance, a colored glass aggregate can make your garden unforgettable. When working with rock gardens and sand, reds, browns and golds are traditional, but white marble or black lava rock can add beautiful contrast.
When it comes to size, stick with something under 3/4 inch because it is comfortable to walk on. The smaller the stone, the softer it is to walk on, but larger stones stay put better in rainy and windy conditions. Flat slate is preferable on inclines because it's less likely to shift and slide around. Buy your gravel from a local quarry or landscaping supplier, and before purchasing, ask for expert advice to make sure your material choice will work well with any unique aspects of your gravel path.
 oversnap/iStock/GettyImages
Designing Your Garden Path
Designing Your Garden Path
The appearance of a path doesn't just depend on the materials but also its design. Think about the layout — whether it will be a simple, straight line across the yard or a meandering walkway through a variety of gardens. You can do this by laying out string, ropes or garden hoses along your planned pathway. Try to avoid putting your path on steep inclines where the gravel will not stay on the path or on low spots where water will pile. Also avoid extending a path right up to a doorway so you don't track rocks inside.
Next, consider how wide the path should be. Most garden paths are 3 to 4 feet wide, and they should always be at least 1 1/2 feet wide for comfortable walking. On the other hand, while they can be as wide as you like, a path that is more than 4 feet wide may look too big for some gardens. Landscaping Network suggests adjusting the width so it is widest at certain points, such as near the porch, to indicate that the visitor has arrived at his destination.
Once the design is complete, figure out the length to start estimating the materials you need to order. For straight paths, you can simply use a tape measure to calculate the length from end to end. For curvy paths, measure the length of the string, rope or hose you used to mark the layout.
To order the landscape fabric, calculate the area of your path in square feet by multiplying the length of the path by its width. For edging, you'll need double the length so you have enough for each side. Finally, for gravel and base material, you'll need the cubic volume, so convert the total path area to inches (multiply the square feet by 144) and then multiply this by 2 1/2 inches for the base and 1 1/2 inches for the gravel. Convert the cubic-inch volume to cubic feet by dividing by 1,728.
Remember to order a little extra of every material to ensure you don't run out before completing your project. If your gravel is made from a special material, order extra now so you can refill your path over the years whenever it runs a little low.
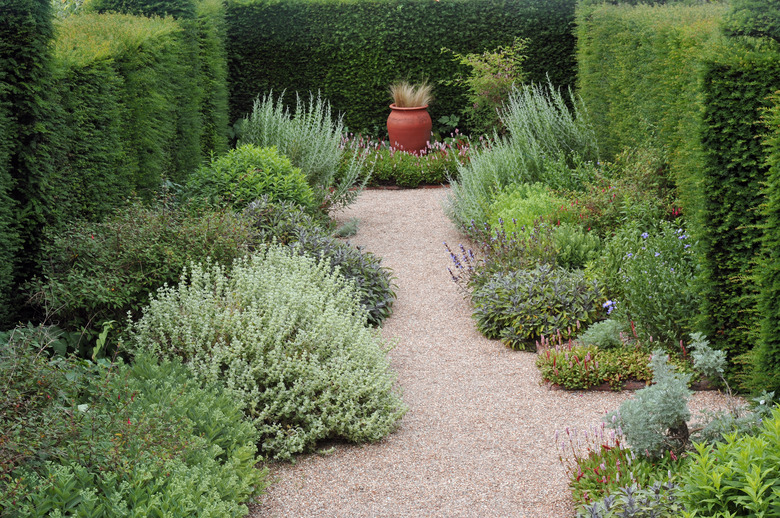
 mcbrugg/iStock/GettyImages
How to Install a Gravel Path
How to Install a Gravel Path
The great thing about gravel paths is because they only go down about 4 inches deep, the installation process is fairly simple. In fact, many projects can be finished in only one day.
Warning
Although gravel paths don't require you to dig very deep, it's still a good idea to call 811—the national before-you-dig hotline—to check for utility lines that may be buried where you're digging.
1. Dig a Trench
Mark your path's borders with string, rope or line-marking spray paint. Take one final look to make sure you like the way it looks—this is your last chance to change the layout before you start digging. Use a square-edged spade to dig a trench about 4 inches deep. Make sure the sides of your path are straight and even while digging.
When the trench is deep enough and the sides are smoothed, finish the bottom by raking the bottom smooth and then use a tamper or plate compactor to pack it down so it's level.
2. Lay Down Your Base
Pour the crushed stone base in the trench and then spread it around by raking it until it's even and around 2 1/2 inches thick. Lightly dampen the stone base with water to minimize dust and then tamp down the stone.
3. Install the Landscape Fabric
Roll out the landscape fabric with the shiny side on top. Cut at curves to fit and overlap at the cuts at least 4 inches. You may want to use spikes or landscape pins to hold down the fabric so it doesn't pop up through the gravel. The edging can also help secure the fabric around the sides.
4. Add the Edging
The edging installation process will vary greatly based on what material you use, so always find instructions for your specific edging material. Metal and plastic edging will generally be installed directly in the soil with the spikes included with the product, whereas stones should be placed above gravel and installed with a rubber mallet, and bricks must be set on a sand bed and secured with gravel or soil on each side. Wood (such as landscape timbers) installs quickly with rebar spikes or stakes securing it to the ground.
Standard plastic and metal edging are usually lined up flush with the surrounding plants, mulch or lawn, but you may want to set decorative metal, stone, brick or wood edging higher to make it more visually stimulating.
5. Fill in the Gravel
Add enough gravel to fill up your path and cover the landscaping fabric while still leaving about 1/2 inch of space below the top of the edging. Keep raking the gravel until it is even and ready to walk on and until no landscape fabric is visible. Do not overfill or the gravel may shift outside of the designated path area.