How To Install A Vinyl Fence: A DIY Guide
We may receive a commission on purchases made from links.
An easy option for installing a fence that doesn't have the maintenance needs that come with a standard wooden fence is to install a vinyl one. Made of durable and weatherproof PVC, vinyl fences have come a long way from the shiny plastic versions, often piercingly white in color, that dominated the market when the material first became available. Those original vinyl fences were easy to install, but the materials looked cheap, and the surfaces become chalky and discolored after just a few years. Today's vinyl fences are made from a better-quality PVC vinyl, and they come in colors and textures that convincingly mimic real wood.
Vinyl Fence Variations
Vinyl Fence Variations
Vinyl fences can use one of two different construction methods: panel installation and board-and-rail installation. Further, there are several styles of fence from which to choose:
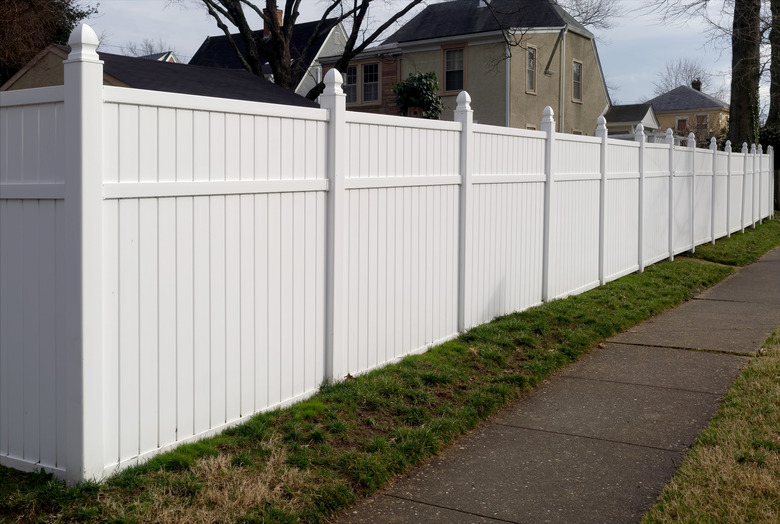
- Privacy fences use solid panels without any gaps between the boards. The panels are prefabricated, and installation is a matter of setting posts and panels one by one, carefully following a layout line. In some instances, these solid-panel fences are assembled board by board.
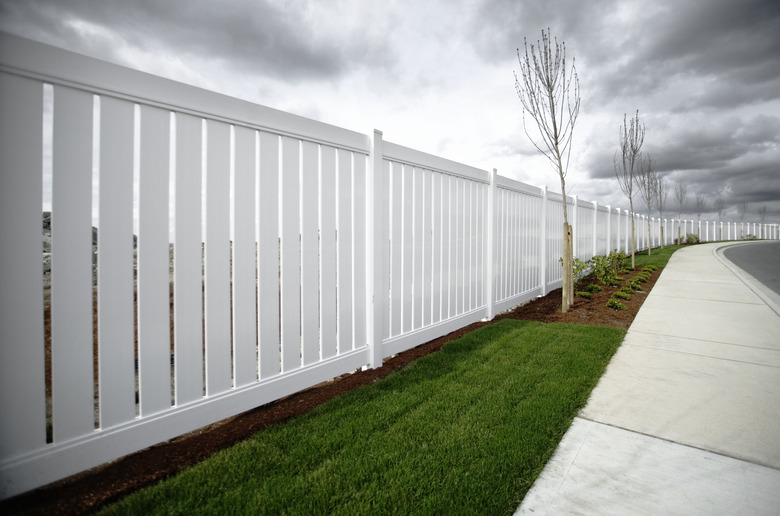
- Semiprivacy fences are also prefabricated panels installed the same way as privacy fences, but the boards are gapped so there are spaces between them.
- Picket fences use decorative vertical pickets attached to horizontal rails that span between posts. These are often installed in the same way as traditional wood picket fences — rails attached between posts and then vertical pickets attached one at a time.
- Ranch-style fences resemble the classic farm fences, consisting of two or three simple, flat, horizontal rails installed between posts with no pickets or vertical infill boards. These are installed in the same way as traditional wood fences — posts first and then rails attached between the posts.
Precise installation methods vary from manufacturer to manufacturer, so it is important to follow directions exactly. For example, CertainTeed, a major vinyl fence manufacturer, instructs that corner, end and gate posts should be solidified with either concrete and rebar or with aluminum post stiffeners.
Many fences require brackets mounted to the inside faces of the posts, which hold the ends of the panels or the fence rails, while others have mortise slots into which tenons at the end of the panel rails are inserted. Review the manufacturer's instructions as well as any online video demonstrations offered for the particulars on how a specific type of fence is installed.
Things Needed
-
Stakes
-
Masking tape
-
Long boards for bracing
-
Metal brackets (if needed)
-
Vinyl post caps (if needed)
-
PVC adhesive or clear silicone sealant (if needed)
-
Tape measure
-
Hammer
-
(2) bar clamps
-
(2) sawhorses
-
Drill with driver bits
How to Install a Vinyl Panel Fence
1. Establish the Vinyl Fence Layout
All fence installations depend on an accurate, straight and level layout line, so begin the installation by using stakes and mason's string to establish a straight line across your yard to represent the fence line. Level the lines using a line level. Next, measure along the string and mark the intervals where the posts will be located using tabs of tape. Follow the recommendations of the fence manufacturer for intervals very carefully. If your fence will have a gate, be especially precise about marking the post locations on either side of the gate, as the spacing between the posts is critical.
Normally, the post locations are marked "on-center"— the distance from the center of each post. Using a plumb bob, transfer the post markings on the layout string down to the ground and mark each post location with a stake driven into the earth.
 ghornephoto/iStock/GettyImages
2. Evaluate the Slope
Measure from the leveled string down to the ground at both ends. If the distances are the same, then your yard is level, and installation of the posts and panels will be fairly straightforward. If the distances are not the same, then your yard has a slope that you will need to consider as you install the posts and panels.
If the slope is gentle, this can be accomplished by setting the fence panels at one end slightly higher so that the panels remain flush at the top, and the space between the bottom of the panels and the ground varies slightly from one end to the other. If the slope is more pronounced, the typical method is to install the fence panels so they "step down" along the slope. The top of each panel will be level, but the panels will be staggered downward as the slope progresses.
3. Dig the Post Holes
Using a post-hole digger, dig each post hole to the depth specified by the fence manufacturer. Unless the manufacturer specifies otherwise, dig the hole slightly deeper than the post requires to create space for placing 3 inches of gravel in the bottom of the hole to improve drainage. To make the holes, you can use either an inexpensive clamshell post-hole digger or a motorized rental post-hole digger, which is available for lease at home centers or tool-rental outlets. The posts for ends, corners and gates are sometimes larger posts that may require a wider hole.
When all post holes are dug, cover the bottom of each hole with a 3-inch layer of gravel. This gravel will assist with allowing seeping rainwater to drain away rather than pooling at the bottom of the concrete post footing.
4. Position the First Post
Begin installation with the first post at the end or corner of the fence. Manufacturers have special posts designed for the ends and corners, so make sure to use the right style.
Position the post in its hole and adjust it so it is perfectly vertical (plumb) using a level. Make sure the post is at the proper height. If your fence uses mortise slots to fit the ends of the panels, it is crucial that the bottom slot be the correct distance above the ground. Usually, these slots are set about 2 to 4 inches above the ground but review the instructions for the precise positioning for your fence. You can add or remove gravel from the bottom of the hole if necessary to adjust the depth of the post.
Brace the post in place using two long boards clamped diagonally between the top of the post and the ground.
Tip
In high-wind areas, local building codes may require that the posts have some form of internal stiffener. This can be a short length of wooden post inserted into the vinyl post before it is installed or a metal stiffener sold by the manufacturer. This may be required for end or corner posts only or for all posts.
5. Pour Concrete in the First Post Hole
With the post braced in place, use a concrete mixing tray to prepare bagged dry concrete in a quantity sufficient to fill the hole around the post. Normally, it takes about two 60-pound bags of concrete to fill each post hole.
Carefully pour or shovel the wet concrete into the hole around the post. You can either leave the concrete slightly below ground level so that it can be filled with soil after the concrete hardens or you can fully fill the hole and shape the wet concrete into a slight dome around the post to help shed water from around the base of the post.
 Brand X Pictures/Stockbyte/GettyImages
6. Set the Last Post
Install the last post in the fence line using the same techniques. Make sure to double-check the on-center measurements of all the post holes before you anchor this last post in concrete.
When the concrete for the end posts has sufficiently hardened, adjust the mason's line between the posts so the string runs along the front face of the posts. This string will serve as a guide as you install the interim "line" posts and panels. Some installers like to install two string lines: one at the top and one at the bottom of the end posts.
7. Install Brackets (If Needed)
If your fence style requires it, attach metal brackets to the inside face of the first fence post at the height specified by the manufacturer. Some fence styles require no brackets; they have mortise slots in the face of the posts into which the panel rails fit.
8. Install the First Panel
The method for installing panels varies slightly depending on the manufacturer.
With some fences, the entire panel is already prefabricated. If this is the style you have, lift the first panel into place so the ends fit into the mortise slots or brackets on the end post (a helper is essential for this step). While supporting the panel in place, position the second post in the next post hole and snug it up against the panel so the mortises or brackets fit over the end of the panel.
With other fence styles, the panels are assembled in pieces: first a bottom rail spanning between posts, then a series of vertical boards and finally a top rail that caps the tops of the vertical boards. If you have this style, begin by inserting the bottom rail into the bracket or mortise slot on the first post and then position the next post into the post hole and snug it up against the bottom rail. Adjust the post so it is plumb and then brace it in place against the ground using diagonal boards and clamps. Next, insert the vertical boards one at a time into the groove on the top edge of the bottom rail. Finally, fit the top rail over the vertical boards so the ends of the rail fit into the brackets or mortise on each post.
With the first panel in place, screw it in place to the posts or post brackets as directed by the manufacturer. Check the panel to make sure it is perfectly plumb and aligned with the layout string and then mix a batch of concrete and fill the second post hole. Allow the concrete to set before moving on to the next panel.
9. Install Remaining Panels and Posts
Repeat this process to assemble each subsequent panel and post one at a time. Carefully check each panel to make sure it is plumb and aligned with the layout string. If the fence line follows a slope, you will need to consider this as you install the post brackets for each panel. Make sure to position brackets on the post so the panels will step down by an appropriate amount.
At gate openings, follow the manufacturer's instructions for post installation. Some manufacturers require that gate posts be fitted with an aluminum post stiffener placed inside the posts or with concrete poured down into the hollow posts.
 Joe_Potato/iStock/GettyImages
10. Cut Vinyl Fence Panels (If Needed)
Where partial panels are needed at the end of the fence or at gate openings, you can cut the panels down to size using a circular saw. Lay the fence panel on a flat work surface or sawhorses and then mark a cutting line along the panel. Set the circular saw to a blade depth just slightly deeper than the thickness of the vinyl panel and then cut along the marked line.
11. Install the Vinyl Fence Gate
If your fence has a gate, install it last, after the concrete post footings have fully cured. The method may vary slightly depending on the manufacturer, but it generally involves attaching hinge hardware to one post and latch hardware and a stop molding to the other post and then mounting the gate between the posts. Make sure to mount the hardware so the top of the gate will be at the desired height — usually flush with the tops of the adjoining fence panels.
12. Add Vinyl Post Caps
Add decorative caps to the tops of the posts if desired. These can best be attached with PVC adhesive or clear silicone sealant.
Variations for Other Fence Styles
Variations for Other Fence Styles
If you are installing a ranch-style fence with just two or three horizontal rails, the process is largely the same as for panel fences. Rather than installing full panels, you will simply install horizontal rails between the posts, fitting them into the mortise slots or brackets on the sides of the posts.
Picket-style vinyl fences are usually assembled so that all the posts and rails are installed first. Then, the vertical vinyl pickets are screwed to the rails one by one from one end of the fence to the other.
References
- Lowe's: Install a Vinyl Fence
- Wholesale Vinyl Fencing: How to Install a Vinyl Fence
- Black & Decker The Complete Outdoor Builder – Updated Edition: From Arbors to Walkways 150 DIY Projects, by Editors of Cool Springs Press (Cool Springs Press, 2016)
- CertainTeed: Brookhaven & Brookhaven With Lattice – Privacy Fence