How To Build A Picket Fence Gate: A DIY Guide
We may receive a commission on purchases made from links.
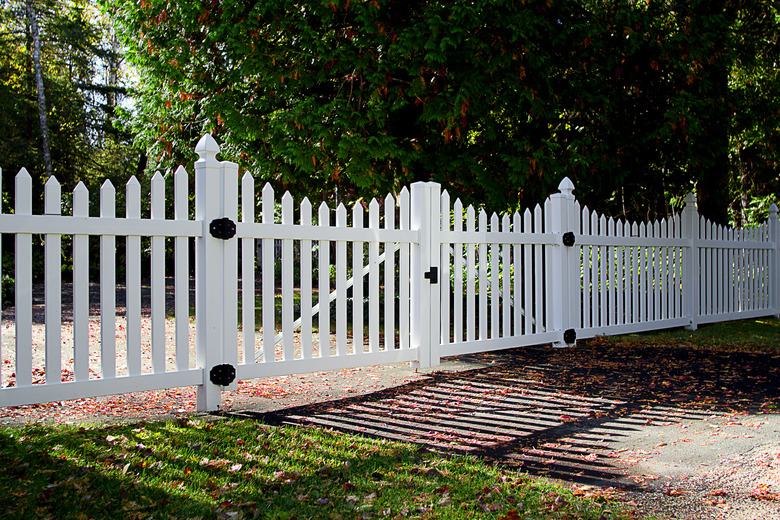
A wooden fence gate not only serves as a functional entry to your backyard, but it also adds to the curb appeal of your home. As ubiquitous as a picket fence gate seems to be in any given neighborhood, it's still helpful to find design inspiration when you're building one on your own for the first time. You can find plenty of examples on such internet destinations as Own the Yard and Backyard Boss, which between them offer over 50 unique images — and that's just two sites. You'll probably want to keep it simple if you're building your own gate, though, especially if you're a novice fence builder. If you decide to exchange the gate a few years down the road for another DIY version with a more complex design, your experience will stand you in good stead because most wooden fence gates have basically the same structure and differ only cosmetically.
The simplest design for a wood picket fence gate is one that copies the rest of the fence by having the same contours and using the same pickets. If you have basic carpentry skills and an adequate supply of pickets and lumber on hand, you can put together a simple picket fence gate in less than an hour, but what's the hurry? Take your time, pay attention to details and enjoy the sunlight as you add the finishing touch to your new picket fence or give new life to your old one.
Fence Gate Design and Materials
Fence Gate Design and Materials
A typical fence gate is between 30 and 36 inches wide, and the simplest ones consist of a rectangular structure that usually incorporates one diagonal brace or a pair of braces that form a cross. Once you've constructed this basic frame out of 2x4 lumber, you attach a covering, which in most cases is the same covering that's on the rest of the fence. If yours is a picket fence, you'll want to use pickets, and you can make these yourself from 3/4-inch lumber, which you may have to do if you can't find matching pickets at the lumber yard.
Redwood and cedar are the best wood species for fences and fence gates because they resist rot and moisture damage, but if you're going to paint the gate, pine and fir are also suitable because the paint will protect them. Neither fir nor pine will hold up well under a semitransparent or clear finish unless they are pressure treated, and although you can find pressure-treated fencing slats with a cedar tone that you can cut into pickets, real cedar pickets are less expensive and are the way to go. Choose rough-sawn or planed wood depending on what you have on the rest of the fence.
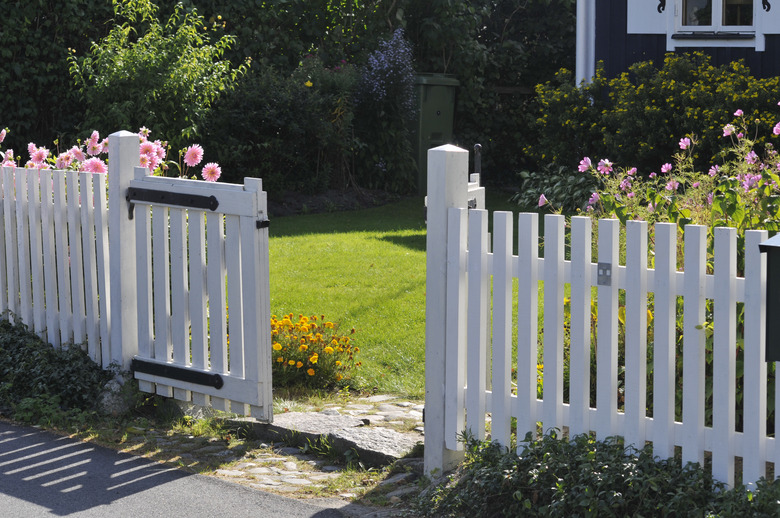
The gate hardware, which includes the hinges and latch, is standard and inexpensive. Gate hinges usually mount on the outside surface, but they can go on the inside if you prefer to have the gate swing into the yard. Self-closing hinges add a nice touch to a picket fence gate, especially if you want to keep the dog in the yard.
 DonKurto/iStock/GettyImages
Making Your Own Pickets
Making Your Own Pickets
You can usually find pickets to match the ones on your fence, but if you can't, you can easily make pickets from standard 3/4-inch fence slats or from some other type of 3/4-inch lumber. This is easiest if you have a table saw and the know-how to use it safely, but if not, you can do the job with a circular saw.
Start by measuring the length and width of one of the existing fence pickets and marking those dimensions on the lumber you're going to cut. Crosscut the lumber to the proper length, make an additional mark for the width, draw a straight line through both marks using a straightedge and rip-cut along the line to trim the board to the desired width. It helps to clamp the board on a table or bench with the offcut side hanging over the edge, and be sure to wear goggles so you can watch the saw's progress without getting sawdust in your eyes.
To cut the profile on the top of the picket, align the trimmed board with one of the fence pickets and draw the outline of the top. If the top is triangular, you can cut the angled lines with a circular saw, but if the top has a curved design, you'll need a jigsaw. Once you have one picket, use it as a template for making the others.
Things Needed
-
1 1/2-inch wood screws or 1 1/2-inch galvanized finish nails
How to Build a Picket Fence Gate
How to Build a Picket Fence Gate
Warning
When working with a power saw, wear safety goggles so sawdust doesn't get in your face
1. Find a Place to Work
Look for a large, flat and level area in which to build the gate frame. Use a workbench if you have one, but if you're constructing the gate on-site, avoid building it on the lawn or on an uneven walkway. A flat concrete driveway or patio is best.
2. Determine the Dimensions of the Gate Frame
Use a tape measure to accurately measure the width of the opening, taking measurements from both the tops and bottoms of the gate posts, and subtract about 3/4 inch for swinging clearance. If the measurements are different, one of the posts is leaning or may be loose, and you should fix that before you make the gate. The frame looks best if the top and bottom rails are the same height as the fence rails, or if you make the gate shorter or taller than the fence, the gate rails are offset from their respective rails by equal amounts.
3. Cut the Frame
Using a circular saw, cut two 2x4s to the width of the gate (minus 3/4 inch — don't forget) to make the crosspieces. To calculate the lengths of the uprights, subtract 3 inches (twice the thickness of a crosspiece) from the distance between the fence rails, plus or minus the offset you calculated as applicable. Mark this length on two more 2x4s and crosscut them to make the uprights.
4. Assemble the Frame
Set the crosspieces on edge on your work surface and place the uprights between them to form a rectangle. Check each inside corner with a speed square to make sure it's 90 degrees and then screw the frame together with 3-inch deck screws. You can drive these screws through the crosspieces into the uprights, but there's a more elegant way to do it using pocket screws.
To make the pockets, you can do as Build-Basic advises and use a jig, but if you do that, you need screws to match the jig distances. It's just as easy to drill holes freehand using a 3/8-inch drill bit. Drill two holes on the inside face of each upright 2 1/2 inches from the end and angled about 30 degrees with respect to the upright. Sink the bit about 1/2 inch into the wood and then drive a 3-inch deck screw into each hole to secure the crosspieces to the uprights.
5. Add a Brace
Lay a 2x4 on edge from one top corner of the frame to the diagonally opposite bottom corner such that the outer face of this brace (the face pointing away from the gate) just touches the corners on both ends. Trace the line formed by the crosspiece on both ends of the brace and then remove the brace. Set the bevel angle of a circular saw to the angle made by the lines and cut bevels on both ends of the brace.
Set the brace in place between the crosspieces and fasten it by driving 3-inch screws through the crosspieces into the brace. If you want the screws to be hidden, drive pocket screws through the brace into the crosspieces.
 Buccina Studios/Photodisc/GettyImages
6. Make a Spacer for the Pickets
Measure the distance between the pickets and cut two pieces of 2x4 to that length. These are spacers that will help you set the gate pickets a uniform distance apart.
7. Attach the Pickets
Set the first picket flush with the hinge side of the frame and nail or screw it to the upright and the two crosspieces using 1 1/2-inch screws or galvanized finish nails. Set the spacers next to the picket on both crosspieces, place a picket flush against the spacers and fasten it to the crosspieces. Work your way to the other side of the gate, ripping the last picket to the proper width as needed with a circular saw.
Some carpenters prefer to adjust the spacing to avoid having to change the width of the last picket. To do this, you'll need two slightly shorter or slightly longer spacers.
8. Install the Hardware
Screw the hinges to the face of the gate centered on the top and bottom crosspiece. Use screws with a minimum length of 2 inches so they penetrate the picket and sink into the frame. The screws usually come with the hardware. Finish by installing the gate latch at a comfortable height on the opposite side of the gate.
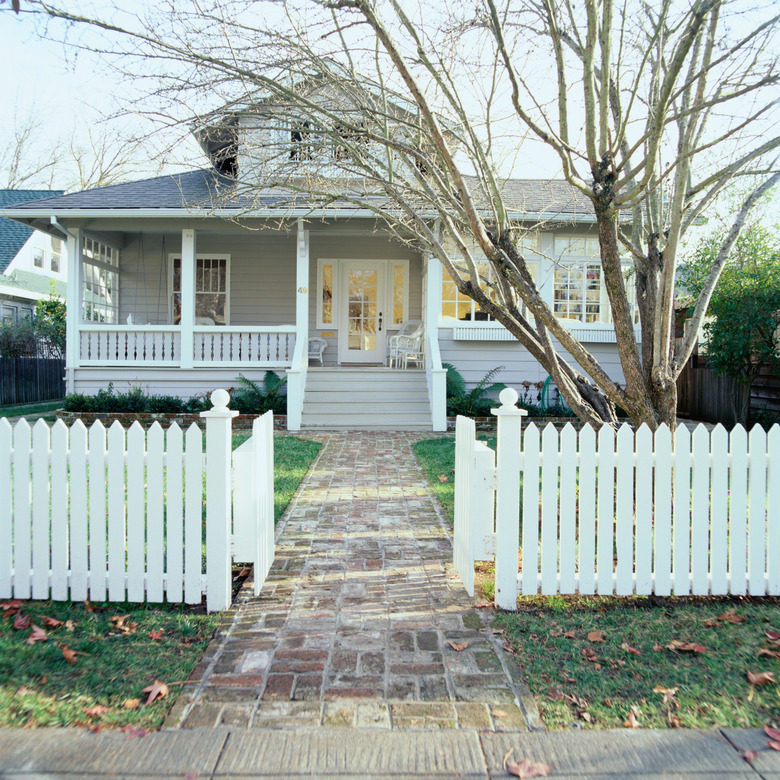
Setting Posts and Hanging a Wood Gate
Setting Posts and Hanging a Wood Gate
If you're building an entire fence or the posts on your existing fence are rotten and sagging, you have the opportunity to set new fence posts. You'll be setting a lot of posts if you're building a fence, so you may want to rent or buy an auger, but if you're just setting two posts, you might as well use a post-hole digger.
Normally, you set a fence post a third of its length in the ground, which is 2 feet for a 6-foot fence, but post holes for gate posts should be a little deeper, and they should include an additional 3 inches of depth for drainage gravel. Quikrete.) advises that the hole should be three times as wide as the post, which is about 12 inches for a standard 4 x 4 pressure-treated fence post.
When setting the post, drop in the gravel, then the post and finally the concrete. Plumb the post in both directions with a level after filling the hole about a third of the way with concrete. Then, fill it another third of the way and recheck for plumb. Check again when you fill it all the way.
When the concrete has cured, hanging the gate is easy, but you'll probably need a helper. One person holds the gate at the right height against the hinge post, and the other person drives lag screws to hold the hinges to the posts. Open and close the gate a few times to make sure it swings freely and then attach the strike for the latch on the opposite post.