Tile Countertop Repair: A How-To Guide
We may receive a commission on purchases made from links.
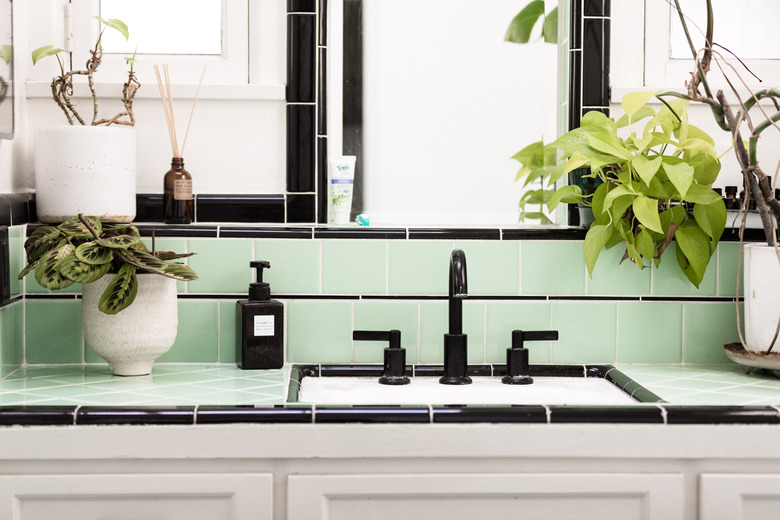
You won't find indestructibility on the list of reasons many homeowners choose tile countertops for kitchens and bathrooms over wood, laminate, solid-surface or granite countertops. Sure, a tile countertop will easily shrug off a pot of boiling water that you wouldn't dare put directly on a wood, laminate or unsealed natural-stone surface, but if you drop the pot, you could have some tile repair work on your hands. Tiles are made of fired clay, which is brittle, and the grout between them is typically a mixture of Portland cement and sand, which, like clay, can chip, crack and crumble.
If you have a ceramic tile countertop, it's comforting to know you'll hardly ever need to call an expensive tile pro because almost every tile repair you'll ever have to make is a DIY project. When damage occurs, you can usually address it with a spot repair rather than having to replace the whole surface, as you might have to do with a material like laminate. If you can't do the job with epoxy putty, the worst that could happen is that you'll have to replace one or more tiles and/or regrout, which is fairly easy to do, assuming you can find matching materials.
Fixing Small Chips and Cracks in Tile Countertops
Fixing Small Chips and Cracks in Tile Countertops
You can repair most small chips and cracks, provided the cracks aren't spreading, with fast-setting, two-part epoxy, which has a glossy sheen that matches the sheen on glazed tiles. You can often find epoxy putty in colors, and you may come across one that matches your tiles, but if not, you can always paint the repair with enamel paint.
To fix a crack or chip in the center of a tile, mix the epoxy putty and use it quickly while it still has its honey-like consistency. Apply it to the defect with a toothpick or similar implement and let it flow in and seek its own level. When repairing chips on the edges of tiles close to grout joints, wait for the epoxy to stiffen and then mold it into place, making two applications if necessary. When the epoxy hardens, use an artist's brush to paint over it, and the repair is complete.
 Peter Schweitzer
You May Need to Replace One or More Tiles
You May Need to Replace One or More Tiles
Certain types of damage, such as large cracks, loose tiles or a broken tile, call for tile replacement. This isn't as hard to do as you might think, but before you start the job, you should investigate the reason for the damage. It could be something that you need to fix, such as water seepage through unsealed grout, which could call for replacement of the grout, or an unstable tile substrate, which would indicate the need to redo your bathroom or kitchen countertops.
Another thing you need to do before replacing tiles is to make sure you have suitable replacements. Matching color and patterns is important, but you can get around that by using a decorative tile and making it a feature. Don't use a tile that's thicker than the others because it will always look out of place, but a replacement tile that is thinner than the others isn't as big of an issue because you can compensate by building up the mortar base underneath it.
Removing a Ceramic Tile for Replacement
Removing a Ceramic Tile for Replacement
Before you can fit in a new tile, you have to take out the damaged one, and that starts with removing the grout around it.
- Chip out the grout surrounding the damaged tile using a grout saw. If the grout lines are very thin, you may need to use a rotary tool and a thin grinding wheel, which is also the best tool for removing epoxy grout. Keep the wheel angled toward the damaged tile to avoid scraping the ones around it. Once all the grout is gone, lay tape on the surrounding tiles to avoid damaging them when you pry out the tile you need to replace.
- Break up the damaged tile so you can pry out the pieces with a putty knife. The best way to do this is to drill a hole in the center using a drill and a masonry bit and then score two diagonal lines that intersect in the center across the face of the tile using a glass cutter. One moderately hard whack with a hammer will break the tile cleanly with the least possible amount of debris. Wear goggles because without them, glasslike ceramic shards could fly into your eyes.
- Pry out the pieces as gently as possible, especially if the tile is part of a backsplash attached to drywall because the drywall paper will want to come with the tile. Scrape off the dried tile adhesive (thinset or tile mastic) with the putty knife to make a clean space for the new tile.
 slobo/iStock/GettyImages
Gluing In and Grouting a Replacement Tile
Gluing In and Grouting a Replacement Tile
Once you've cleaned up the space left by the damaged tile, you won't have any trouble setting the new tile. Spread thinset mortar or tile mastic on the countertop substrate (or on the wall if you're replacing a backsplash tile) using an appropriately sized putty knife or trowel and then set the tile on the adhesive and tap it with a rubber mallet to seat it. Once the adhesive sets, apply new grout, wait several days for the grout to cure and then seal the grout with a grout sealer.
Matching the grout color is important, and it isn't always easy given that the existing grout has had time to discolor with age. Test the grout you plan to use by putting a few dabs on a piece of cardboard and letting it set. If it isn't a good match, you might be able to darken it with dye after you apply it, or you could simply purchase different grout. Remember to use sanded grout for grout lines wider than 1/8 inch and unsanded grout if the grout lines are thinner than that.
How to Handle Damaged Grout
How to Handle Damaged Grout
Cracked or chipped grout looks just as bad as cracked or chipped tiles, and the way to fix it is to regrout. You have to remove the damaged grout first because if you simply apply new grout over it, the new grout will also crack. Use a grout saw or rotary tool and grinding wheel to do this job.
New grout is bound to look slightly different than existing grout no matter how hard you try to match the colors, so it's usually a good idea to remove more grout than necessary to make the new grout blend better. For example, instead of replacing a small 1-inch patch of cracked grout, replace the entire grout line from one side of the countertop to the other. It's a little more work, but it will improve the overall appearance.
The grout on your kitchen countertops may be intact, but it may be discolored by mold, grease or grime, and that looks just as bad on tile countertops as cracked grout. Clean the grout with a toothbrush and a mixture of baking soda and water or oxygen bleach (mixed with water as directed) and then seal it with a quality grout sealer to prevent moisture and grime from settling into the grout.