How To Seal Stone Countertops
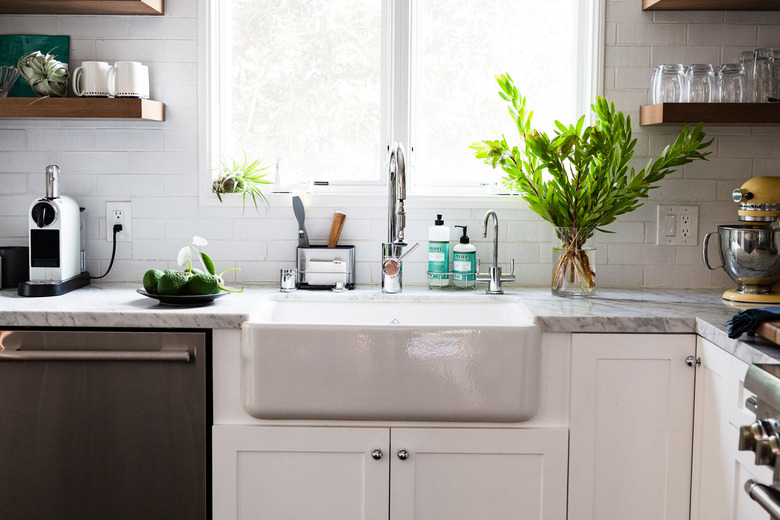
Natural stone is a porous material, so stone countertops can absorb water, oils and other gunk you leave on them, such as mustard and ketchup, and can sustain spots and marks that detract from their appearance. The best way to prevent this from happening to your stone countertops is to apply a sealer, which involves a quick and painless DIY procedure that will take less than an hour of your time.
Before you buy a bottle of sealant and apply it to every stone surface in your house, however, you should know two things. The first is that it's common for manufacturers to factory seal natural-stone countertops with resin before they ship them, and application of a sealer to a stone surface that already has one is redundant and may cause problems. The second is that some types of natural stone, including dark granite and soapstone, are so dense that stone experts such as RestorationMaster don't recommend sealing them at all for fear of leaving streaky messes on the surface.
You can use simple tests to determine whether or not your stone countertop needs to be sealed. If you decide you need a sealer, you won't have any trouble finding one. Every hardware store and home-improvement outlet carries at least one high-quality sealer and usually more than one. Although you should always follow the application directions for the product you purchase, the procedure is pretty much universal, and it's simple.
To Seal or Not to Seal
To Seal or Not to Seal
Some types of natural stone, such as marble and limestone, are very porous and almost always benefit from sealing, but the question is open for denser materials like granite. As you might expect, the manufacturer of Granite Gold recommends sealing every stone surface, including granite, but RestorationMaster contradicts this advice. The Natural Stone Institute maintains that granite countertops can benefit from a quality sealer, but dark granite usually doesn't need one, especially if it has been resin-treated at the factory.
 Peter Schweitzer
How can you tell whether your granite or marble countertops need a sealer? The most simple test involves splashing a few drops of water on the stone surfaces in question and watching what happens. If it beads up on the surface, then no sealer is needed, but if it soaks in to create a dark spot, then you should seal. It's a good idea to repeat this test with a nonaqueous solvent such as acetone to check the stone's ability to absorb oils.
What Makes a Quality Sealer for Natural Stone?
What Makes a Quality Sealer for Natural Stone?
A penetrating sealer for a dense material like granite is typically a solvent-based one that is able to soak in deeply, but several water-based products can do this as well. The most high-quality sealers, which are also the priciest, contain fluorocarbon aliphatic resin, so check for this ingredient on the label. Other ingredients you may find listed on labels of less-expensive products include siloxane and silicone.
To get the most benefit from the product you purchase, you should match it to the type of stone surfaces you're sealing. A product such as Granite Gold is specifically designed for granite countertops, as the name suggests, whereas some products, such as DuPont STONETECH BulletProof Sealer, are better for more porous materials. Superior Zero Ultimate Stone Sealer, formulated with fluoropolymers, is a good all-purpose choice that comes in a spray bottle. It's easy to use, and it won't break the bank.
 Stephen Paul
No sealer completely prevents etching, a type of discoloration that occurs when natural stone comes in contact with acids such as citrus juice, vinegar and wine. A quality sealer, however, can forestall damage long enough for you to wipe up the offending liquid.
How to Seal Stone Countertops
How to Seal Stone Countertops
Things Needed
-
Water
-
Nail polish remover
-
Dish soap
-
Isopropyl alcohol
-
Sealant
-
Clean rags
-
Spray bottle
1. Test for a Sealer
Drop some water on the countertop and observe whether or not it soaks in. Then, repeat the test with nail polish remover. If the liquids bead up, your work is done, and no sealing is required. You don't want to apply more sealer to stone surfaces that are already sealed because instead of soaking in, the sealer will harden on the surface and create a layer that will turn dull. If the liquids soak into the stone, proceed with the sealing process.
2. Clean the Countertop
Wipe down the countertop and the stone backsplash with a clean rag, preferably a microfiber one, to remove dirt, crumbs and other debris. Mix a teaspoon of dish soap and 2 tablespoons of isopropyl alcohol with a pint of water and pour the mixture into a spray bottle. Spray the countertop lightly and wipe it clean with another clean rag.
Avoid cleaning with vinegar, baking soda, bleach or commercial cleaners containing any of these ingredients. They are corrosive and may damage the stone.
It's best to complete the cleaning routine 24 hours before you apply the sealer to give the countertop time to dry.
3. Read the Application Instructions
The application directions can vary depending on the sealant you are using. Some products are sprayable, and some aren't. Some require multiple coats, and some require only one. Some can be buffed and polished, and others can't.
4. Test the Sealant
Choose a small, out-of-the-way section of the countertop and apply a small amount of sealant. Let it soak in for the recommended time, wipe off the excess and check for lightening of the stone or other signs of discoloration. If you see any, use a different product.
5. Apply the Sealant
Spray the sealant onto the countertop and spread it with a rag or use a rag to wipe it on, depending on the product. Start at one end and work your way across to the other, wiping the material in a circular motion and being sure to get it on all parts of the countertop, including the edges and backsplash. Let it dry for the time period recommended on the product label and then wipe off any excess with a clean rag.
6. Apply a Second Coat if Necessary
Some products require resealing with a second coat. If you use one of these, apply the second coat in the same way that you applied the first, being especially careful to wipe off excess sealer after the drying time has elapsed.
7. Let the Sealer Cure
Check the label for the curing time, which could be as much as 48 hours. Do not use the countertop during this period, and protect it from water. Once the curing time has elapsed, you can rearrange your dishes, appliances and anything else that lives on the countertop.
References
- RestorationMaster: Tips for Sealing Natural Stone Countertops
- Natural Stone Institute: Natural Stone Institute Statement of Position On Sealing Natural Stone Countertops
- YouTube: SCI – Stone Care International: How to Properly Seal Granite
- MB Stone Care: What Is the Best Sealer to Use on Natural Stone?