Subfloor Repair: A How-To Guide

We may receive a commission on purchases made from links.
You could be walking on the finest tile or hardwood that money can buy, but the truth is that the flooring in your home is only as good as the subfloor beneath it. Sometimes, types of subfloors made of wood types like plywood or oriented strandboard (OSB) can become damaged by external factors like rotting or water damage, which may require subfloor repair. Fortunately, repairs can be made to these subfloor types rather than fully replacing them depending on the amount of damage to the subfloor material.
Different Subfloor Types
Different Subfloor Types
Two common types of subflooring made from wood materials are plywood and OSB. These two materials may look similar since they are both made of pressed wood, but they are quite different when it comes to how they hold up as a subfloor option.
Plywood is made of thin strips of wood veneer that are pressed together using heat. Plywood is the most common type of subflooring used in homes and boasts a quick drying time if it does become exposed to moisture. Because plywood offers a quicker and more complete drying process, it won't warp under wet conditions like OSB, which is known to swell at the edges once it has finally dried. However, plywood is lighter than OSB and can contain more inconsistencies within the board, like knots.
 Jens_Lambert_Photography/iStock/GettyImages
OSB is made from wider pieces of wood, usually about 3 to 4 inches, which are layered to form a board using heat-cured adhesives. OSB is a popular option because it is cheaper than plywood and is denser despite being the same thickness. Although plywood dries out quicker than OSB, the glue that holds it together can become compromised by wetness since it absorbs moisture more quickly. Overall, plywood is known for being more long-lasting than OSB.
Assessing Your Subfloor for Repairs
Assessing Your Subfloor for Repairs
How can you tell if your home's subfloor needs to be repaired? There are a few telltale signs of a damaged subfloor, including damage to your flooring — look for cracked grout in tile flooring, hardwood that's cupping, or laminate floors that appear to have bubbles underneath. Additionally, floors that appear to be sagging or feel like they're sinking or bouncing when you walk on them are all indicators that your subflooring may need to be repaired or replaced.
One of the most common reasons plywood or OSB material needs subfloor repair is due to water damage. If you notice a musty or wet smell in the room, hear your floorboards creaking, or know that your floors have been exposed to excessive moisture be that from flooding or a consistent leak, you'll want to inspect your subfloor for repairs immediately.
Additionally, the presence of rotting floor joists, which are the wooden beams that lay horizontally and are used as structural pieces when framing a space, can be an indicator that your subfloor could use repairing. To check for rotting joists, look for wet or dry rot, insect damage, and rust around hardware near the joists.
You can repair joists that have less than 1 inch of rot by scraping away any rotted wood and filling the space with epoxy. All epoxied joists should be brushed with a few coats of wood preservative before laying anything on top of them. For joists with more than 1 inch of damage, sistering the wood with identical lumber may offer a repair; otherwise, replacement may be necessary.
Things Needed
-
Floor joists
-
Plywood
-
Chalk snap line or pencil and straight edge
How To Repair a Subfloor
How To Repair a Subfloor
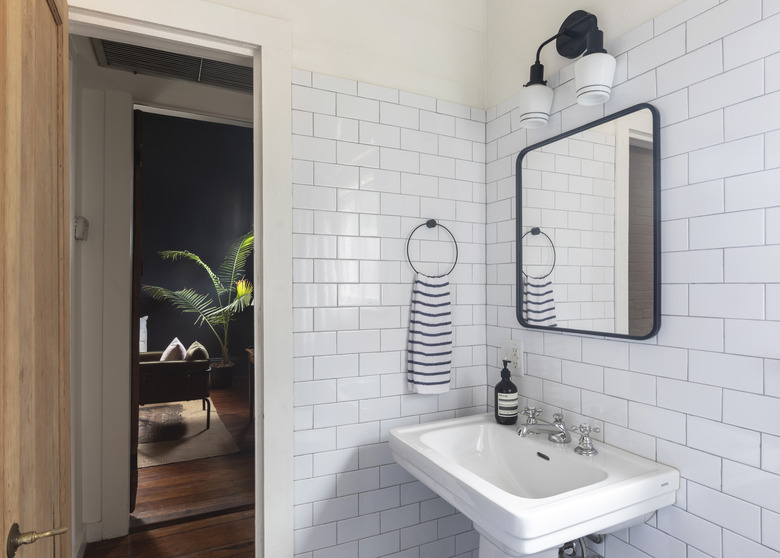
Replacing an entire subfloor can be an expensive and time-consuming task. Fortunately, many subfloors exposed to water damage can be whipped back into shape with a basic subfloor repair. If you have flooring like tile or laminate flooring over your subfloor, it will need to be removed before you begin any of these steps so that you can access the subfloor. Common areas of the home that show water damage to plywood subfloors are kitchens and bathrooms, especially around areas that hold water, like tubs.
1. Indicate the Area You Need to Remove
When repairing water-damaged plywood subfloors, look for water stains that are discolored from the rest of the surrounding plywood. You'll need to mark the area you will be removing with a chalk line or straight edge and measure the area so that you can cut a new piece of plywood to fit perfectly in its place.
When identifying your damaged area, take notice of where your floor joists sit under the subfloor so that you don't cut into them when you saw through your existing subfloor. This can be determined by following the line of nails you see on your subflooring. Plywood subfloor is nailed into the joists.
 Jacqueline Marque
2. Remove the Damaged Flooring
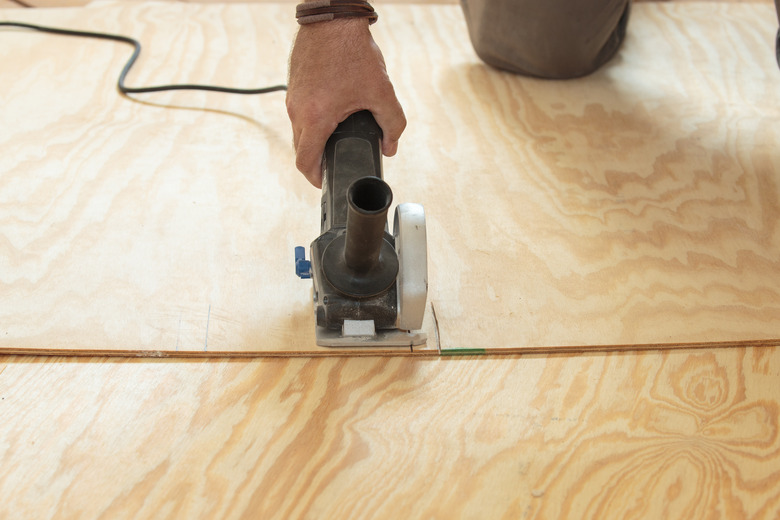
Using a circular saw, remove the damaged patch of the subfloor by following the lines you have marked. To do this without causing potential harm to anything that may be under the subflooring, like electrical wires, measure the thickness of your subfloor and then set the depth of your saw to just a tiny bit deeper than that measurement to ensure a clean cut. Plywood subfloors vary in thickness from 5/8 inch to 1 inch. The wider the space between your floor joists, the thicker your subfloor will be. Use a pry bar to pull up your rotted subfloor.
3. Reinforce Floor Joists
Before you add your patch, you'll need to reinforce your floor joists using a technique known as "sistering." To do this, prepare a joist section with the identical width and thickness as the original for each damaged or inadequate joist. It should be long enough to extend a foot or two beyond the defect on either side. Apply construction adhesive to the existing joist. Attach the "sister" to the existing joist, ensuring it is level before fastening it in place.
4. Apply Your Patch
Use a hammer and nails to attach your plywood patch to the floor joists. When measuring your patch to install the new subflooring section, be sure to leave an extra 1/8 inch between your old and new subflooring, as the wood will expand slightly.