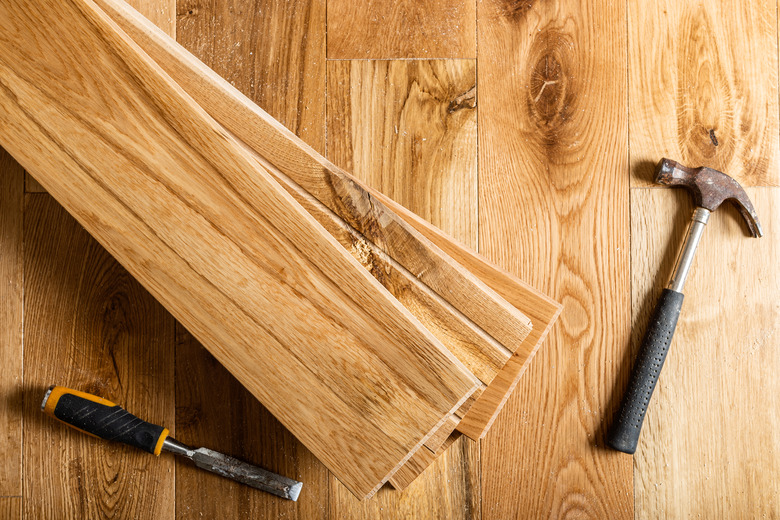
Bamboo Floor Installation: What You Need To Know
We may receive a commission on purchases made from links.
Options abound when it comes to bamboo flooring installation, as is the case with hardwood and engineered hardwood floors. Glueless floating floors are an excellent option for the novice DIYer, as no fasteners or adhesives are required. Another type of floating bamboo floor requires glue at the seams, and the most difficult to install requires nailing or gluing down the boards. While it may seem like a manageable project, glue-down bamboo flooring is best left to a professional installer.
Bamboo Flooring Basics
Bamboo Flooring Basics
No matter which type of bamboo flooring you choose, the costs tend to run less than solid hardwood floors, yet bamboo flooring prices can vary quite a bit. Expect to spend anywhere from $2 to $11 per square foot for the materials. Add another $2.50 to $6 per square foot on average for labor if you have the floors professionally installed. Ask about the grade of the bamboo before purchasing it. Grade A is more durable and is made from mature bamboo, while Grade B bamboo, from younger growth, tends to have more color variations and less durability.
Bamboo is a great option for allergy sufferers since it doesn't trap dust and allergens as carpets do. The downside is that some bamboo flooring contains volatile organic compounds (VOCs) that emit chemicals into the air. These VOCs come from the manufacturing process, which involves binding shredded bamboo bits together with resins. Ask the retailer which bamboo has the least amount of VOCs. Generally, the higher the quality of the flooring, the less volatile the chemicals within it.
Measure the square footage of the room to determine how much bamboo flooring to buy. Purchase 10 percent more flooring than you think you will need to cover damage or measurement mistakes during installation. Extra boards also come in handy in case you ever need to replace a few later on.
Preparing for Installation
Preparing for Installation
No matter what type of bamboo flooring you choose, the room must have a clean, level and smooth subfloor before installation. This means there should be no nails sticking up and no chunks missing from the subfloor.
Floating floors also require an expansion gap around the perimeter of the room and around fixed objects such as pipes, allowing space for the bamboo to expand as it absorbs moisture during humid conditions. The recommended expansion gap is usually between 3/8 and 1/2 inch. Check the directions for your bamboo flooring to find the recommended expansion gap size. Choose flooring spacers that correspond with the expansion gap size you need and space them around the perimeter of the room to set up the expansion gap before or during floor installation.
The bamboo flooring material requires acclimation to the space before installation, otherwise you could experience bamboo flooring problems, such as warping. Allow the flooring to sit in the room where it will be installed for two to three days before installation. Read the instructions for your specific bamboo flooring to ensure proper acclimatization. Some companies may suggest longer wait times depending on the humidity levels within the home. Choose a space away from heating and cooling vents, such as in the center of the room.
Bamboo Flooring Underlayment
Bamboo Flooring Underlayment
Underlayment is also a great idea for most bamboo flooring installation projects. The bamboo underlayment provides a thin layer of cushioning that helps reduce sounds when walking on the floor. It also helps cushion the floor from minor imperfections in the subfloor. Look for an underlayment that serves as padding, as a vapor barrier, and as a sound-absorbing material all in one. Install underlayment by covering the entire subfloor with it, taping its seams together without overlapping after you've removed shoe molding from the baseboards.
How to Install Click-Lock Floating Floors
How to Install Click-Lock Floating Floors
Click-together, glueless floating bamboo floors are by far the easiest and quickest type to install. One long side of each board snaps into a groove on the adjacent board, saving loads of time and preventing messes or mistakes with glue or nails. Baseboards and any trim near floor level should be removed from the space before you begin. Trim that is around passageways from one room to the next may need to be trimmed to accommodate the flooring.
- Choose the longest wall that is the most visible
as your starting point, such as the wall opposite an entry door. Start lining up boards parallel to that wall for a visual key to how many you may need for each row. Ideally, use boards from several different boxes to accommodate slight color variations. - Place wall spacers between the first board and both walls it touches, aligning that first board so the grooved side faces you. Continue placing additional boards along that wall, trimming the last board to size with a table saw or circular saw.
- Set a spacer along the side wall and then start the second row with a board of another length so the end farthest from the corner doesn't line up with the end of the first board. Click the board into the groove on the board in the first row, continuing until you meet the other side wall.
- Continue with additional rows of boards until you've covered the entire floor area. The last row most likely won't fit perfectly, so measure and cut the boards to size with your saw. Make sure to leave room for spacers for the expansion gap.
- Remove the spacers and then replace or add baseboards or quarter-round trim around the perimeter of the room to cover the gap.
How to Install Glue-Together Floating Floors
How to Install Glue-Together Floating Floors
Glue-together floating bamboo floors fit together in much the same way as click-lock flooring except glue is needed along the tongue of each edge that fits into the groove of the adjacent board. Use a polyvinyl acetate wood glue.
- Remove boards from several of the boxes, arranging several boards parallel to the longest, most visible wall.
- Starting in a corner, align the first board, positioning spacers along the short edge that would otherwise touch the wall as well as the long edge. The long grooved side should face you.
- Apply a dab of glue to the short end of the next board you push alongside the first. Continue with additional boards, applying a line of glue to one short side of each board as you press it against the previous board. Measure and cut the final board to size before applying the glue.
- Start the second row with a board of a different length to stagger the ends. Place a spacer along the short edge of the board touching the wall. Before pushing the board in place, apply glue to the top of the tongue that tucks into the groove in the first row. Push the board into the groove.
- Continue with the second and additional rows, applying glue to the tongue edge and side of any board butting up against another that's already in place. Remember to stagger the ends of the boards from one row to the next.
- Measure and cut the boards of the last row to size as needed, as they will not likely fit otherwise. A table saw comes in handy for this.
- Remove spacers and replace or install trim to cover expansion gaps.
How to Install Glue-Down or Nail-Down Flooring
How to Install Glue-Down or Nail-Down Flooring
Glue-down or nail-down bamboo flooring is a bit trickier to install than a floating floor. Either type is best left to a professional. Installing these involves aligning planks in much the same manner as with the floating floors, cutting boards to size as needed.
A urethane adhesive is applied to the subfloor with a trowel, and learning this technique without making a mess can be a bit tricky. The glue may take several days to cure.
Secret-nailing is another installation method. This time, a pneumatic flooring nailer tacks bamboo boards down at a 45-degree angle with the cleats or nails going through the tongues of the boards. A rubber mallet is required to activate the nailer to secure each cleat or nail. This type of nailer saves time and ensures a proper angle compared to nailing each board with a hammer, but it also requires an air compressor. This type of installation is best left to a professional.