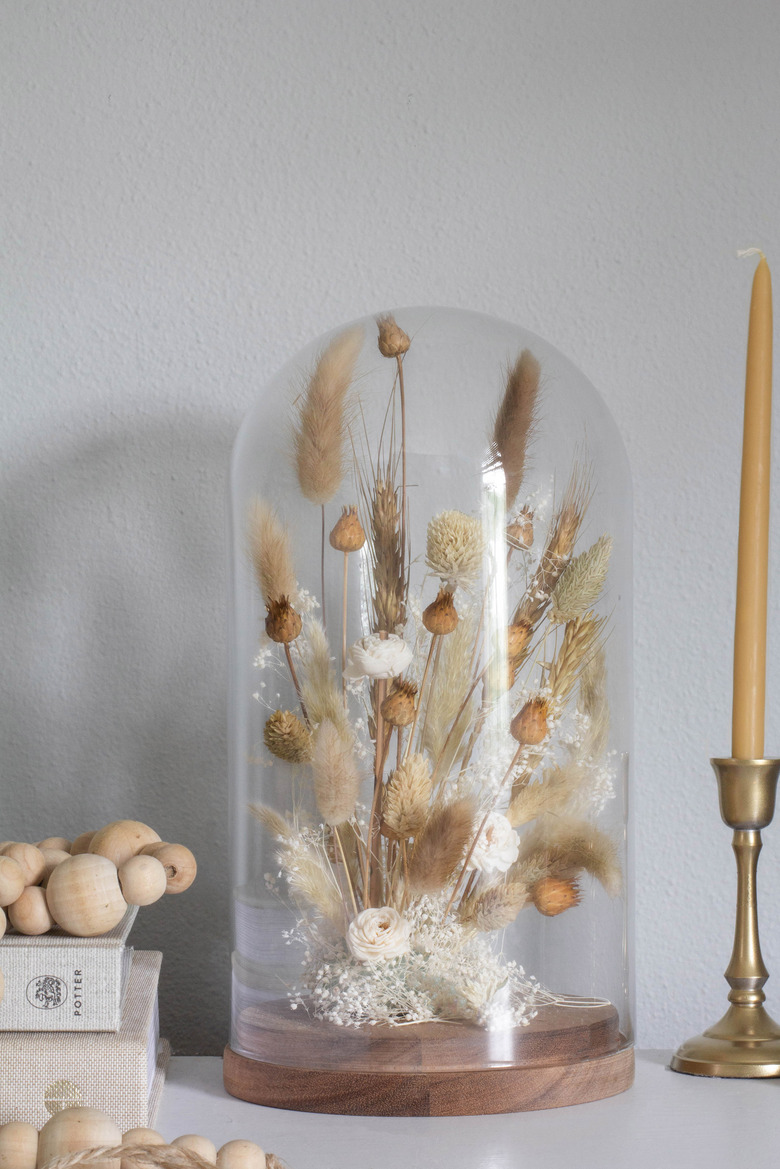
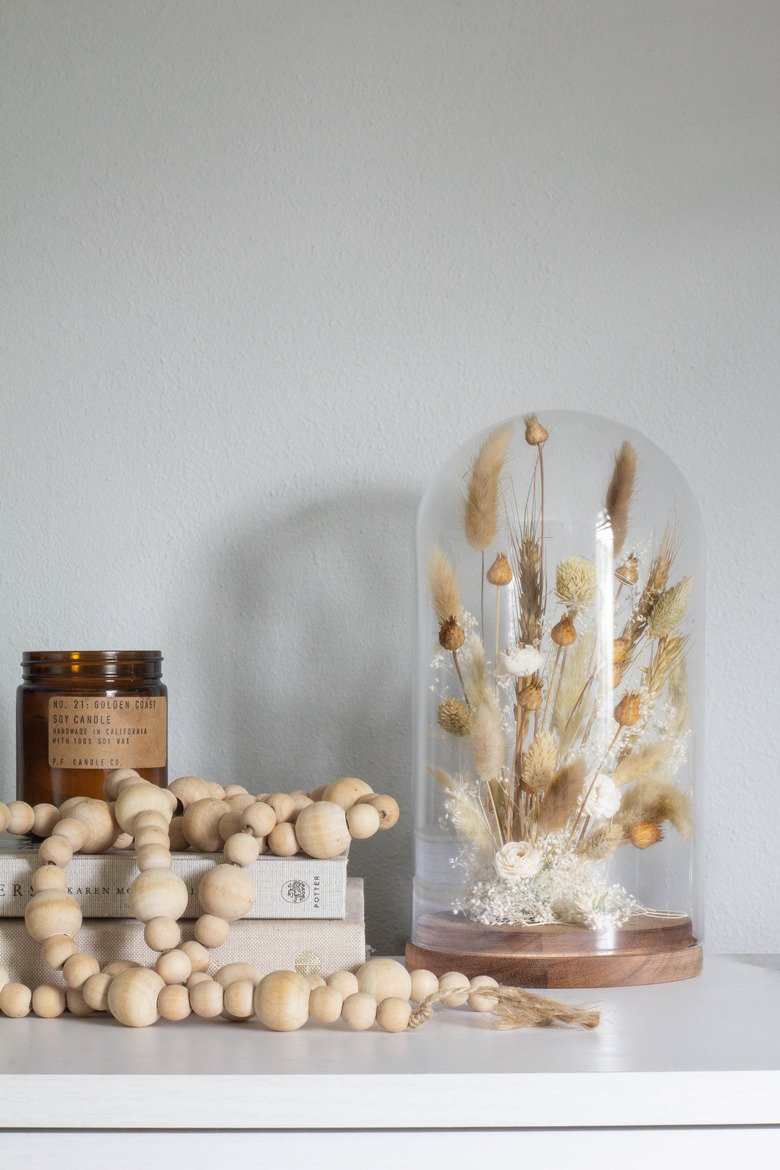
Use Seasonal Dried Florals To Make A Unique Cloche Design

Craving a little Parisian charm in your space? If adding an oversized gilt mirror or decorative crown molding is not exactly in your DIY budget or wheelhouse, consider a simpler alternative: dried florals. Trust us, it's a trend we've spotted in all the chicest French girl apartments. Here, we've opted to display them inside a cloche — there's just something poetic about seeing nature's beauty immortalized under glass. We kept things neutral with a sun-bleached palette of botanicals, but you could go in a moody direction with dark-hued florals, or create a color story with bright and cheery blooms. These "forever" terrariums make great gifts, but honestly no judgement if you decide to keep it for yourself.
 Trisha Sprouse
Things Needed
-
Tape or glue dots (optional)
-
Dried florals (see guide below)
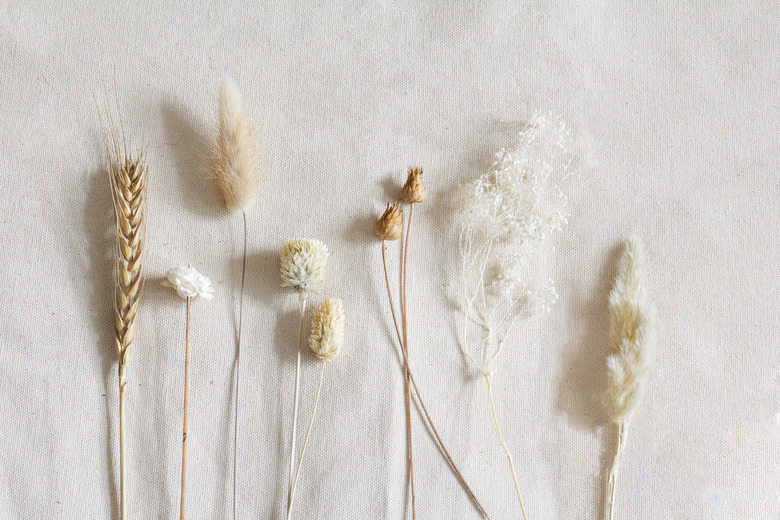
Dried Floral Guide
When sourcing dried florals, your local craft store is likely to have a small selection to choose from — bunny tails, wheat stalks, and baby's breath are generally easy to find. Other dried floral varieties can be found online. We found Afloral, Bloomist, and Dried Decor to be great resources, as well as Amazon and Etsy.
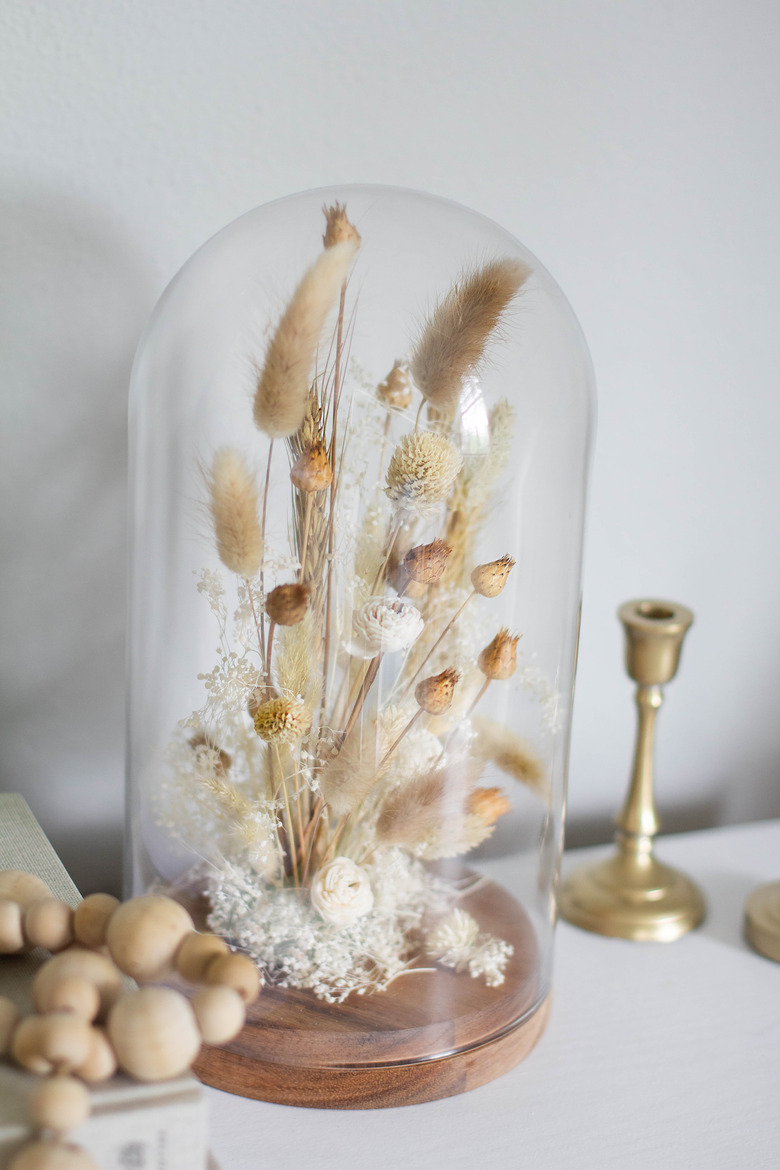
Here's a visual guide of the dried florals used in our cloche from left to right: dried wheat, sola wood flowers, natural bunny tails, white globe amaranth, bleached phalaris, centaurea pods, bleached stardust Gypsophilia, natural pampas grass.
 Trisha Sprouse
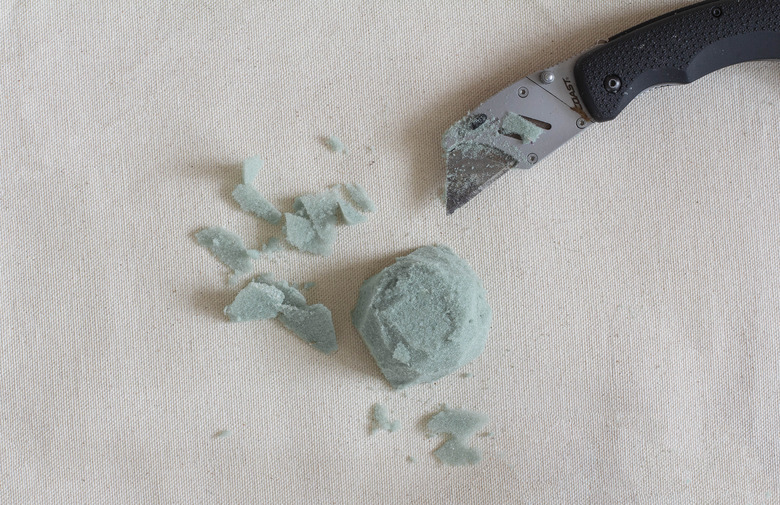
Step 1
Use a utility knife to cut a small block of floral foam that's about 2 inches wide by 2 inches long.
 Trisha Sprouse
Step 2
Shave off the corners of the cube to create a dome shape. This will make it easier to insert the florals at an angle, and it's also easier to conceal.
 Trisha Sprouse
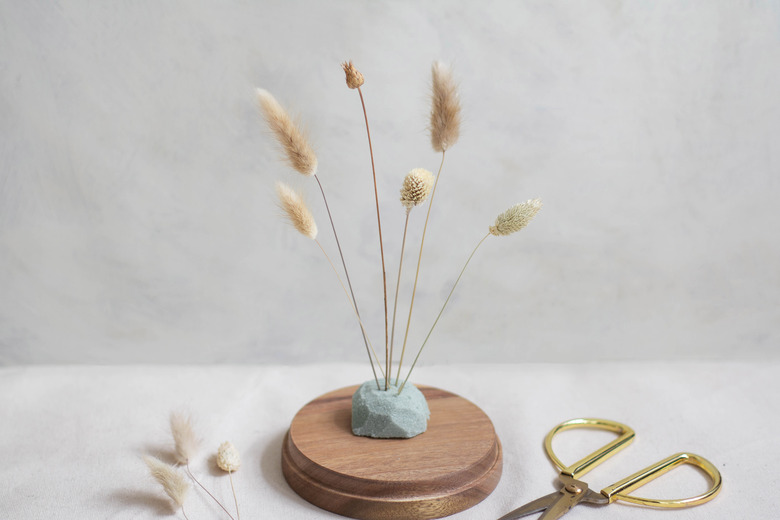
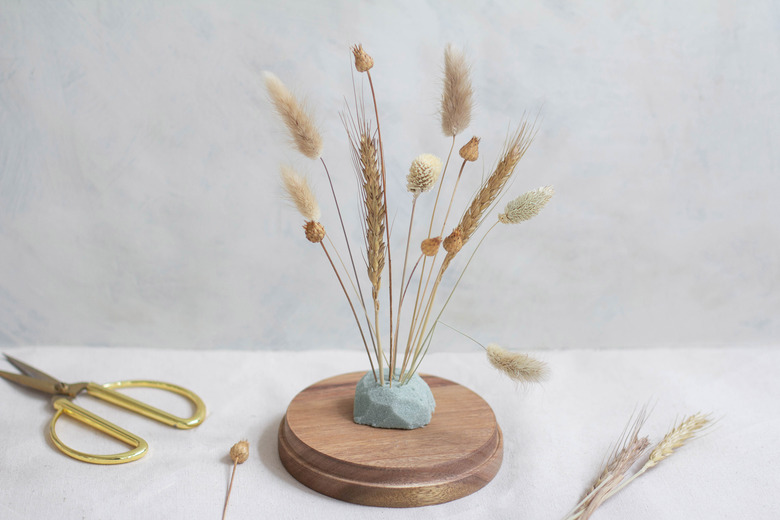
Step 3
Place the foam on the center of your base. Set the height of your arrangement by inserting your longest stems — no taller than your cloche, of course. Here we've inserted six stems, a mix of bunny tails, centaurea pods, globe amaranth, and phalaris.
TIP: We didn't find it necessary, but you could adhere the foam to the base with a bit of tape or glue dots, if you plan to transport or gift your cloche.
 Trisha Sprouse
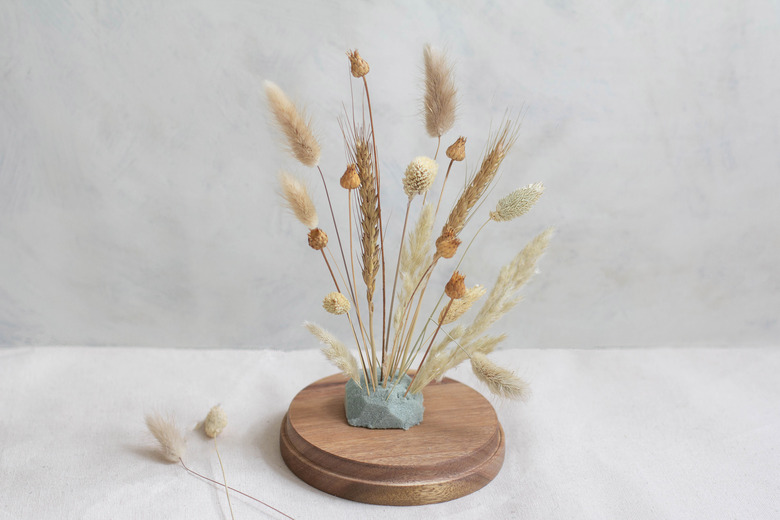
Step 4
Add a few mid-length stems in the center of your arrangement to outline the overall shape. We added a few wheat stalks and more centaurea pods.
 Trisha Sprouse
Step 5
Add shorter stems around the bottom of the arrangement to fill out the base a bit more. We added pampas grass and more phalaris here.
 Trisha Sprouse
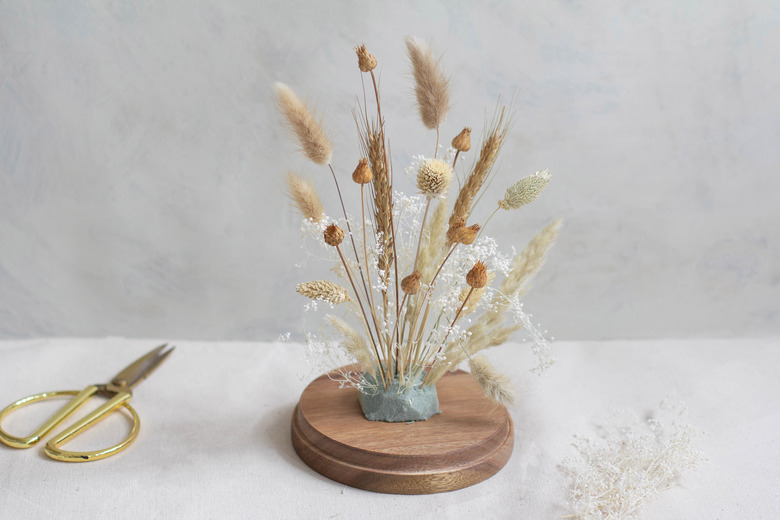
Step 6
Create volume in the center of the arrangement — we used stardust Gypsophilia (baby's breath) to fill ours out.
 Trisha Sprouse
Step 7
Continue adding stems of varying heights, textures, and color tones to create depth and visual interest, concentrating them towards the center and base of the arrangement. Remove the stems off a few sprigs of baby's breath and place the blooms strategically to conceal the floral foam.
 Trisha Sprouse
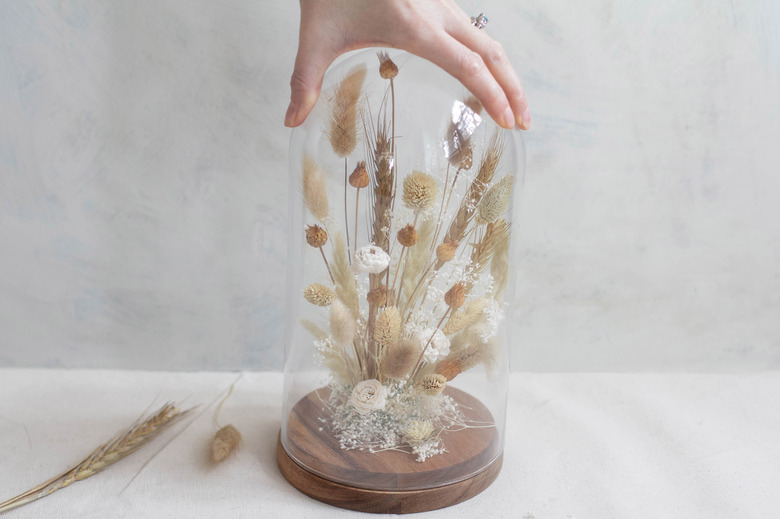
Step 8
Carefully slide the cloche over the arrangement, tucking in any stray stems as you go.
 Trisha Sprouse
Your gorgeous new floral cloche is ready for its #shelfie. On a table, shelf, or dresser, it's sure to add a layer of Parisian style to your space.
 Trisha Sprouse
 Trisha Sprouse
 Trisha Sprouse