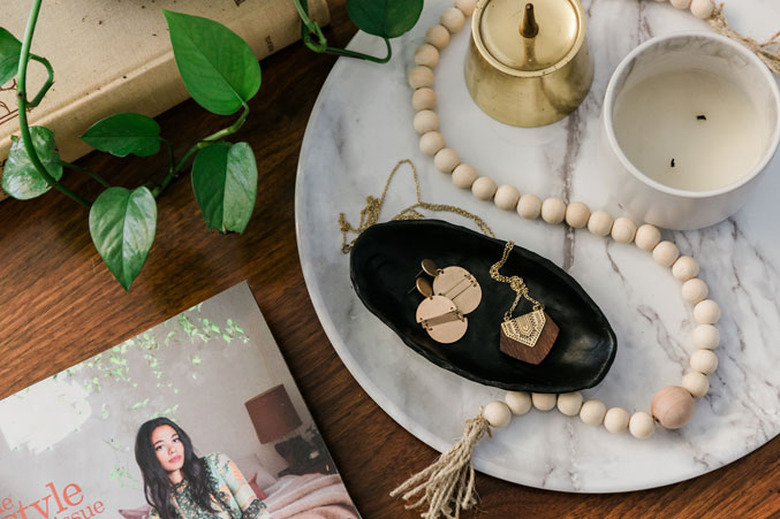
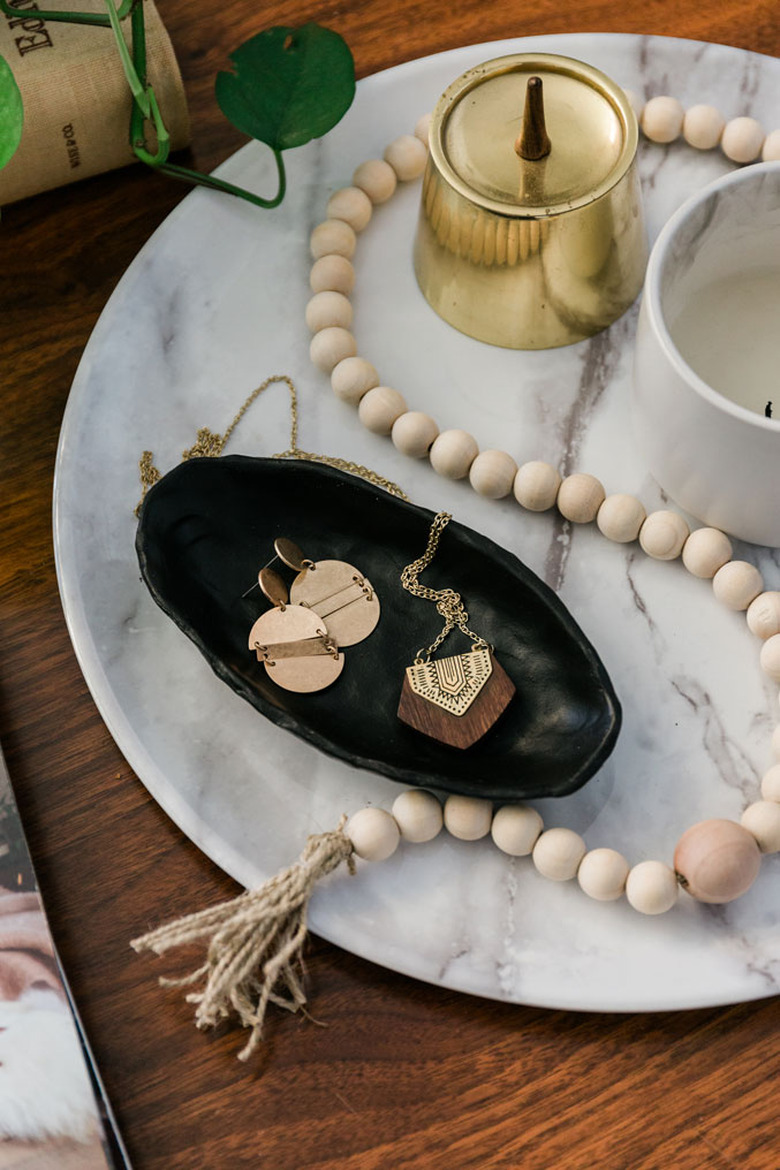
DIY Oblong Dish To Style On Your Coffee Table Or Dresser (Using Air-Dry Clay)
If you asked us to name the one thing we couldn't live without when it comes to interior designing and styling, we'd have just one word for you (OK, maybe two): catchall containers! These sweet little dishes come in all sorts of shapes and sizes, and can be used on practically any tabletop in your home to corral things like your favorite statement earrings, keys, or even an air plant or two. Keep scrolling to watch us turn air-dry clay into a cool, minimalist catchall dish of our own (with just 30 minutes of hands-on DIY activity).
 Carrie Waller
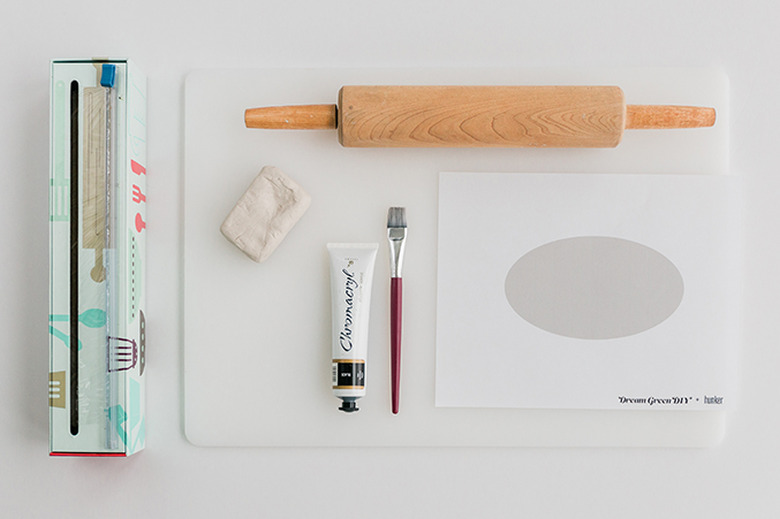
Things Needed
 Carrie Waller
Step 1
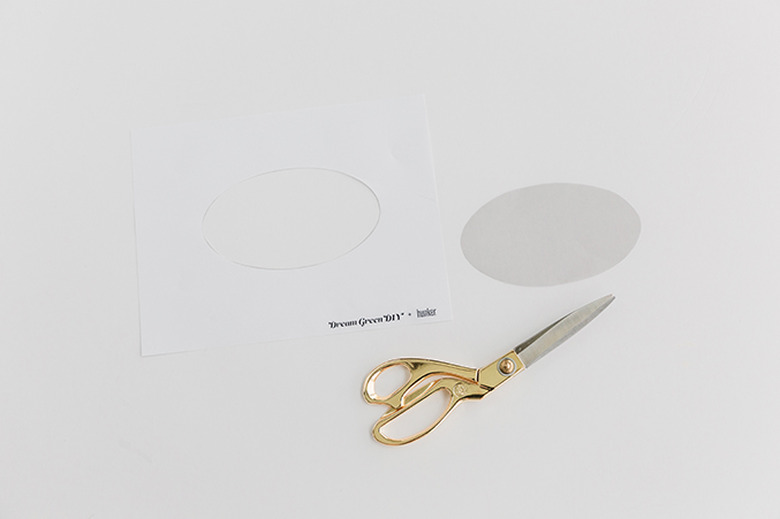
Download our free printable oval template, and print it onto cardstock. Cut the template out along the outside edge of the gray shape using scissors.
 Carrie Waller
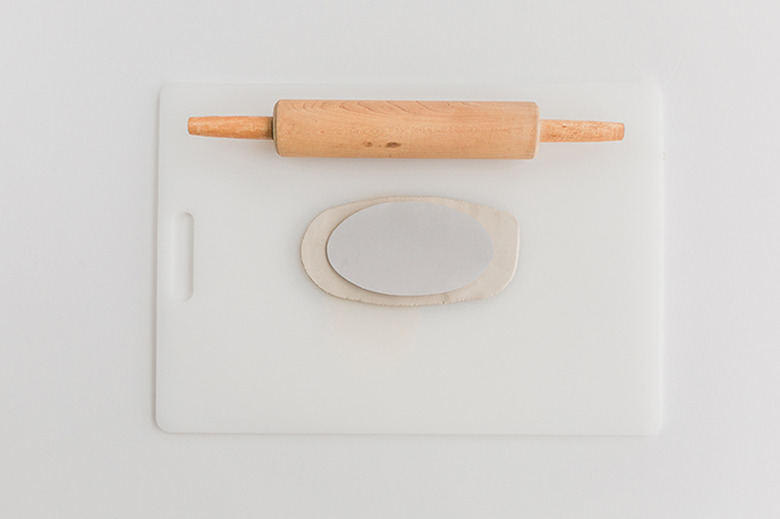
Step 2
Rip or cut off a chunk of air-dry clay from the block, and place it on a plastic cutting board. Roll it out to about 1/4-inch thickness using a rolling pin. Lay the cut template on top of the clay.
 Carrie Waller
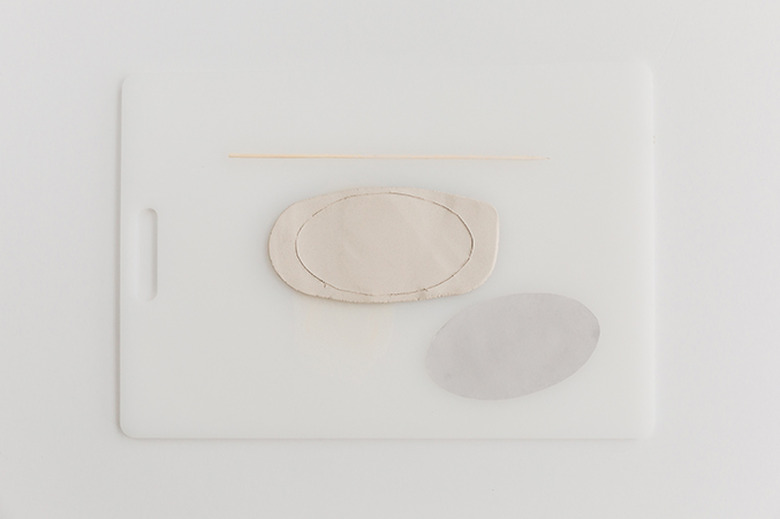
Step 3
Use a skewer or needle tool to trace the shape of the template into the surface of the clay slab. Remove and discard the template.
 Carrie Waller
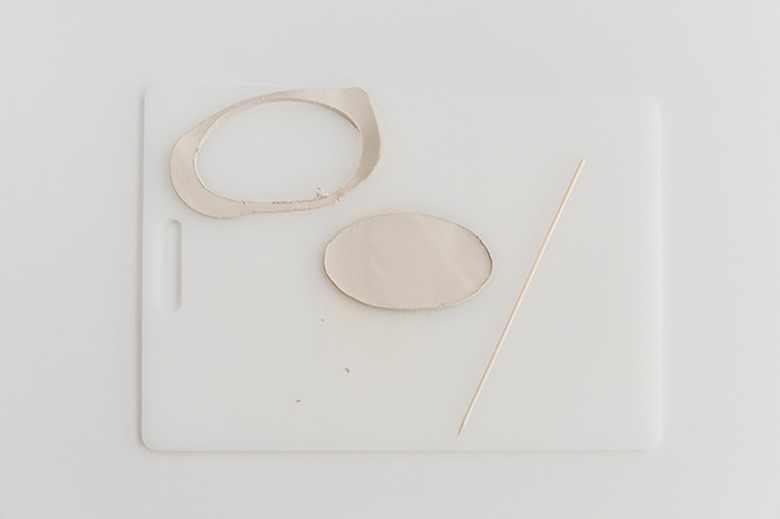
Step 4
Carefully cut all the way through the traced line you marked on top of the clay slab, again using your skewer or needle tool. Remove the excess clay and add it back to the air-dry clay bag to be reused in a later project (see below for some other DIY ideas). You should now be left with an ovular clay shape.
 Carrie Waller
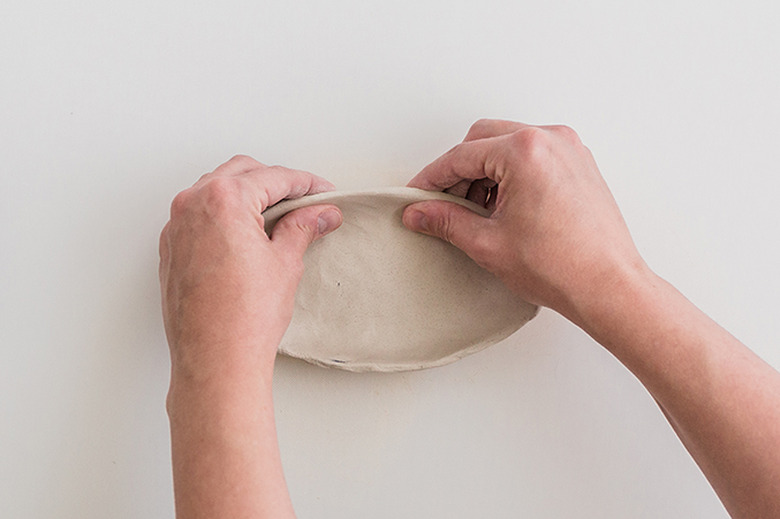
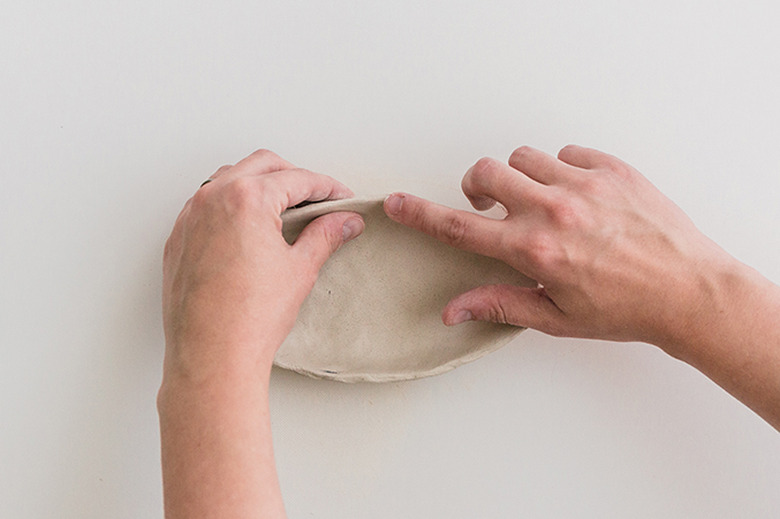
Step 5
Use both hands to gently pinch and squeeze the outer edge of the clay to turn it upward. This forms your dish.
 Carrie Waller
Step 6
If you want your catchall dish to have the same textural look as ours, gently push your fingertips along the entire top surface of your clay dish. You don't want to push too hard — just enough to create a gentle indented texture across the dish's surface. Once you're happy with the shape, smooth the top cut edge of the dish with your finger and a little bit of water.
 Carrie Waller
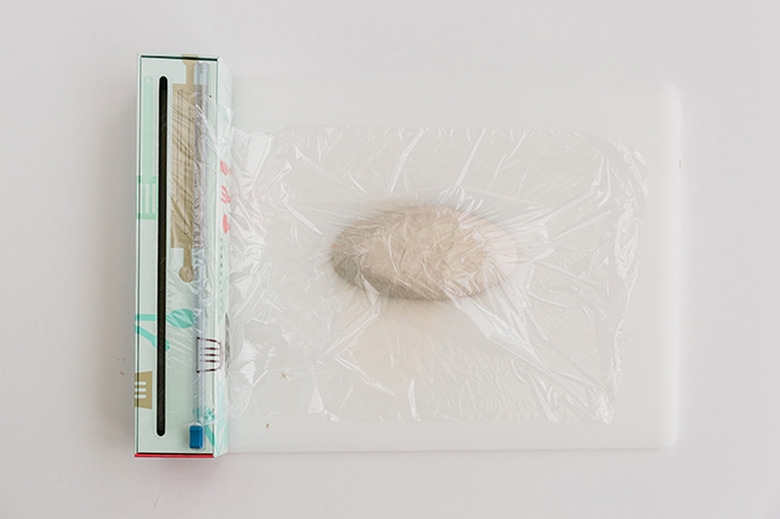
Step 7
Flip the finished dish over, and cover it loosely with plastic wrap. Place the dish (cutting board and all!) in a cool, dry area to cure overnight. The next day, gently flip the dish over and cover loosely with plastic wrap again. Wait an additional 24 hours, then uncover, and let the dish harden uncovered for as long as it needs to. The full drying time will depend on the humidity in your home, so just be diligent with checking it every so often. Once the surface no longer feels overly cool or soft to the touch, you're ready to move on to the next step.
 Carrie Waller
Step 8
Paint the fully dry clay dish black using a paintbrush and black acrylic paint. Allow the dish to dry for 30 minutes, then flip it over and paint the underside. Apply a second coat of paint, if needed, and allow the dish to fully cure for an additional two hours before using.
 Carrie Waller
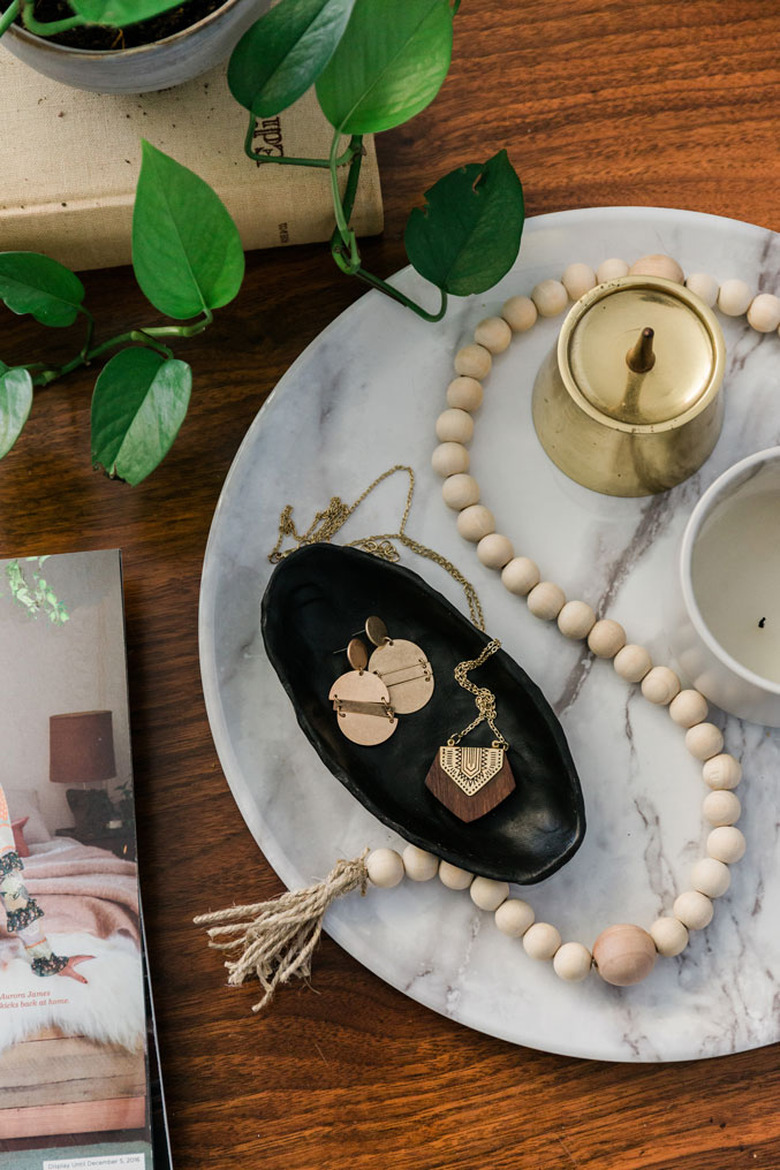
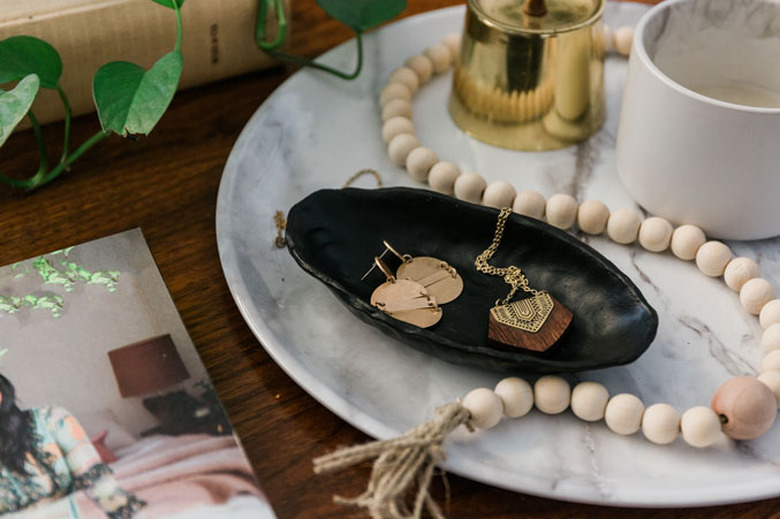
Step 9
Your finished DIY dish is the perfect thing for styling a coffee table or dresser tabletop. Use it to hold all the little things — anything you'd like!
 Carrie Waller
 Carrie Waller
Got Some Leftover Air-Dry Clay?
Got Some Leftover Air-Dry Clay?
Make Faux Concrete Jewelry Cones
 Carrie Waller
 Carrie Waller for Hunker