We Hacked This Popular IKEA Shelving System To Include A Roof On Top
We may receive a commission on purchases made from links.
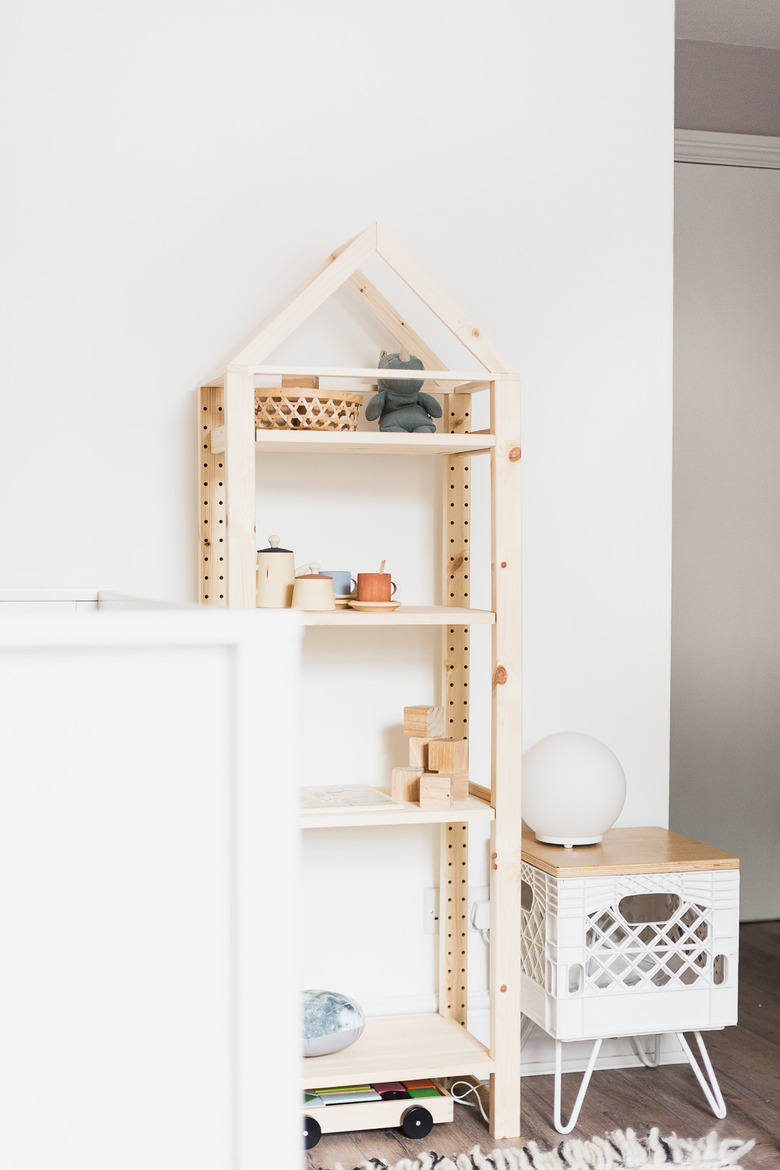
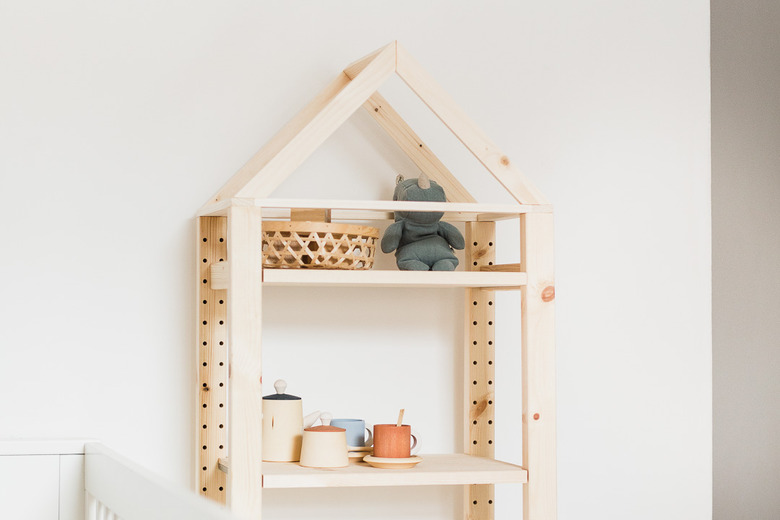
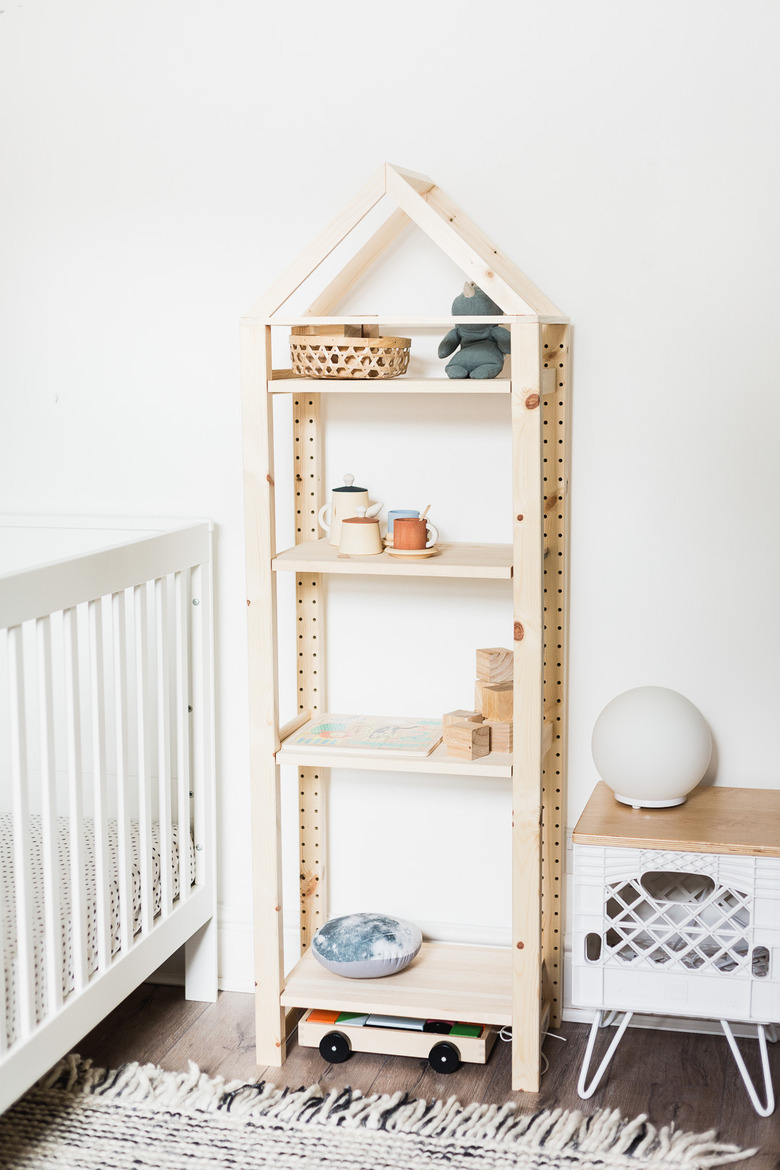
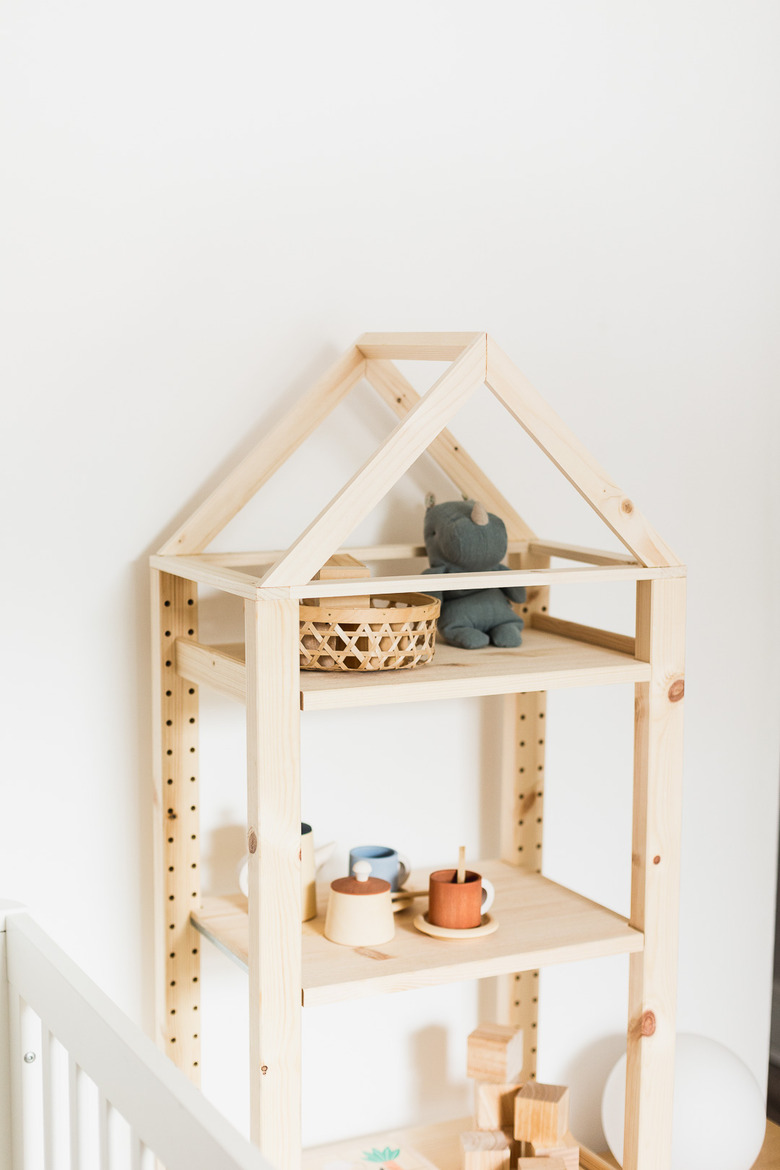
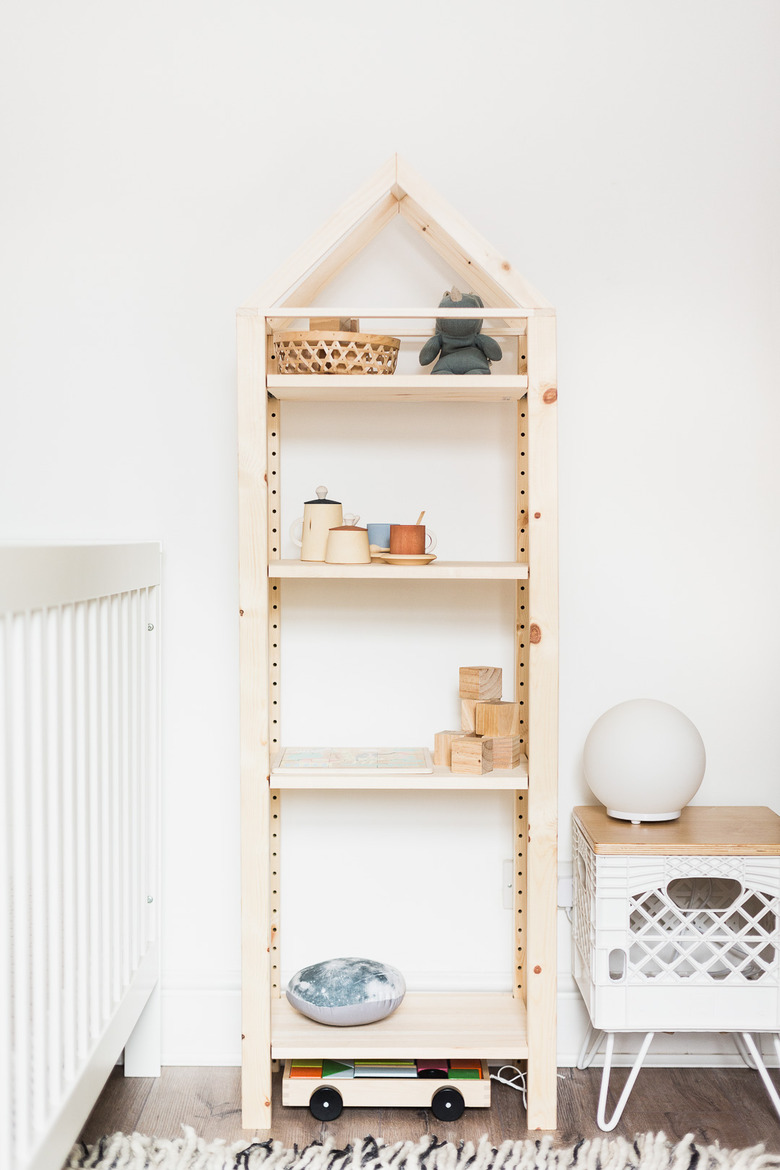
We're getting to that point where, at 18 months, my son is starting to show some real personality. So, I wanted to create a room for him that reflected his current interests and loves. Since we already had a lot of baskets to hold his favorite playthings, I wanted to style an open system where we could easily swap in toys that might have been getting overlooked. It didn't need to be piled high. Just one or two on each shelf would give him options and hopefully pique his interest. And to make it really fun and cute, I hacked the Ivar shelving system to add a roof at the top. It reminds me of the tall canal houses in Amsterdam!
 Francesca Stone
Things Needed
-
10-foot wood strip, 1-1/4 inches by 1/2 inch
-
2-foot wood strip, 1 inch by 1 inch
-
Small wood screws
-
Masking tape
-
Sandpaper
Step 1
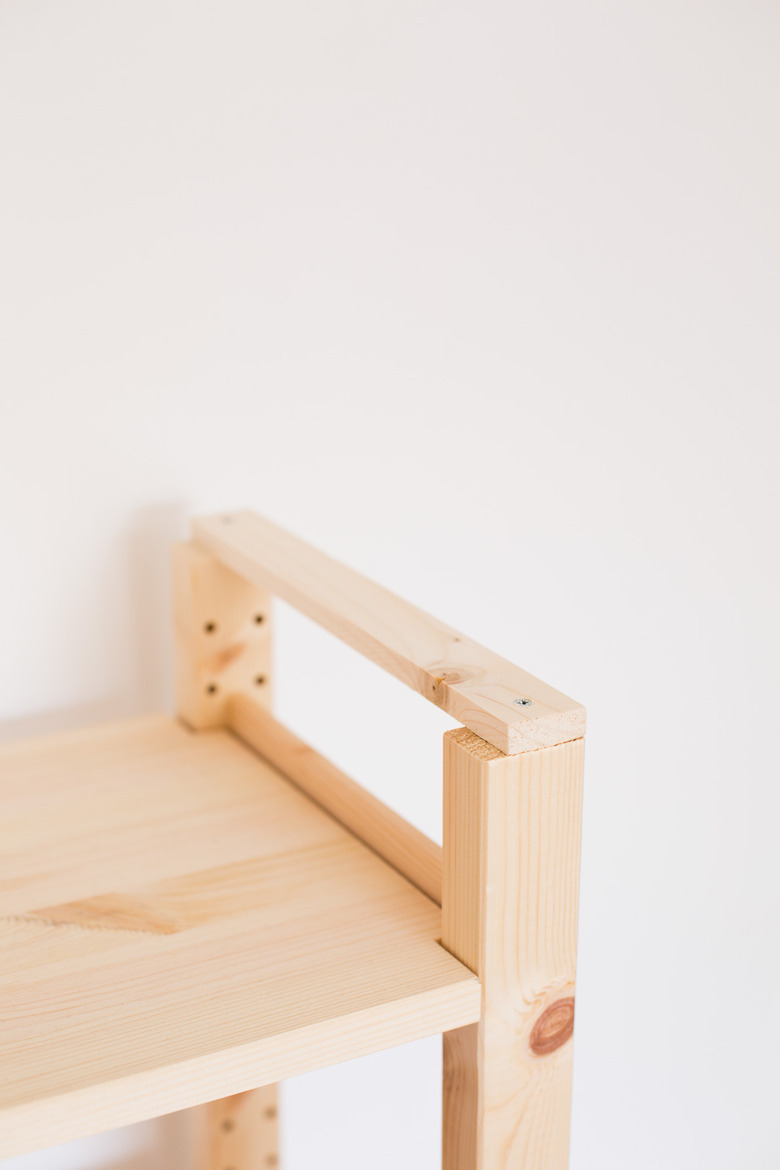
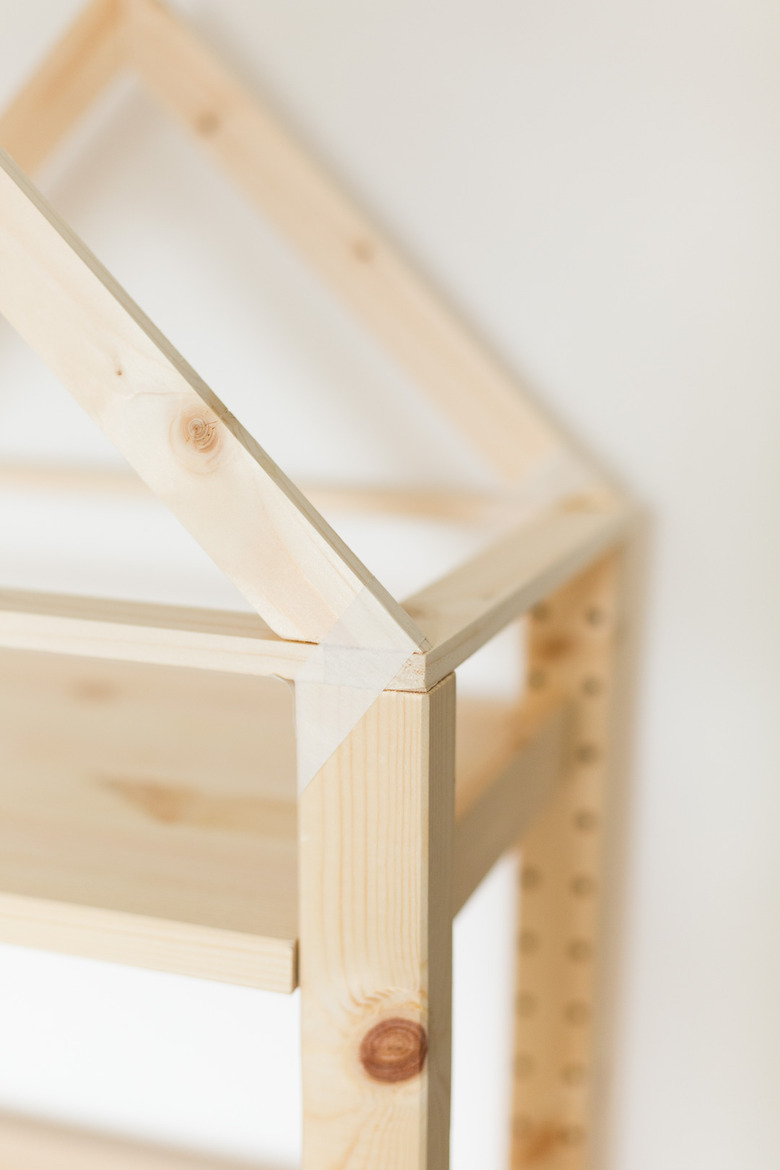
Measure the distance between the front and the back of the shelf. Using a saw and miter box, cut a strip of wood to this measurement, hold it in place on the top of the shelf (see image below) and use the drill driver to screw in a small wood screw at the front and the back. Get these as close to the front and back of the wood as possible, leaving a little space towards the inside of the shelf. Repeat on the other side of the shelf.
TIP: Use sand paper after every cut made to get smooth, splinter-free edges.
 Francesca Stone
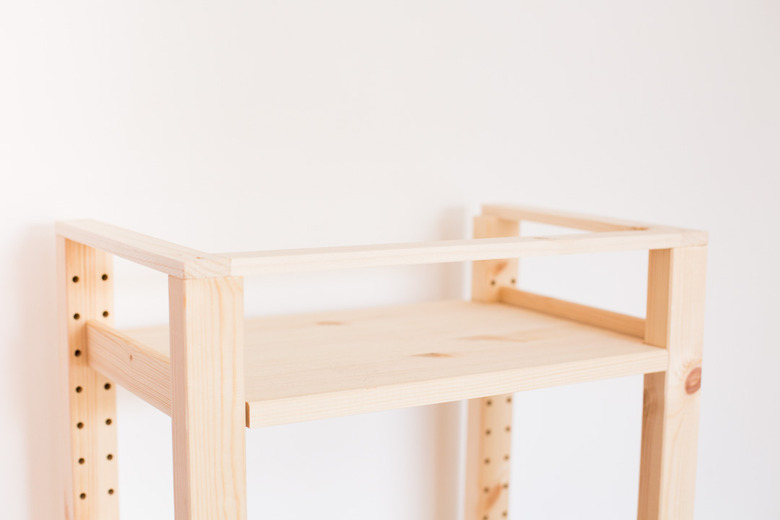
Step 2
Measure the distance between the two pieces of wood we just attached to the top of the shelf. Cut a piece of wood to this measurement. Use wood glue at both ends and slot it into place at the front of the shelf. Leave the glue to dry. Repeat at the back of the shelf.
 Francesca Stone
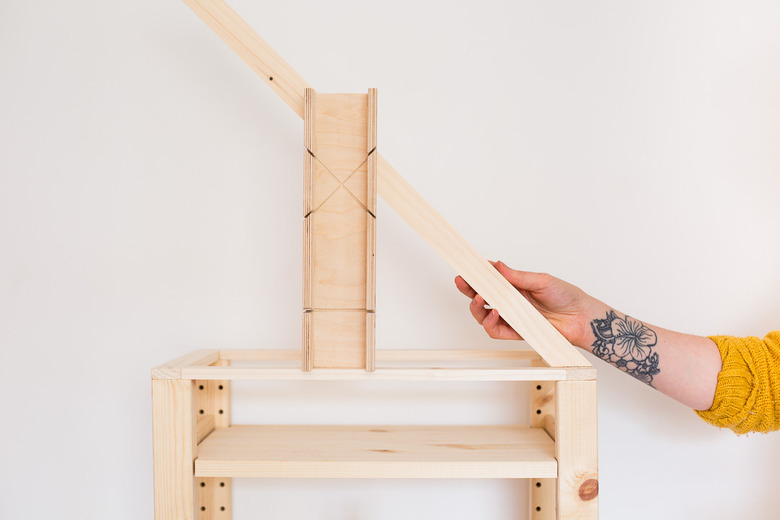
Step 3
Using the 45-degree angle on the miter box, make a cut at the end of your remaining strip of wood. Measure the halfway point along the top of the shelf and place the miter box on its end so that the edge meets the halfway point. Place the angled end of the wood at the very edge of the shelf, leaning in toward the center. Mark a line at the point at which it meets the miter box (the center point).
 Francesca Stone
Step 4
Cut this line using the 45-degree angle on the miter box. Now use this piece as a guide to cut three more pieces. Using wood glue, adhere two of the pieces together at the end to make a peak. Measure the distance between the points at the bottom of the triangle. Make sure this measurement is the same as the length of the shelf. Repeat with the remaining two pieces.
 Francesca Stone
Step 5
Once the glue is dried, use more wood glue to secure them into position on the top of the shelf. Hold them in place with masking tape. Leave the glue to set before the next step.
 Francesca Stone
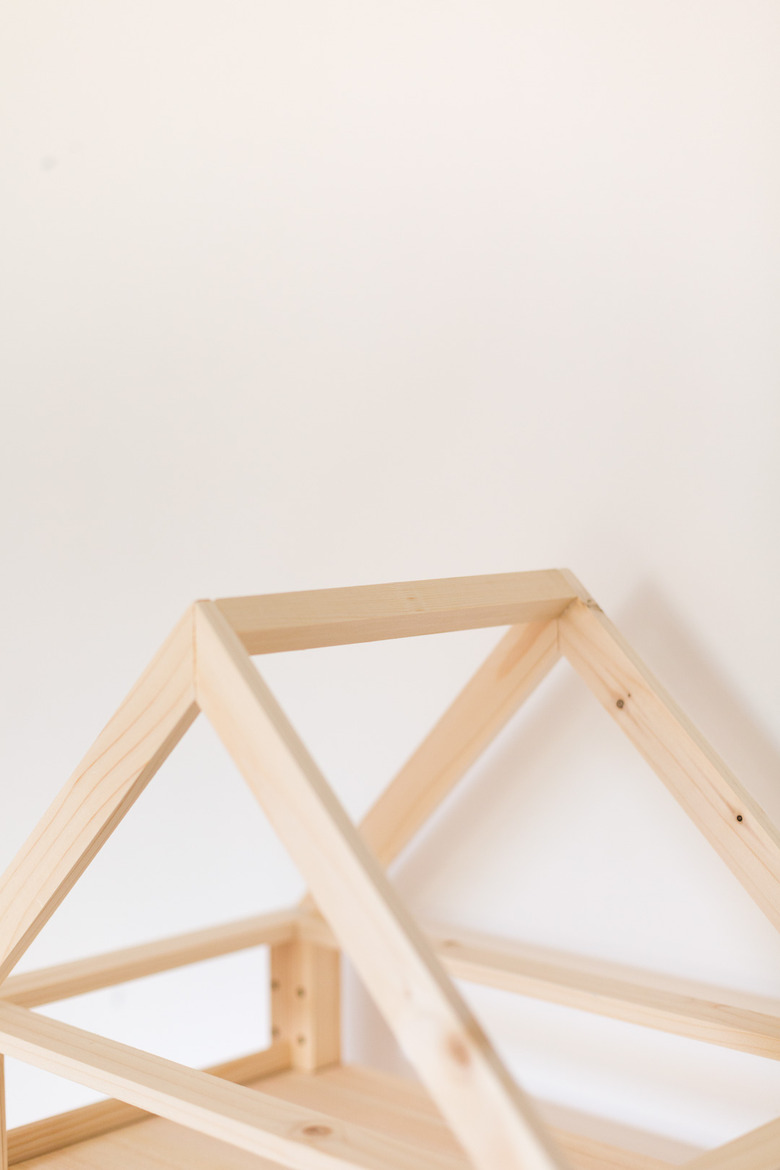
Step 6
Measure the distance between the peaks, then cut a piece this size from the 1-inch-by-1-inch piece of wood. Add a squeeze of glue to both sides and position in place. Hold steady with masking tape.
 Francesca Stone
Step 7
Once all the glue has dried after a few hours, remove the tape and sand the joints smooth.
 Francesca Stone
 Francesca Stone
 Francesca Stone