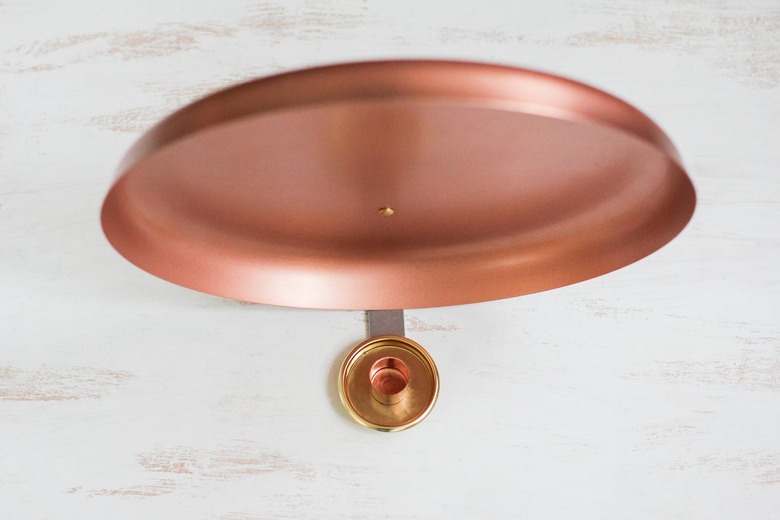
We Hacked A Target Serving Platter Into A Beautiful Brass Sconce
We may receive a commission on purchases made from links.
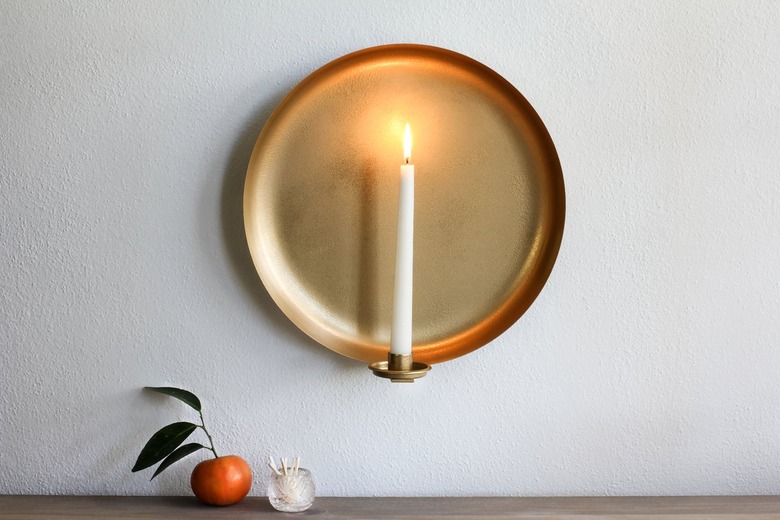
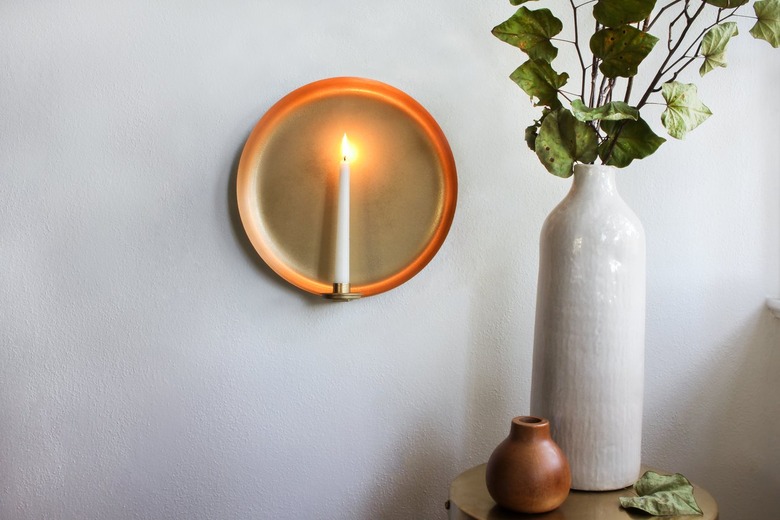
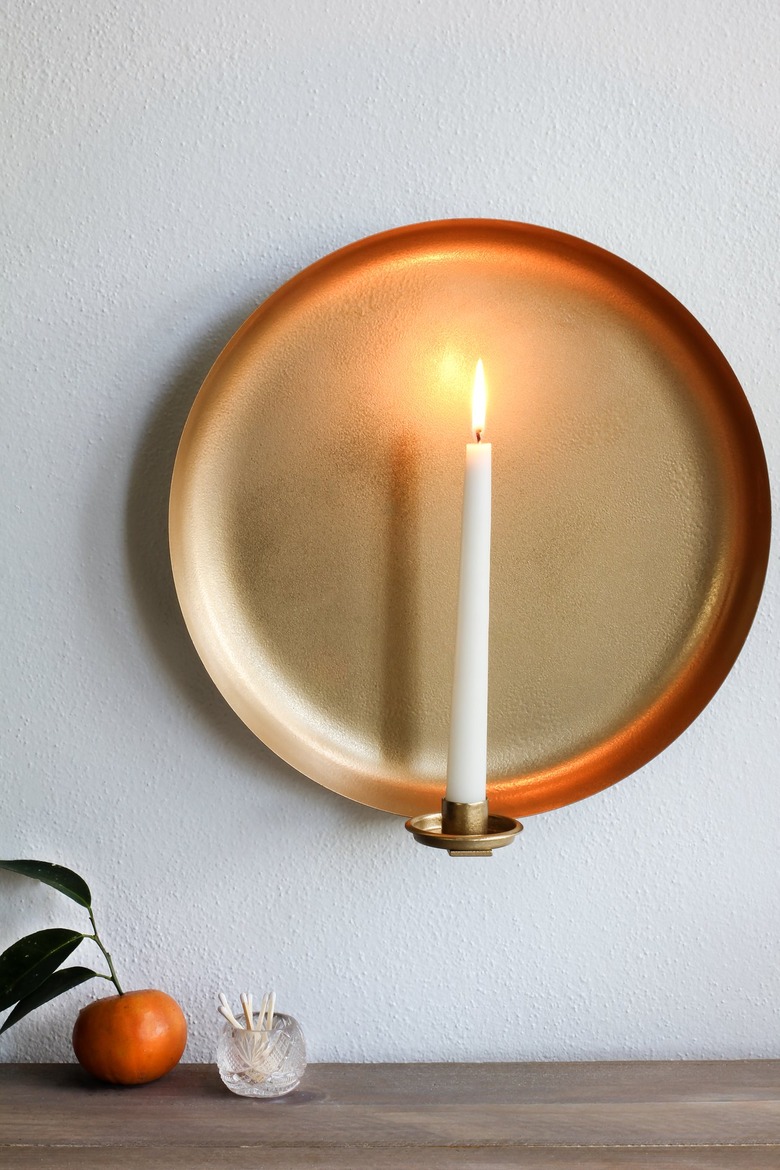
The gorgeous glow of candlelight flickering from a wall sconce adds instant ambiance to any space, no? We're absolutely smitten with the old-word-meets-modern charm of this designer candle sconce, from its hand-hammered finish to the beautiful brass tones. So much so that we rolled up our DIY sleeves to figure out how to hack this Target serving platter to get the look for less.
 Trisha Sprouse for Hunker
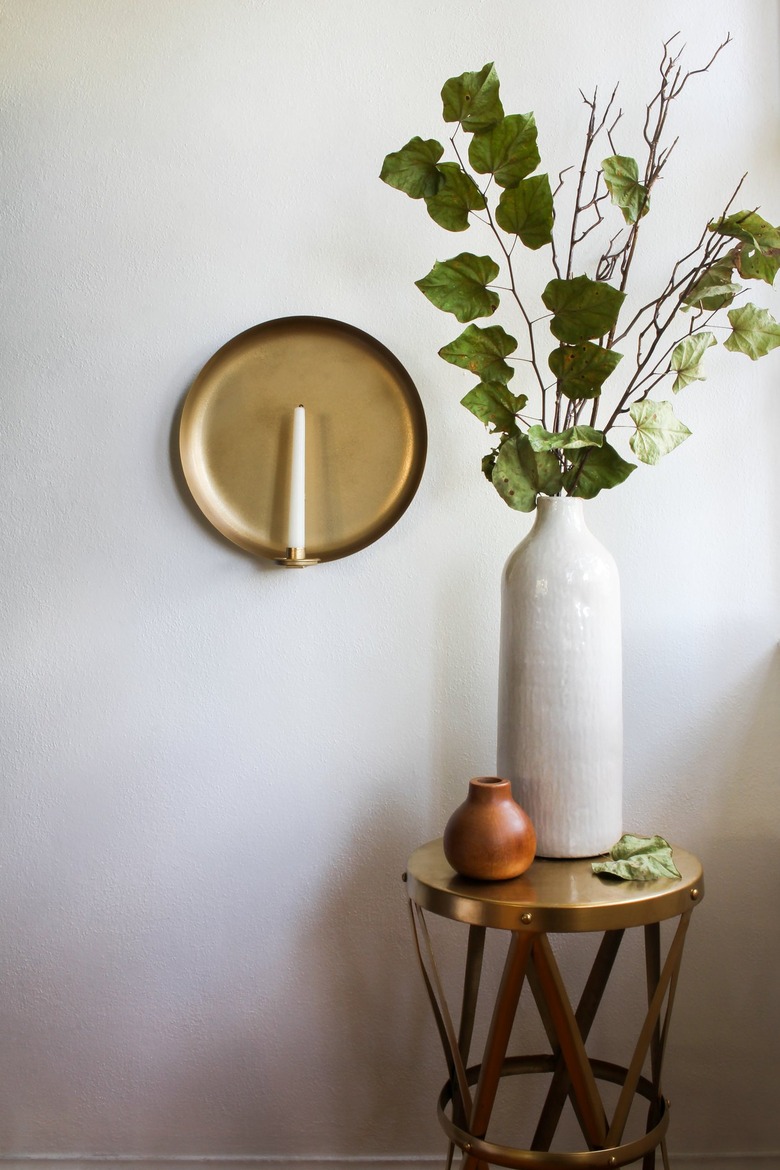
We're really digging the lovely balance it strikes between vintage and modern. Can't you just picture its flames illuminating the long corridor of a modern home, or even a small corner of a cozy cabin? No matter your dwelling type, we guarantee you'll have mood lighting in spades with this sconce decorating your wall.
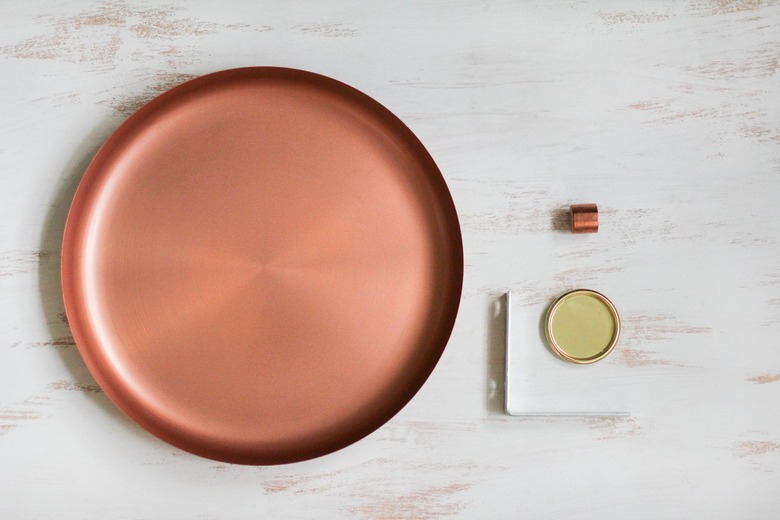
Things You'll Need
Things You'll Need
- Round metal serving platter
- Power drill
- 1/8-inch titanium drill bit (for drilling metal)
- 4-inch steel corner brace
- Protective eyewear
- Work gloves
- 8 x 8mm double cap rivet
- M3 flat washers, ( 2 )
- Hammer
- 2-1/8-inch sliding door cup pull
- 1/2-inch copper pipe end cap
- E6000 industrial adhesive
- Hammered gold spray paint
- Metallic finish gold spray paint (optional)
- Adhesive plate hanger
- Taper candle
 Trisha Sprouse for Hunker
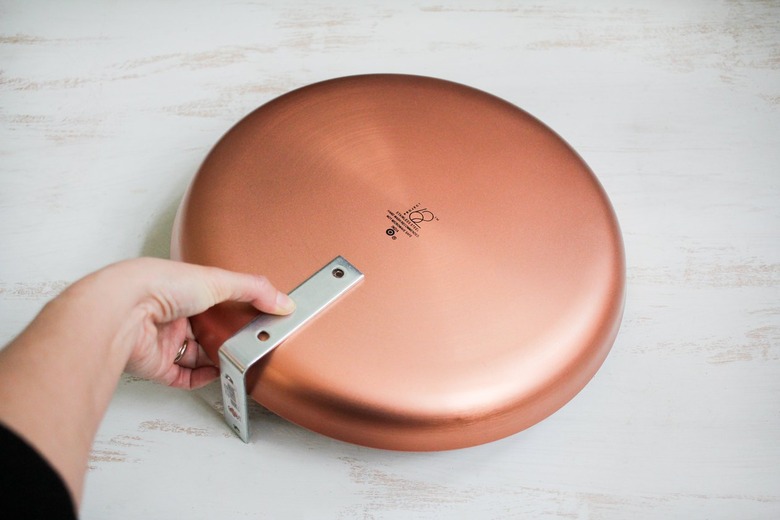
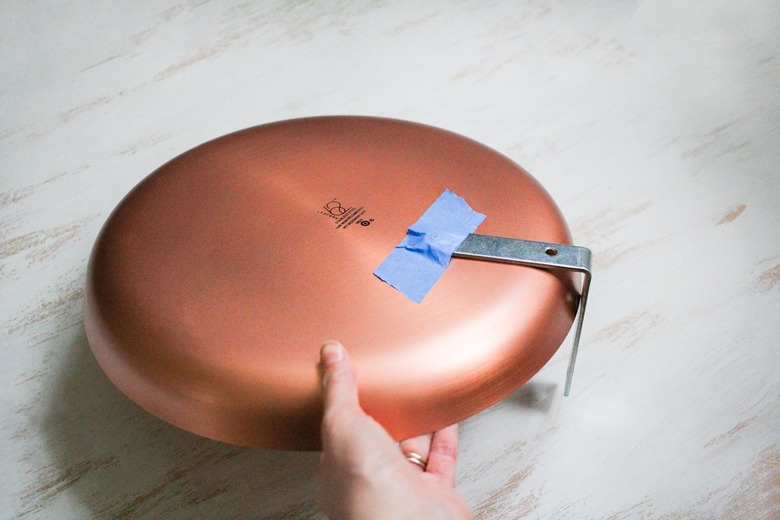
Step 1
Step 1
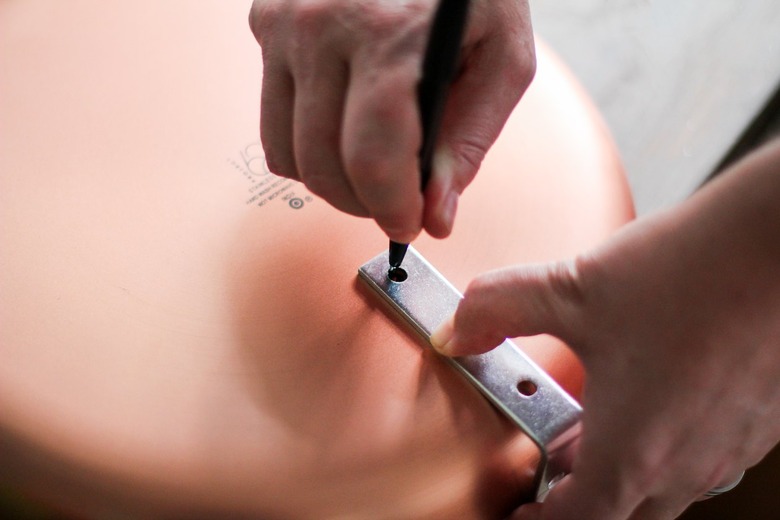
Turn the metal serving platter over so the backside is facing up, and place the corner brace on top. Position the brace so that it's centered at the bottom of the platter.
 Trisha Sprouse for Hunker
Mark the top hole of the corner brace on the platter.
 Trisha Sprouse for Hunker
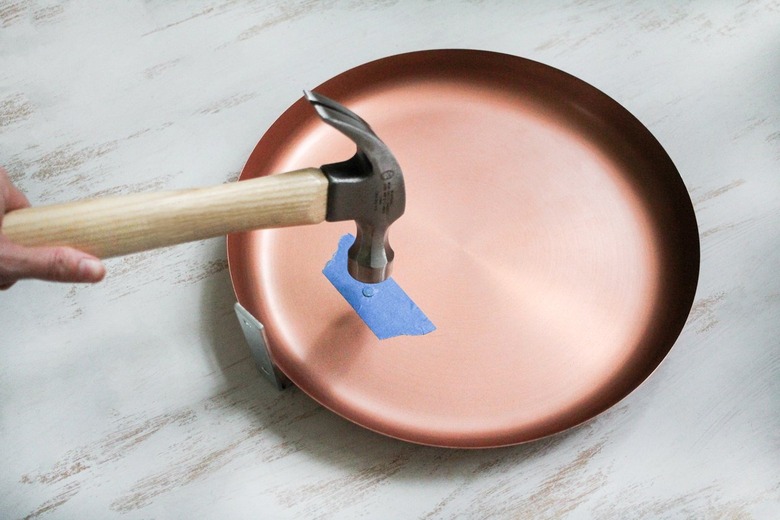
Step 2
Step 2
Using your power drill with a 1/8-inch titanium drill bit attached, drill a hole in the spot where you marked. Carefully wipe the platter and your work surface clean after drilling.
WARNING: Be sure to wear protective eyewear and gloves, as the tiny chards of metal from drilling can cut you or get in your eyes.
 Trisha Sprouse for Hunker
Step 3
Step 3
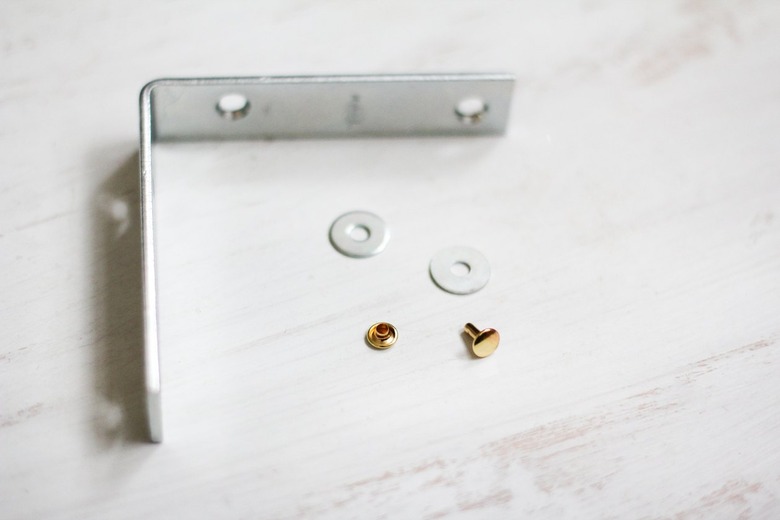
For reference, here's a photo of the corner brace, washers, rivet post, and rivet cap we used in this next step.
 Trisha Sprouse for Hunker
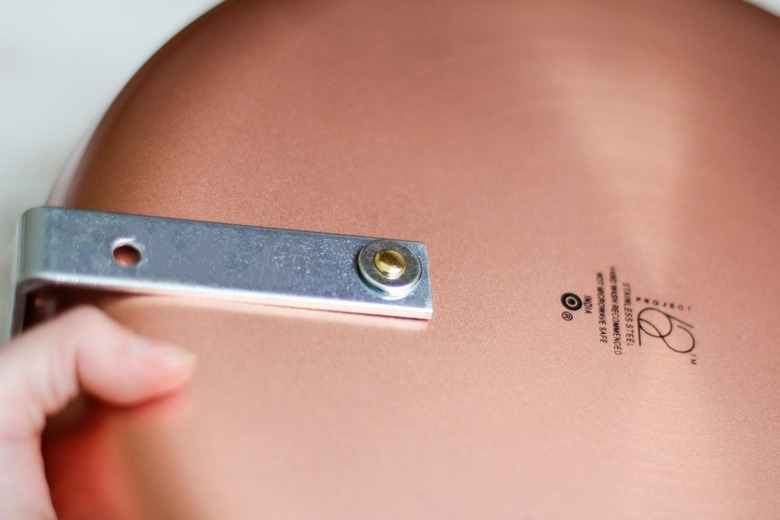
Place the corner brace on the backside of the platter again, lining up the hole on the brace with the hole you just drilled, and slide the rivet post through the holes from the front of the platter to the back.
 Trisha Sprouse for Hunker
Stack two washers on top of the rivet post and then place the rivet cap on top. The washers will help the rivet have a tighter fit against the brace.
 Trisha Sprouse for Hunker
Step 4
Step 4
Tape the rivet and washers in place on the front and back of the platter.
 Trisha Sprouse for Hunker
Place the metal platter right side up on a flat surface and hammer the rivet post and cap firmly together.
 Trisha Sprouse for Hunker
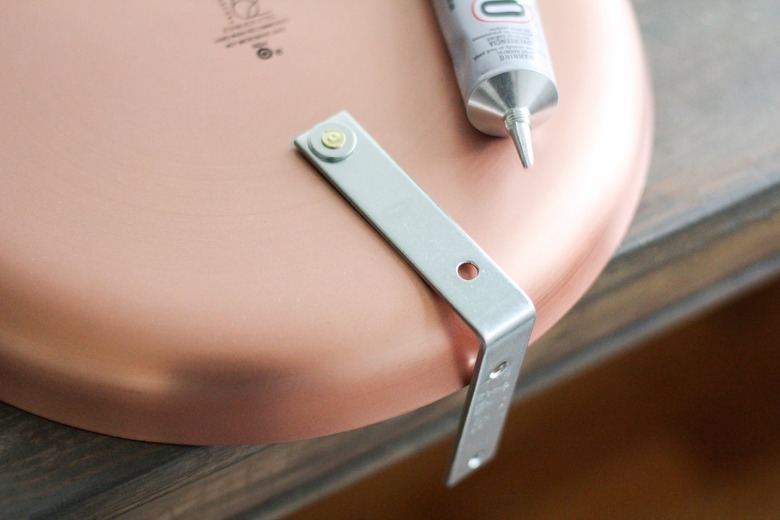
Step 5
Step 5
Remove the tape and lay the the platter so the backside is facing up and the corner brace is hanging off the edge of a table. You'll notice even with the rivet hammered securely together, the corner brace still wiggles a bit. To stabilize it, apply a thin coat of E6000 on the underside of the corner brace and press it firmly to the platter. Allow the glue to fully dry.
 Trisha Sprouse for Hunker
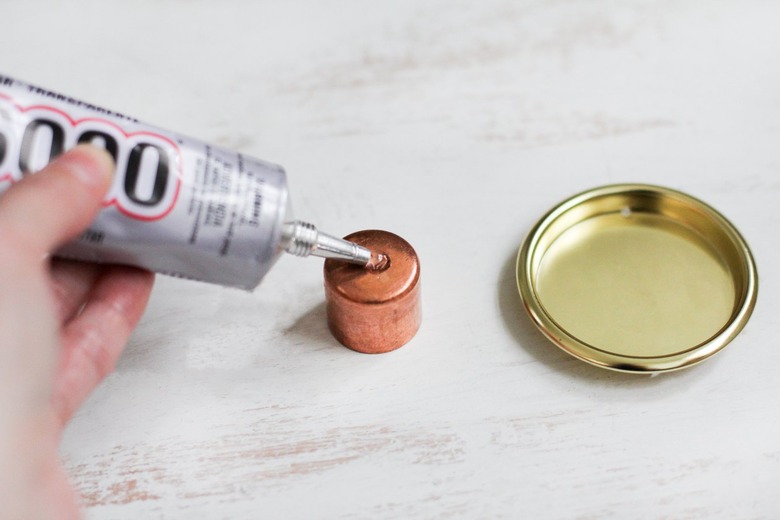
Step 6
Step 6
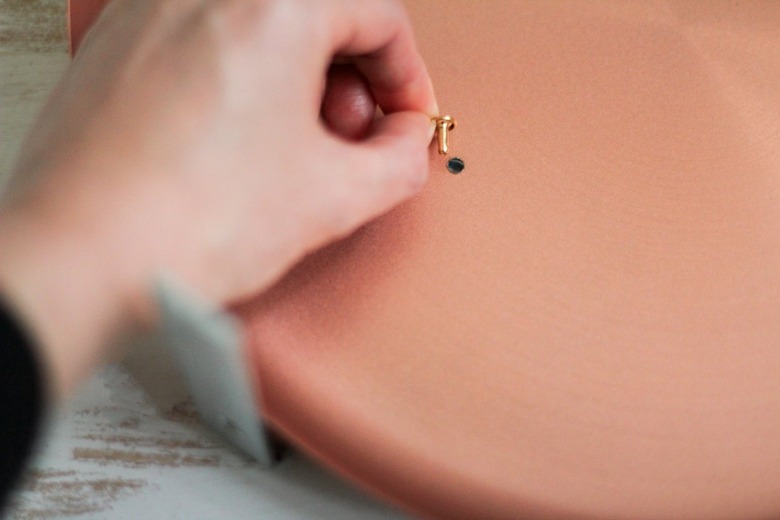
Pipe a small dab of E6000 onto the bottom of the copper pipe end cap.
 Trisha Sprouse for Hunker
Glue it to the center of the cup pull. Allow the glue to dry fully.
 Trisha Sprouse for Hunker
Step 7
Step 7
Once the glue has dried on the corner brace and the copper end cap, set the metal platter upright (it should be able to balance on the corner brace). Use E6000 to glue the bottom of the cup pull on top of the corner brace. Allow the glue to dry fully.
 Trisha Sprouse for Hunker
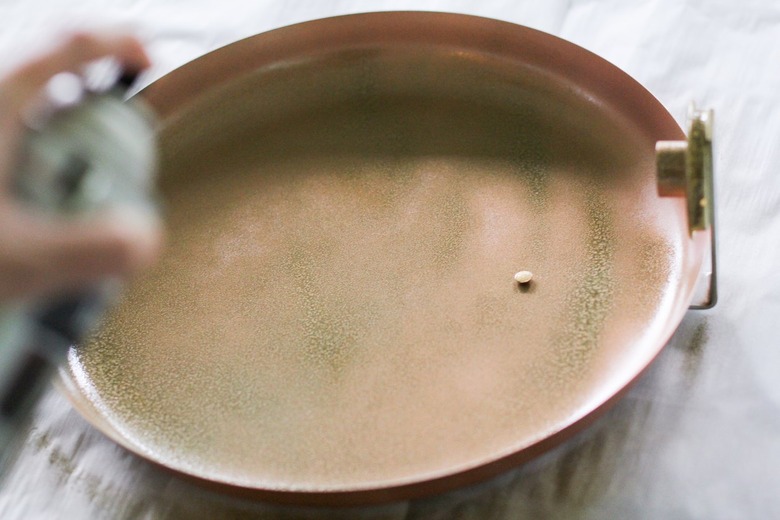
Step 8
Step 8
Once the glue has completely cured (24 to 72 hours depending on humidity), spray paint the entire piece with hammered gold spray paint. Please note the fumes from this specific type of paint can be particularly harsh, so be sure to spray in a well-ventilated area.
 Trisha Sprouse for Hunker
It may take several light coats (allowing adequate drying time in between) to achieve the desired hammered metal look. We found that spraying short bursts at close range helped to achieve the texture we wanted.
 Trisha Sprouse for Hunker
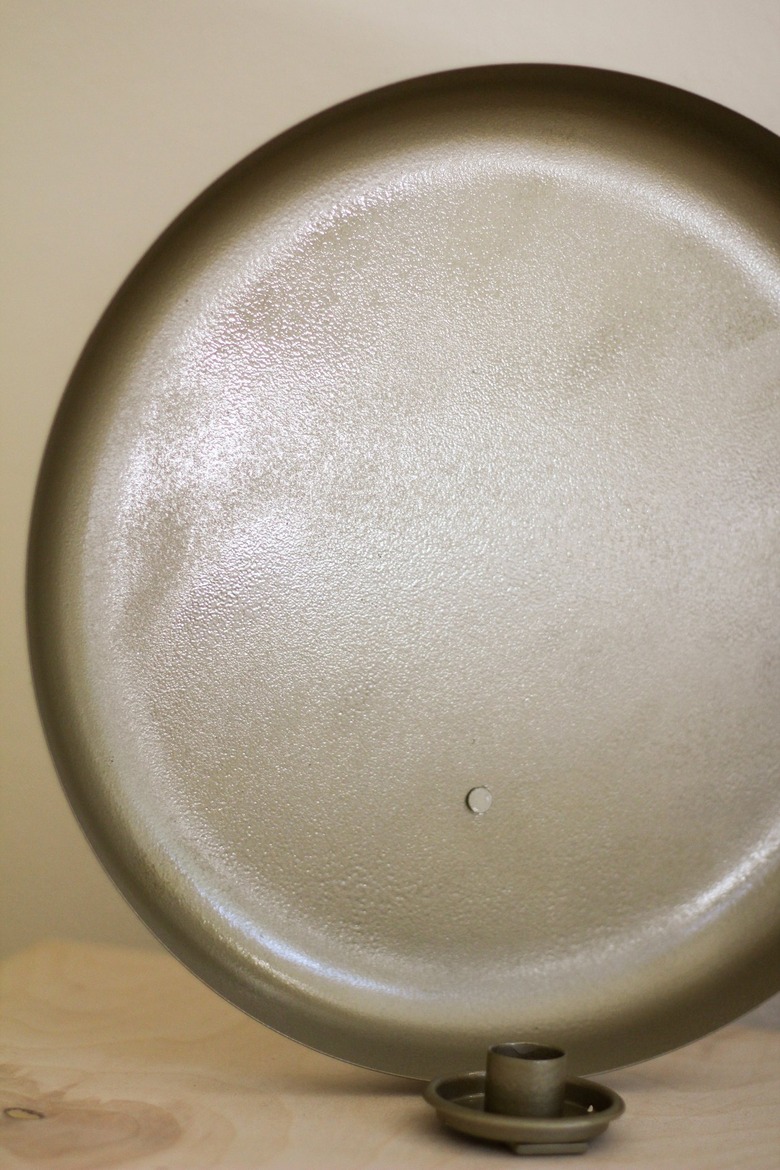
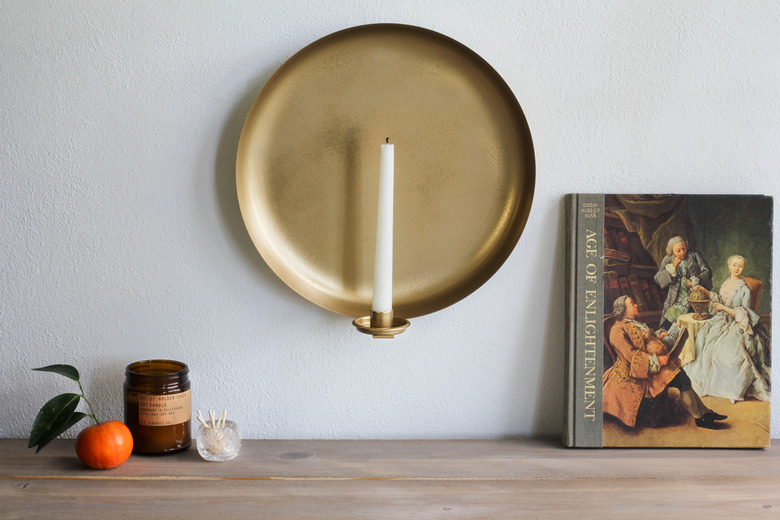
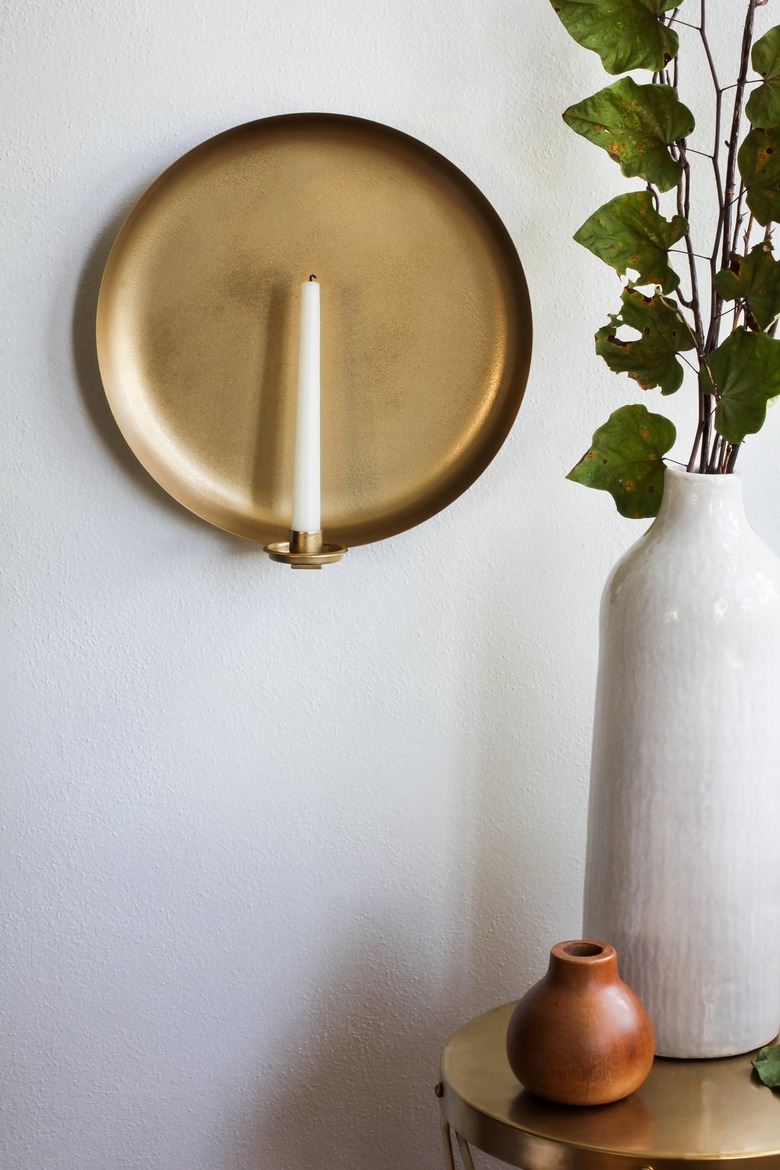
You could stop here, as this last part is optional. While we were happy with the texture from the hammered paint, we wanted the sconce to have more of that gilded look the designer sconce has. So we ended with spraying a light coat of this metallic gold paint on top of the hammered paint.
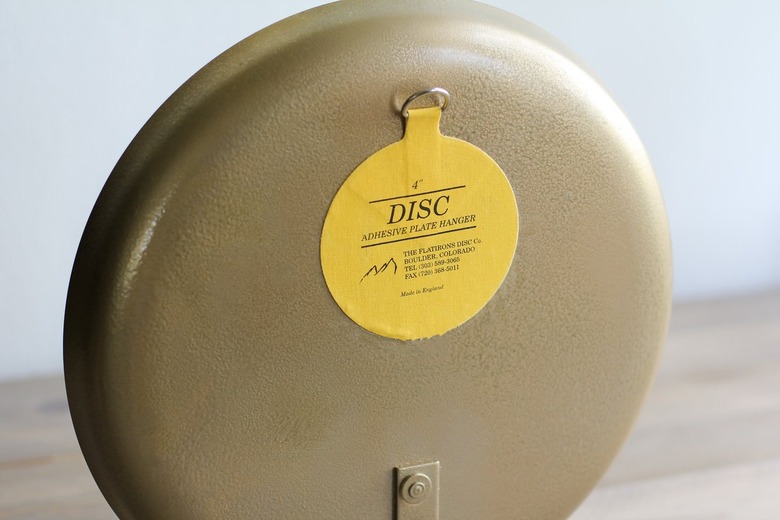
Once dry, your beautiful new sconce is all set for hanging. Simply follow the instructions on the adhesive plate hanger and secure it to the back of the platter, making sure the hook is centered.
 Trisha Sprouse for Hunker
Once it's secure on the wall, place a taper candle inside and then enjoy the dancing candlelight flicker and glow across your walls.
 Trisha Sprouse for Hunker
 Trisha Sprouse for Hunker
 Trisha Sprouse
 Trisha Sprouse for Hunker