How To Use A Laser Level
If you are hanging a picture or a cabinet, a 2- to 4-foot bubble level should do the job nicely. But if you are hanging several pictures or several cabinets and especially if those pictures or cabinets are on different walls, you need a leveling device with greater reach. You need a laser level. Laser levels project a beam across a room or outdoor space to establish a common level easily and reliably.
There are other ways of establishing a common level over distances a 2-foot level can't manage. A string level is a small bubble level that hooks onto a string stretched between two stakes. This may be adequate in situations where accuracy is less than critical—marking the tops of a line of fence posts, for example—but inevitably the weight of the level on the string will deflect it slightly and compromise its accuracy. Laser level lines are unaffected by gravity.
In order for a laser level to be effective, it must be solidly stable—mounted on a sturdy tripod or affixed to a railing or wall where it won't be jostled. Then the laser level itself must be leveled. The specifics of how each laser level should be set up and operated will vary with the manufacturer, so reading the tool's instructions is advised, but they all follow the same basic procedure. The simpler models employ a bubble level that must be adjusted manually. Larger and more sophisticated laser levels are equipped with the ability to level themselves using an internal pendulum and magnets. The leveled device when switched on will emit a level laser beam that then must be raised or lowered to the desired height.
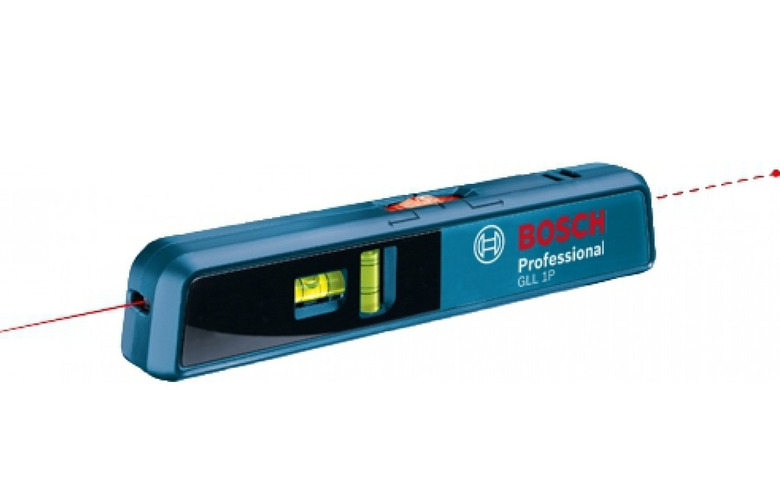 Image © TheToolNut.net
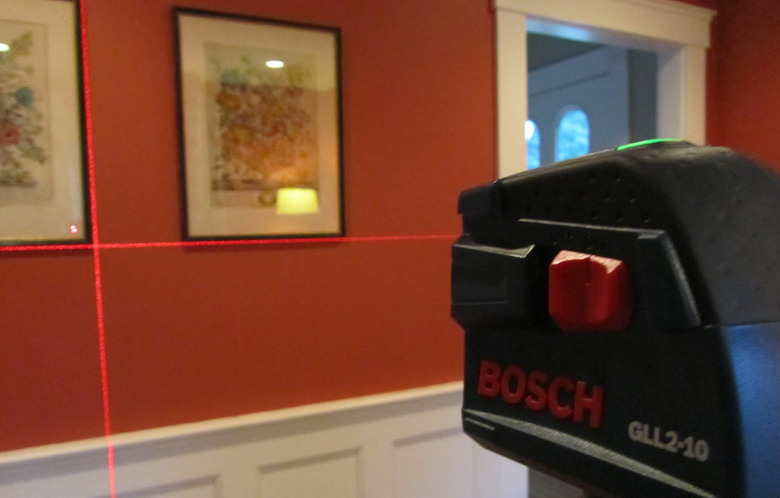
Point Laser Levels
Point Laser Levels
The simplest and most economical laser levels are the point laser levels. These project a single spot on the target wall. Assuming the level is mounted on a securely stable tripod and you've established that the device itself is level and aimed where you want it, you can transfer that level point anywhere in the room simply by rotating the laser on the tripod. It's always a good idea to mark the height of your original laser spot so that after moving it to other locations you can return to verify that the level adjustment hasn't changed. You can also use a point laser level to align a series of objects—fence posts, for example. Just be sure you start with the one furthest out and work toward the laser level.
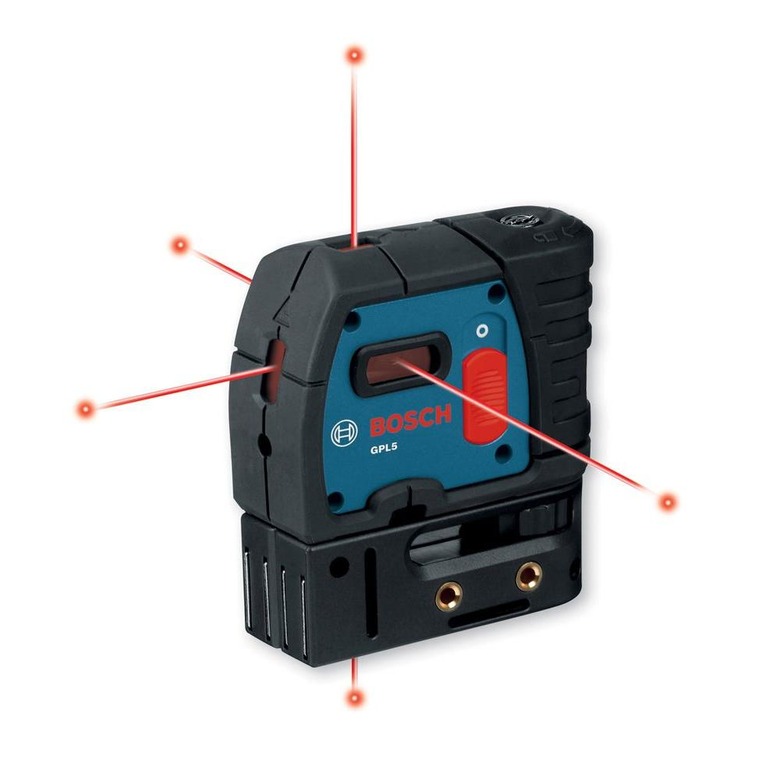 Image © Home Depot
Some point laser levels are designed to emit three or as many as five spots: forward, out the sides at right angles to the forward beam, and above and below—plumb and at right angles to the other three beams. These five point levels are particularly useful for marking corresponding perfectly plumb points on the ceiling and floor and for squaring up walls over extended distances.
Line Laser Levels
Line Laser Levels
A line laser level projects a line rather than a single dot, so that once you've leveled the device and adjusted the height of the laser beam, you have a perfectly level line on your target wall without the need to rotate the laser level or make marks on the wall. A cross line laser level gives you two lines at right angles to each other—one horizontal and level and one vertical and plumb. You can use either line as a guide or both together, as the circumstance requires.
 andreygonchar/iStock/GettyImages
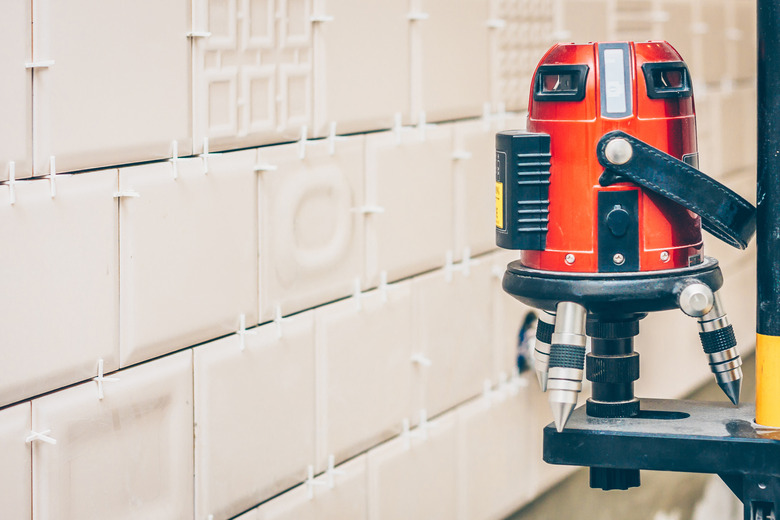
Rotary Laser Levels
Rotary Laser Levels
Rotary laser levels tend to be designed for professional use, and therefore are heavier and more expensive. Once secure on its tripod and leveled or allowed to self-level, the rotary laser level produces a beam in every direction—a full 360 degrees—through the use of mirrors and a spinning projection unit. If you need to determine a common level on every wall of a room—for a chair rail, wainscoting or a drop ceiling, for example—a rotary laser level can be invaluable. For most likely homeowner uses, however, a simpler and less expensive level should suffice. If you have a project where only a rotary laser level will do, consider renting one.
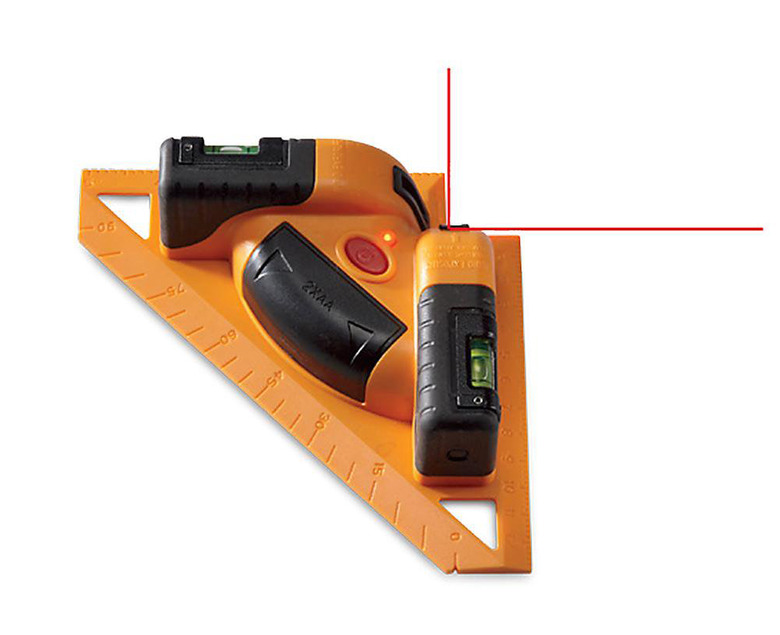 Image © Family Handyman
Laser Squares
Laser Squares
Strictly speaking, laser squares are not levels. That's not their principal function. But like laser levels, they must be leveled before they can be accurate and so one can assume that the beams they project are level. Laser squares project two laser lines at right angles to each other in a horizontal plane. They are meant to sit flat on the floor or the ground rather than on a tripod or other elevated mount. Laser squares are useful for laying out tile or squaring up a wall or outbuilding because the lines they project are more accurate and extend so much further than an ordinary metal square. Because laser squares have two bubble levels placed perpendicular to each other, you can also use the square vertically, placed flat against the wall. If the horizontal bubble is level, the vertical laser beam should be plumb.
 Jevtic/iStock/GettyImages
Using Laser Levels Outdoors
Using Laser Levels Outdoors
Laser beams are very bright, and as they've been improved, they have gotten brighter. One should never look directly into the beam of a laser level. Yet for all its brightness, a laser level beam can be almost invisible when the level is used outdoors in full daylight.
There are special glasses available that tint everything red (or green, if you are using a green laser) and thus make the laser projection more visible. There are also laser level detectors that have a sensor that can register a beam undetectable to the naked eye. Not every detector works with every laser level, however, because different lasers project different light frequencies. The manufacturer of your laser level should provide a list of compatible receivers. Of course, the most economical way to effectively use a laser level outdoors and the one that perhaps makes the most sense for the average homeowner is simply to execute the layout portion of your project at a time when the light level is low—in the morning, the evening, or on an overcast day.
A Toolbox Essential
A Toolbox Essential
If you haven't worked with a laser level, you should consider getting yourself at least a basic one. They are available for as little as $25 and you'll be surprised how often you use it. For leveling at distances greater than 3 or 4 feet, they are unsurpassed.