Installing A Floating Shelf Is Easy When You Follow Our Guide
Putting up shelves is a classic DIY project. Whether you're looking to add extra storage space or to display some of your favorite photographs, there are lots of different shelving options to choose from. We love the clean look of floating shelves, but for those of you who have never installed them before, we imagine that it can be a daunting do-it-yourself. However, if you thought it was a job best left to the professionals, think again. We're going to show you how easy it is to install floating shelves in this step-by-step guide.
Things Needed
-
Floating shelf
-
Power drill
-
Level
-
Cable, pipe, and stud detector
-
Masonry wall plugs or plasterboard fixings (see Step 1)
-
Masonry or all-purpose drill bit
-
Screwdriver
-
Hammer
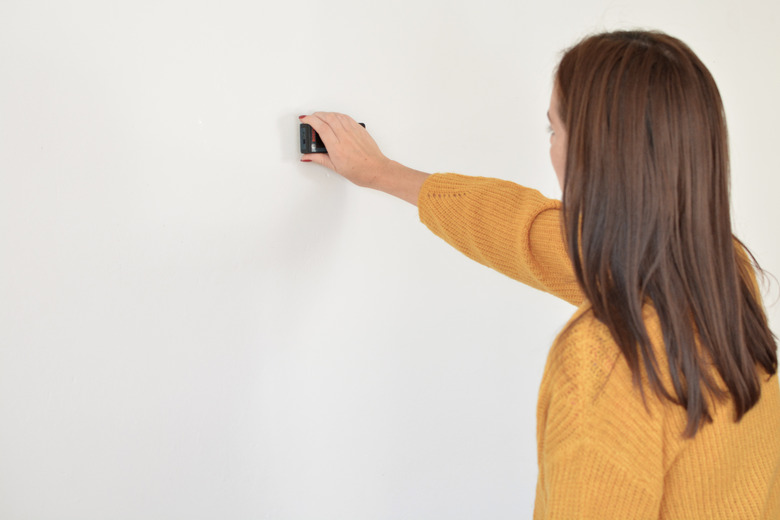
Check your wall type.
Check your wall type.
Your wall is most likely either masonry/brick or hollow plasterboard/drywall. Knowing which one you have will help determine which hardware you'll need to use. Run a handheld cable, pipe, and stud detector over the installation area to check that it's free from any hidden electrical cables or water pipes. Trust me guys, you really don't want to drill into these! (The wall used in this tutorial is solid brick.)
If you have hollow walls, you may want to locate and mark the vertical wooden studs at this point. You can drill into the wooden studs behind the plaster or drywall as they will provide extra support. (If you want to place the shelf without the restrictions of the stud locations you can just use plasterboard hardware.)
 Caroline Burke
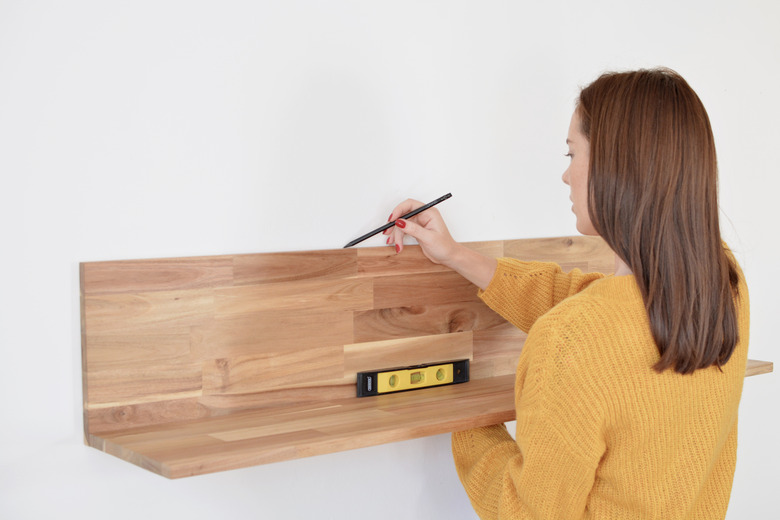
Decide on your shelf placement.
Decide on your shelf placement.
Use a level to make sure that the shelf is straight, and then mark the location. (Mark the line slightly lower than where you want the finished shelf to sit as that's where your brackets will be.)
 Caroline Burke
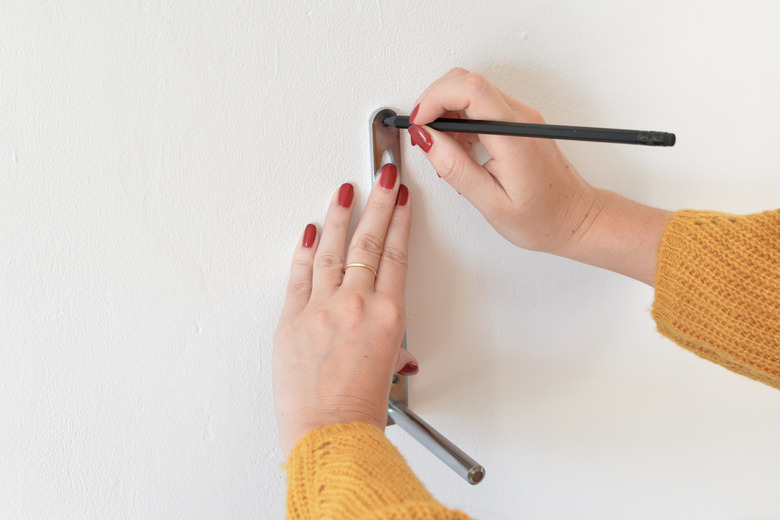
Mark the bracket drill holes.
Mark the bracket drill holes.
Don't forget to consult the instructions for your specific shelf as you go along. Each floating shelf will vary, but they tend to have either one large or several smaller hidden brackets that will be fixed into the wall behind the shelf.
 Caroline Burke
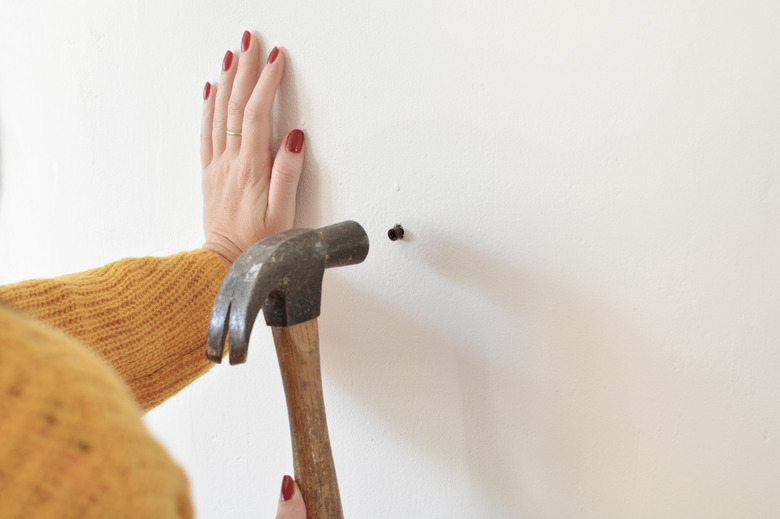
Drill your holes.
Drill your holes.
For a brick wall you'll need to use a masonry drill bit and wall plugs. (Remember to make sure the drill bit matches the size of the wall plugs you've chosen.)
Plasterboard hardware is designed for use on hollow walls, from toggles to GripIt anchors (they work by expanding, which then provides extra support). If you are drilling into plasterboard, the drill bit will depend on the type of fixing you are using, so check the recommendations on the packaging.
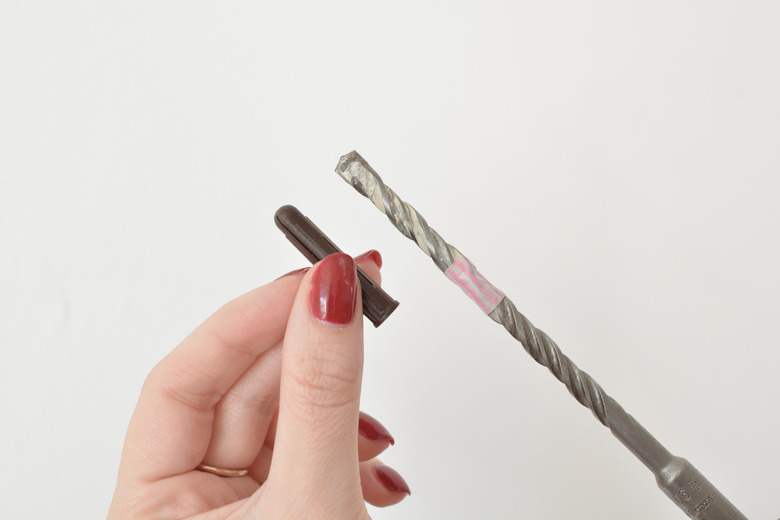
PRO TIP: Hold the wall plug against your drill bit and mark where it ends with some tape. Now you'll know exactly when you've reached the correct depth when drilling into the wall.
 Caroline Burke
Drill as many holes as your brackets require. For solid walls you'll need to use the hammer drill function. Hold the drill firmly, especially when first establishing the hole.
 Caroline Burke
Insert your hardware.
Insert your hardware.
Hammer in your wall plugs, if the fit is snug. For plasterboard walls, insert your fixings now. (If you are drilling into wooden studs, drill a small pilot hole first.)
 Caroline Burke
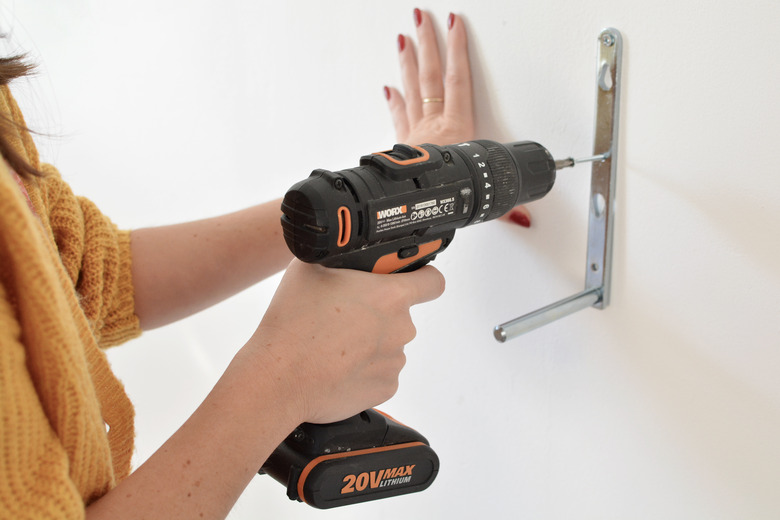
Screw in the brackets.
Screw in the brackets.
Don't fully tighten the screws until they're all in place and you're happy everything is level.
 Caroline Burke
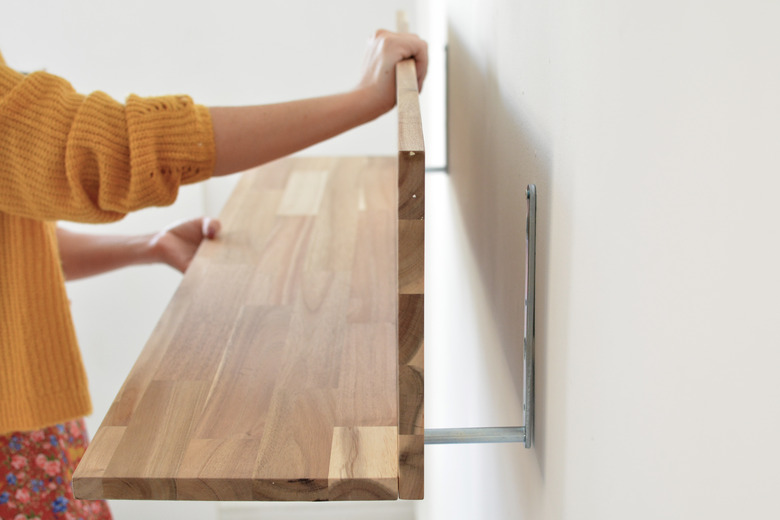
Slide on your shelf.
Slide on your shelf.
The shelf will instantly appear to float on the wall thanks to those hidden prongs. Some shelves come with screws located underneath the shelf to stop it from sliding off the brackets; screw them in place to finish.
 Caroline Burke
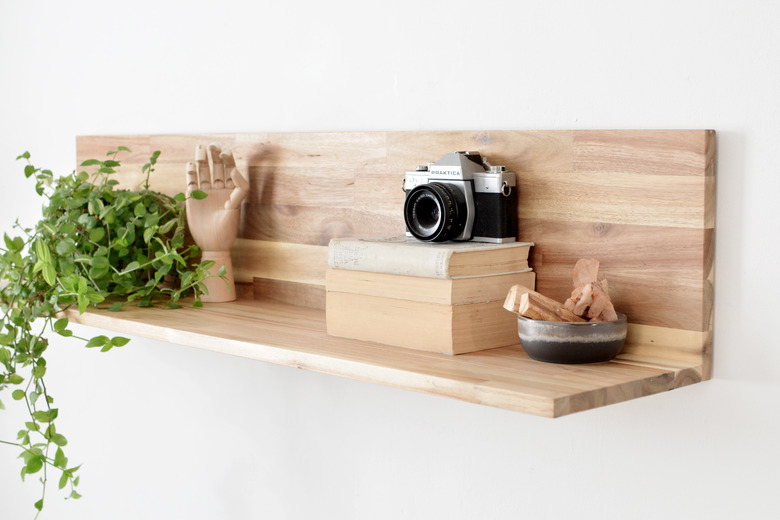
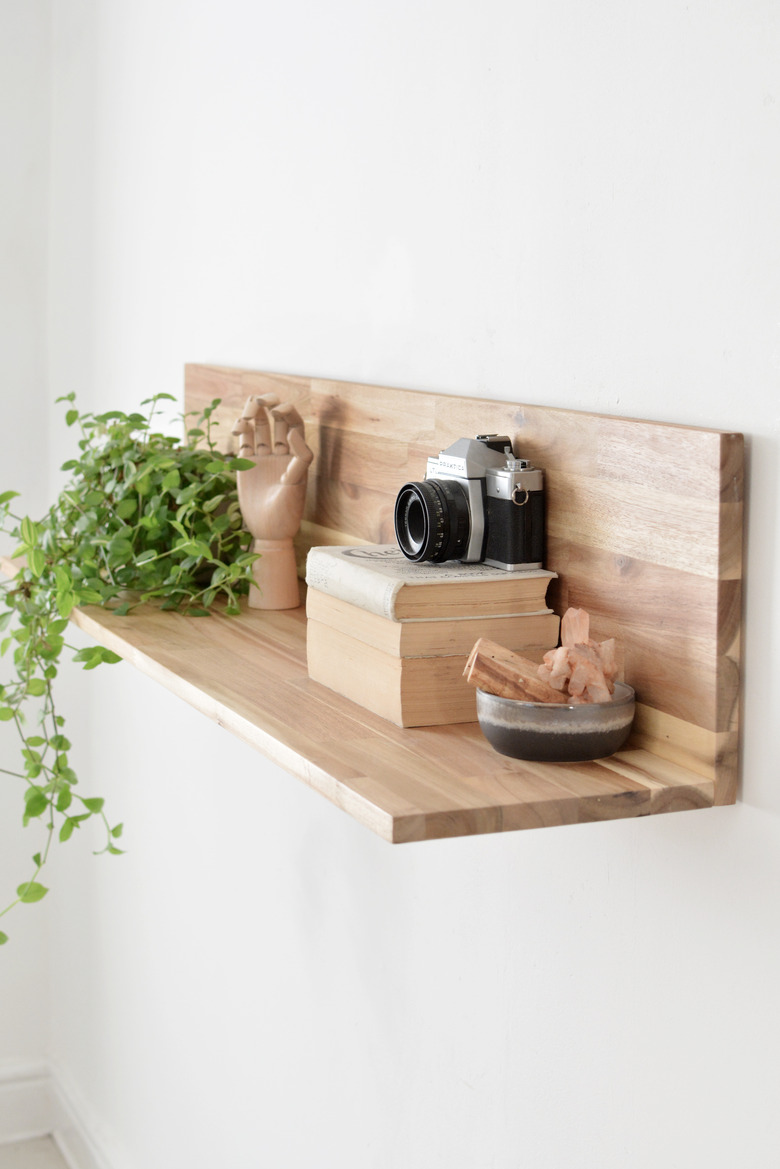
Now you just need to display some of your favorite decor and take a 'shelfie.'
 Caroline Burke
Be careful not to place too much weight on your floating shelf as they're not designed for very heavy items — distribute the weight evenly. If in doubt, consult the manufacturer's maximum load recommendation for the shelf.