5 Genius DIYs To Display Photos Without Frames
We may receive a commission on purchases made from links.
Whether you are on a tight budget and can't afford to frame every single one of your favorite pictures, or you just love to change up your decor often, these five DIY ideas for displaying photos on walls or tabletops are definitely for you. Today we are thinking outside of the frame and sharing some fun, creative ways to show off your favorite moments and memories. And there's no tape or push pins involved, so your images stay damage-free.
Idea #1: Photo Pendant
Idea #1: Photo Pendant
This classic pendant shape is perfect for displaying a few of your favorite shots. With magnets holding the photos in place, you can easily rotate the image with each new season. Images can be displayed in straight rows or in a more haphazard way like I did below.
Things You Need
- Fabric, 12 inches in length
- ¼-inch wooden dowel, cut to 14 inches in length
- Twine or string
- ¾-inch diameter magnets, ( 8 )
- Hot glue gun
- Wooden half spheres, ( 4 )
- Sewing machine
 Jeran McConnel
Start by sewing the pendant. Cut two identical pieces of fabric. This pendant is 10 inches wide and 18 inches long (to the tip of the pendant). Sew the right sides together. Turn down the top of the fabric 1 inch, and sew a tube for the dowel. Insert the dowel and tie twine on either end.
Jeran McConnel
To make the magnets, glue four of the magnets to the wooden spheres. Attach the pictures to the pendant by placing a second magnet on the backside of the fabric, under the photo.
Jeran McConnel
Idea #2: Velvet Ribbon Hanger
Idea #2: Velvet Ribbon Hanger
The combination of velvet and brass is always a win.
Things You Need
- 1 ½-inch brass D rings, two rings per ribbon
- 1 ½-inch velvet ribbons, different lengths
- Hot glue gun
- Brass paper clips
Jeran McConnel
Using a hot glue gun, attach a D-ring to both ends of the ribbon. All you need to do is fold about an inch of the ribbon around a D-ring and then glue. The top ring is for hanging the ribbon and the bottom is for weighing it down. Then, simply attach your pictures to the ribbon with paper clips.
Jeran McConnel
Idea #3: Colorful Clipboards
Idea #3: Colorful Clipboards
For the most part, if you are ordering photos these days, it's probably going to be 4x4 prints (thanks to Instagram), traditional 4x6 prints, and maybe a few 5x7 prints. These mini-clipboards are perfect for your everyday images. Grouped together on a wall, they serve as a perfect little gallery. Clipboards allow you to stack prints on top of prints, so that you can rotate your photos frequently. (Plus, they're inexpensive: you can get three clipboards for roughly $7.)
Things You Need
- Mini-clipboards, ( 6 )
- Blue painter's tape
- Small craft paint brush
- Craft paints in colors that work with your decor
- 3M Command Strips
Jeran McConnel
Jeran McConnel
Jeran McConnel
Idea #4: Modern Wood Block and Elastic Photo Holders
Idea #4: Modern Wood Block and Elastic Photo Holders
I love finding ways to display pictures on tabletops and bookshelves. A grouping of two to three of these simple wood photo holders is a nice addition to any flat surface. And if you want to have fun with a little color, use different colored elastic bands. I chose to go for a high contrast look with bold black elastics.
Things You Need
-
Wood or hot glue
-
Craft wood pieces, I used 4 ½ x 9 ½ inches and 4
½ x 4 ½ inches
All you need to do for this project is to glue the wooden blocks onto the wood pieces. Be sure to center one wood block at the bottom edge of a wood piece when you attach. Let dry. Hang your photo with one or two rubber bands, and you're done!
Jeran McConnel
Jeran McConnel
Jeran McConnel
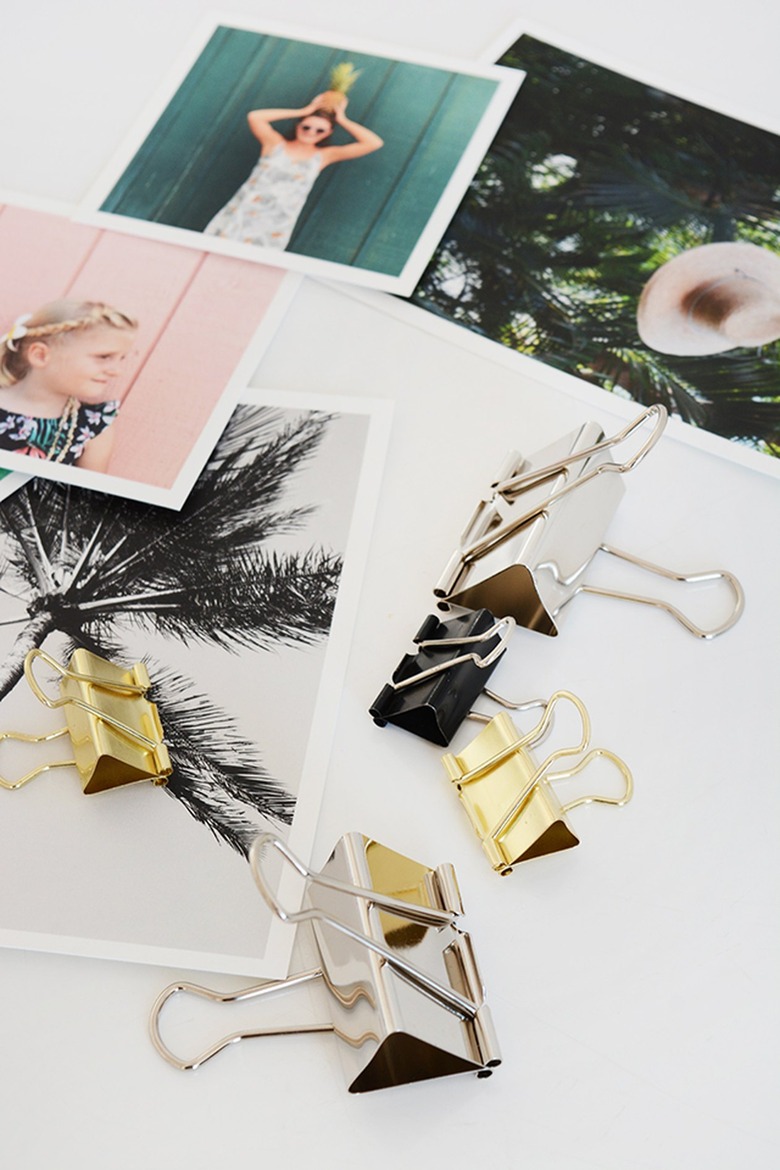
Idea #5: Bulldog Clip Photo Stands
Idea #5: Bulldog Clip Photo Stands
I'm not even sure if this can be called a DIY when it's this simple! I've added pictures all over my house, thanks to a package of gold bulldog clips.
References
Things You Need
- Bulldog clips in various sizes (I like the metallic clips the best)
 Jeran McConnel
Jeran McConnel
Jeran McConnel
Jeran McConnel
Jeran McConnel