How To Replace A Heating Element On An Electric Water Heater
If you turn on the hot water in the kitchen and the water doesn't get hot, that doesn't necessarily mean something is wrong with the water heater. Someone could be taking a shower, or the washing machine could be using all the hot water. However, if you try again in a few hours with the same result, and the same thing happens in the bathroom or laundry room, it's time to take a look at the water heater.
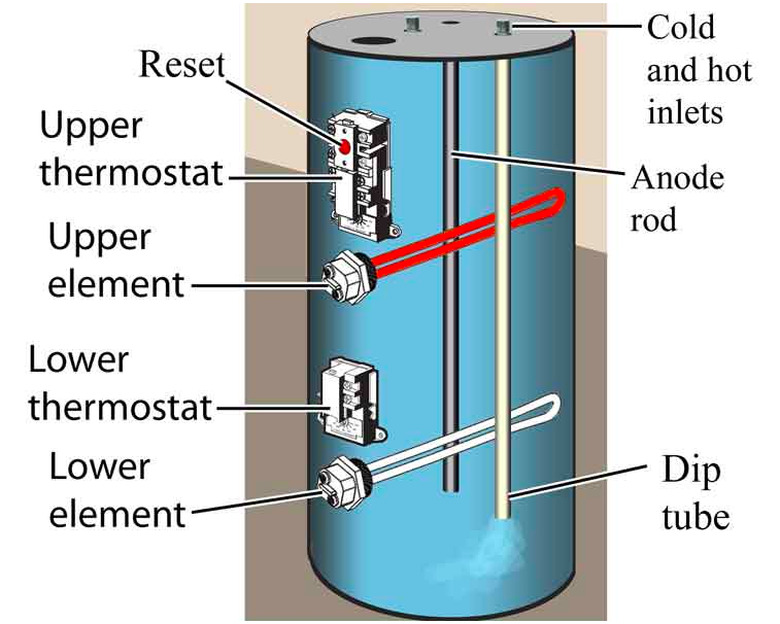
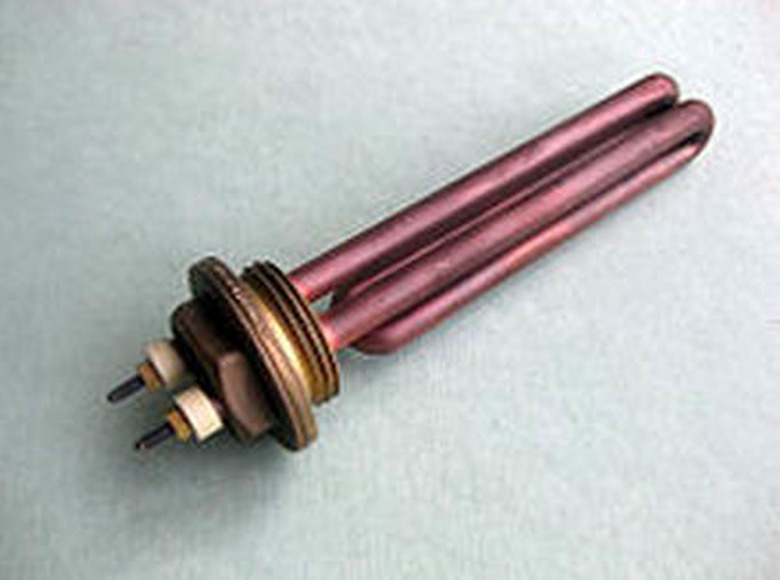
If you have an electric water heater rather than a gas heater, you can identify it by the fact that it will have no vent duct or chimney to exhaust gases, and it will have a metal electrical cable running to it. Electric water heaters have one or more heating elements that look very much like one of those heaters you put in a cup of cold water to make an instant cup of hot tea.
Water heater elements can and do wear out, and replacing a bad one is a job you can do yourself. The job involves draining at least part of the tank, which puts your water heater will be out of commission for the better part of a day. To avoid doing this unnecessarily, you should first check the circuit breaker to make sure it has not tripped. Locate the water heater breaker in the main panel. It's a double-gang breaker, and it should be labeled. If it has indeed tripped, turn it all the way off and then back on. If it stays on, that may be all you need to do, but if it trips again, that often indicates a short in one of the heating elements. If the breaker hasn't tripped at all, the lack of hot water is probably because one of the heating elements is worn out.
If the circuit breaker was not the culprit, then you will need to proceed to testing the heating elements. This process exposes you to the risk of a shock—a remote possibility, but it does mean you need to proceed with caution.
How to Test Water Heater Elements
How to Test Water Heater Elements
Things Needed
-
Screwdrivers
-
Multimeter
- Turn off the power to the circuit breaker controlling the water heater.
- Remove the cover plates on the water heater elements by loosening the screws. Set the cover plates aside.
- Remove the insulation covering the wire terminals.
- Set a multimeter to measure voltage in the 100- to 1,000-volt range, and place the one probe on each wire terminal on the heater element.
- The meter reading should be 0 to indicate that the power is off. It's now safe to proceed with a continuity test.
- Disconnect the circuit wires from the heating element you're testing.
- Set the multimeter to measure resistance in ohms.
- Touch one probe to one terminal and the other probe to the other terminal.
- If the element is functioning, you'll get a zero reading. Anything other than that indicates the element is burned out and needs to be replaced.
- You can also use the ohmmeter to check for a short circuit. With the wires still disconnected, touch one probe to one of the element terminals and the other to the element mounting bracket. If you get a zero reading when you perform this test, it means electricity can flow from the element to the water heater body. In other words, it's shorted and needs to be replaced. Test the other terminal in the same way.
 Circuit Specialists
Tip
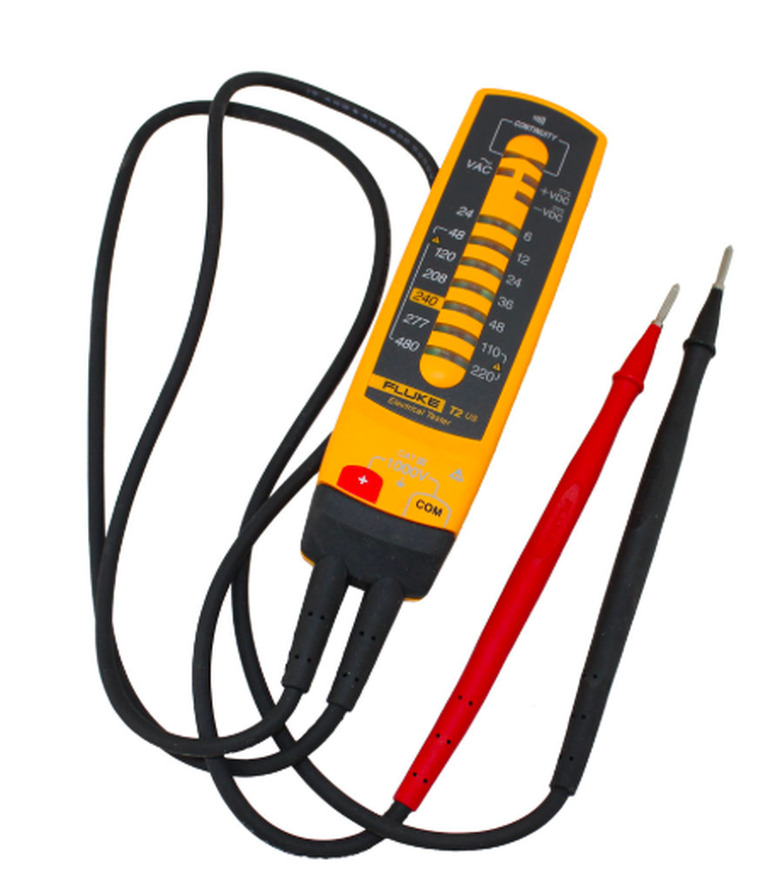
You might prefer to use store-bought voltage and continuity testers for these tests instead of a multimeter. If the voltage tester lights up when you check for voltage, power is flowing, so turn off the breaker. When the continuity tester lights up during the continuity test, it's the same as getting a zero reading on an ohmmeter.
Replacing Heating Elements
Replacing Heating Elements
After you've tested and found which heating element is bad, buy a new element to match the water heater's specifications. Before you remove the bad element and replace it, you'll need to drain water out of the tank. If you're replacing an upper element, you only need to drain the tank about halfway, but you should drain out all the water if you're replacing a lower element. If you haven't checked the voltage yet, be sure to do that after uncovering the element and before you touch anything with your tools. Turn off the breaker if you get a reading.
Things Needed
-
Garden hose
-
Heating element wrench
-
Screwdrivers
-
Rag
-
New heating element
- To drain the tank, turn off the cold water supply and open a hot water faucet in the house to allow air into the system. Connect a garden hose to the drain plug, open the drain plug and let the water flow into a floor drain, laundry tub or somewhere outside.
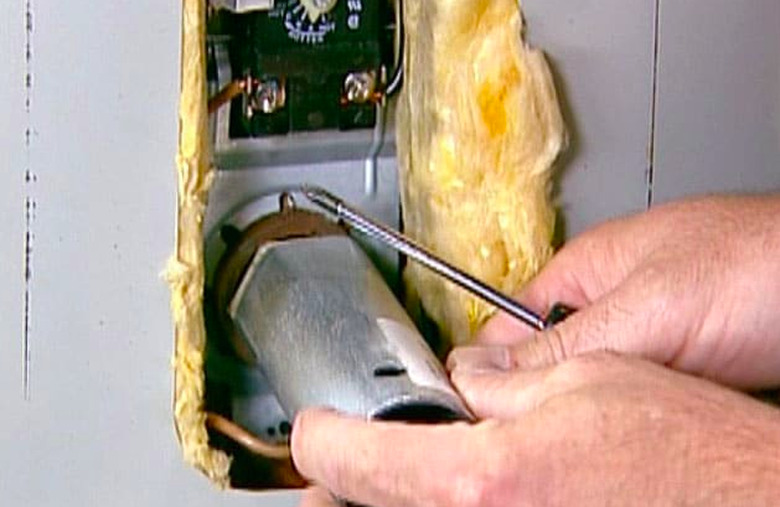
- The method for removing an element depends on the model, but usually, you will first need to disconnect the two circuit wires.
- Push the wires out of the way and fit a water heater element wrench over the element. This is a large socket wrench that fits the element nut.
- Turn the wrench clockwise to unscrew the element, using a screwdriver for leverage if the element is stuck. On some models, you have to remove the entire mounting plate by loosening the four screws that hold it, using a Phillips screwdriver.
- Once the element is out, clean debris from around the hole using a damp rag.
- To install the new element, slide on the rubber gasket that comes with it, insert the element into the hole and screw it in with the wrench or replace the mounting bracket.
- Connect the circuit wires to the new heating element in the same configuration they were on the old element.
- Replace the insulation and cover plate.
- Do not turn the breaker back on until you've refilled the tank. To do that, close the drain plug and turn on the cold water. Leave the hot water faucet in the house open until a steady stream of water flows from it, then turn off the faucet.
- Turn the water heater circuit breaker on.
References
Other Service the Tank May Need
 Mr. Plumber
When you drain the tank, you may notice some discoloration of the water. It may be brown or yellow, which indicates rust; or it may be milky white, which means it's full of scale, Either way, you should flush the tank before refilling it. To do this, let the tank empty, then keep the cold water on until the water from the drain plug turns clear.
If the element you replace is corroded, that's a sign that the sacrificial anode is also corroded and needs to be replaced. The sacrificial anode is a long rod that you can remove by unscrewing it from the top of the tank, using the element wrench or a conventional one. The purpose of this rod is to attract corrosive minerals so they don't attack the tank liner, and it needs replacing every five years or so. The fact that it has corroded is the reason why you had to replace the heating element, and replacing the anode rod will prevent similar corrosion from ruining the new heating element.