3 Modern Ways To Decorate A Pumpkin (No Carving Required!)
We may receive a commission on purchases made from links.
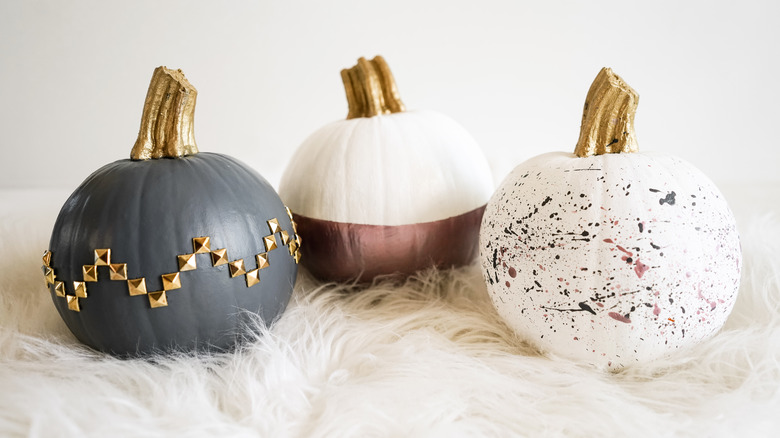
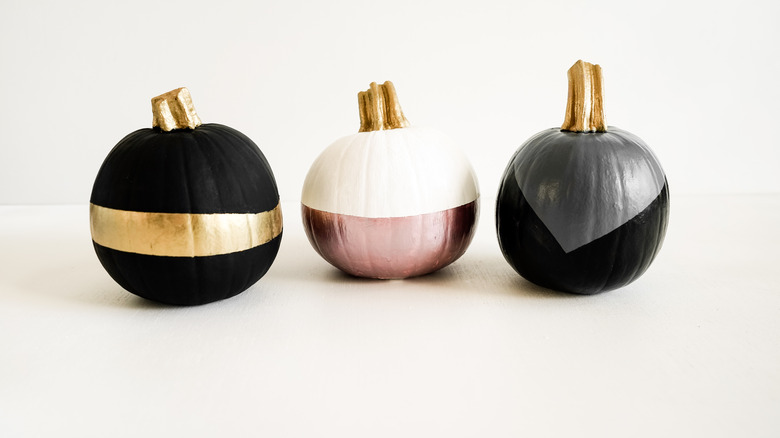
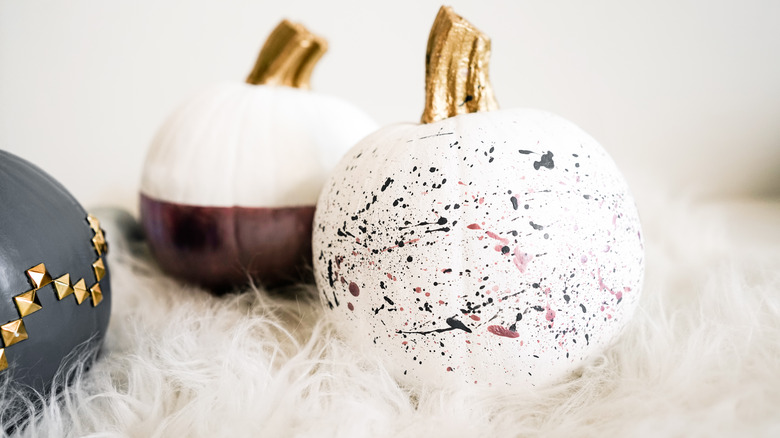
If your pumpkin carving skills are basic at best, we've got three incredibly easy ways to make everyone's favorite seasonal squash look unexpectedly modern and chic. Yes, we said it. Chic pumpkins. (Because as far as we're concerned at Hunker, spooky-chic is a thing.) Whether color-blocked, paint-splattered, or studded, any one of these pumpkins would be an eyecatching, on-trend addition to the rest of your autumnal decor.
 Maya Marin
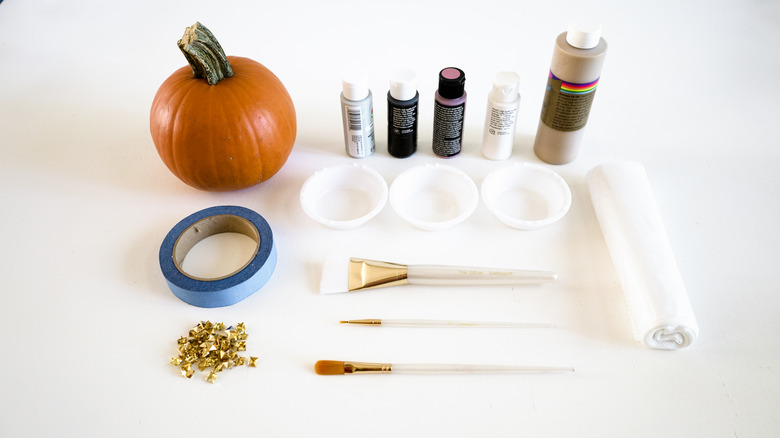
Things Needed
-
Pumpkins, small (orange or white)
-
Acrylic craft paints in chosen color palette
-
Paint primer (optional)
-
Craft paint brushes (recommended brushes: wash brush, #1 or #2 round, #5 filbert)
-
Metal clothing studs of desired shape and finish
-
Cardboard box with one side cut out (optional for paint splatter)
 Maya Marin
Prepare Pumpkins for Decorating
Prepare Pumpkins for Decorating
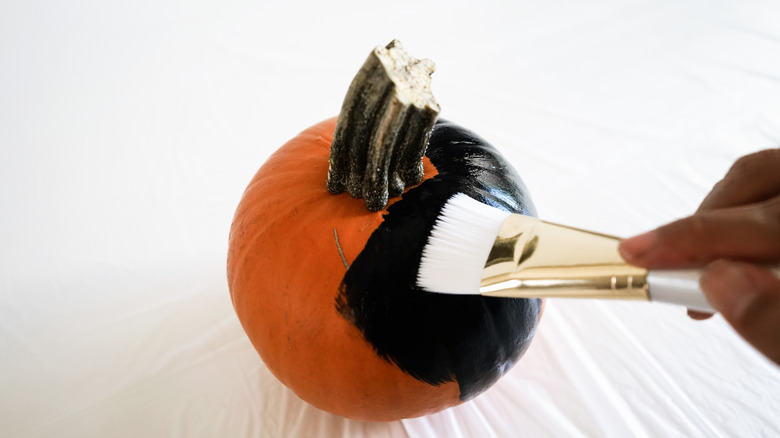
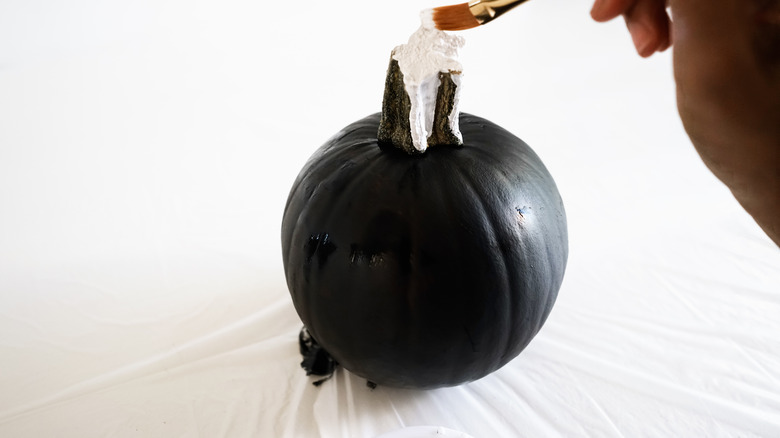
Before beginning any of the decor methods below, you'll need to prep your pumpkins first by rinsing them of any dirt and drying them completely. If you've got orange pumpkins but don't want their natural hue as your base color, use your wash paintbrush (i.e. straight, flat brush) to apply one to two coats of paint on the entire pumpkin. If painting a very dark shade (like black, as shown below), you'll only need one coat. If using a lighter color, you'll need at least two coats to cover up the orange.
TIP: Some pumpkins are waxed to increase shininess, which might make it difficult for paint to adhere. It might be especially troublesome during the color block method, as the masking tape may pull off a bit of the base paint when the tape is removed. For this reason, if you notice a lot of wax on your pumpkin, you may choose to apply a coat of spray primer first. However, this isn't absolutely necessary as you'll still be able to easily touch up any base coat paint that has flaked off by simply repainting over trouble areas. (See Color Block Pumpkins below.)
 Maya Marin
 Maya Marin
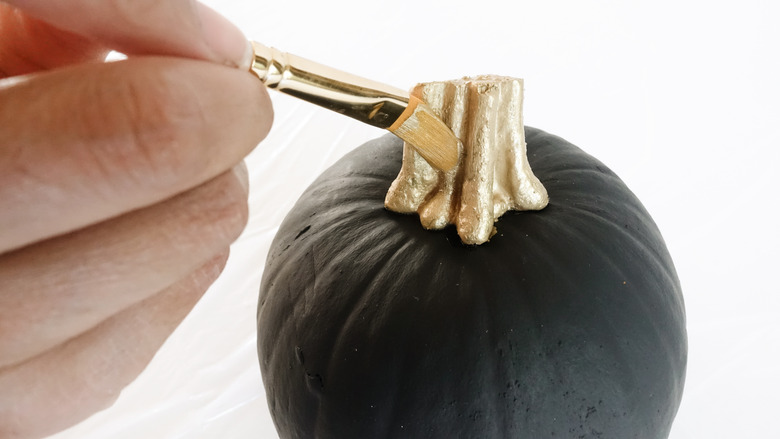
You may also want to paint the stem a different shade within your color palette.
 Maya Marin
If you're using white pumpkins, you can leave them as is or paint them another color. Note that you may only need one base coat of paint for white pumpkins, as white is typically easier to cover up than orange.
Color Block Pumpkins
Color Block Pumpkins
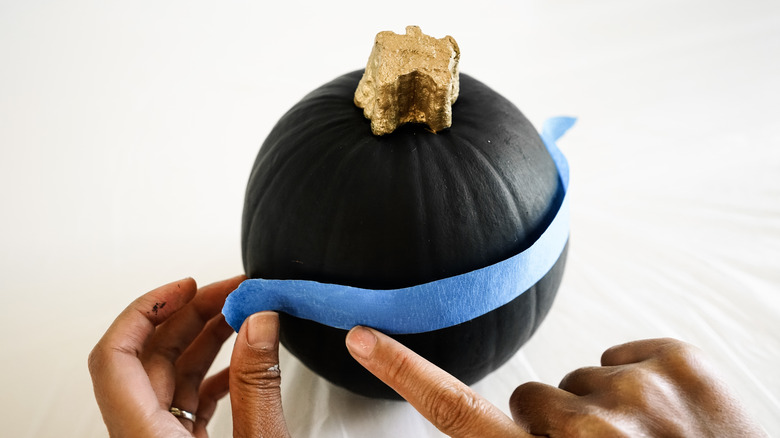
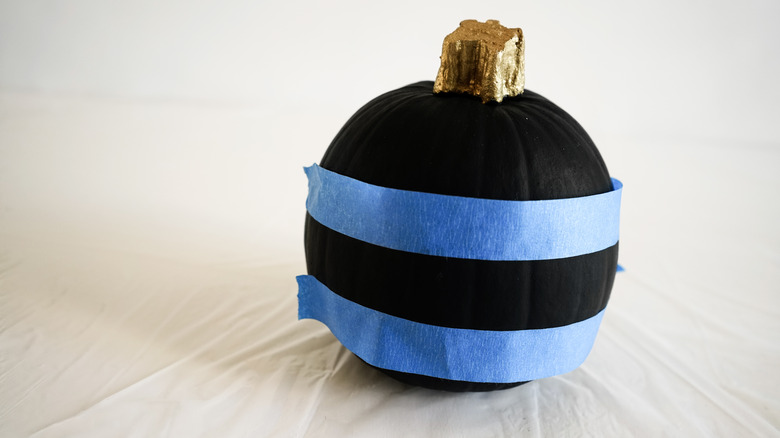
Step 1
Using painter's tape, mask off sections you'd like to leave unpainted. Take a look at some color block designs for inspiration.
 Maya Marin
For this example, we're doing a simple thick stripe of color around the pumpkin's mid-section.
 Maya Marin
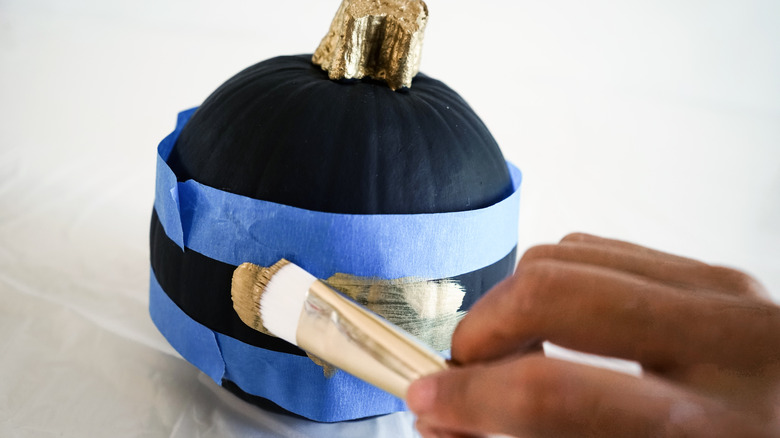
Step 2
Use your wash paintbrush to apply a coat of paint to the exposed area between your taped-off sections.
 Maya Marin
If needed, apply a second coat of paint. (This is typically needed if your base coat is a very dark color.)
 Maya Marin
Allow to dry.
 Maya Marin
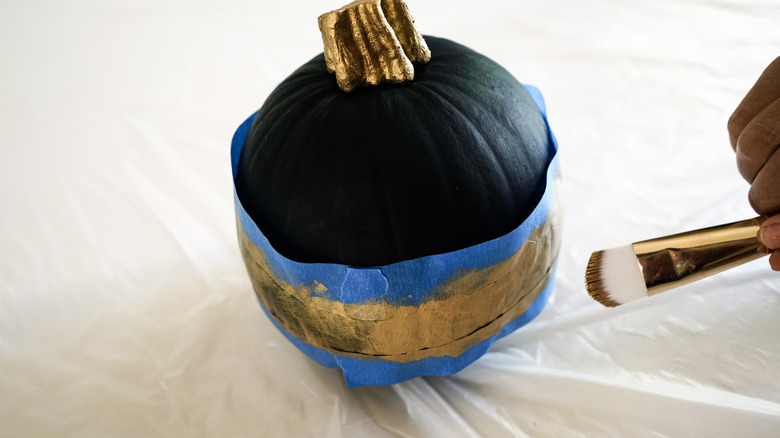
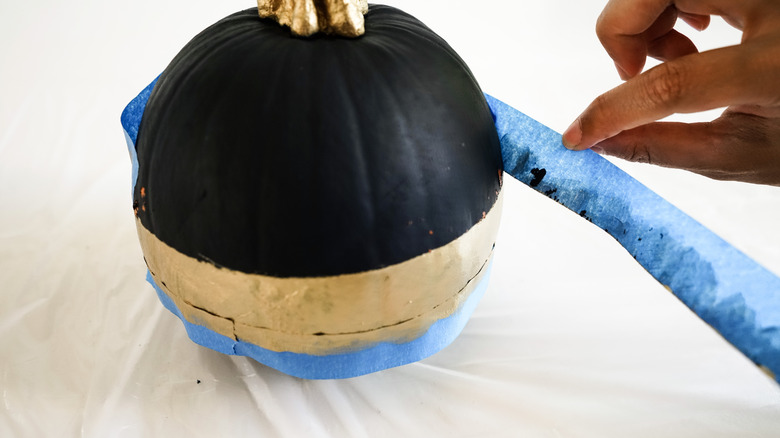
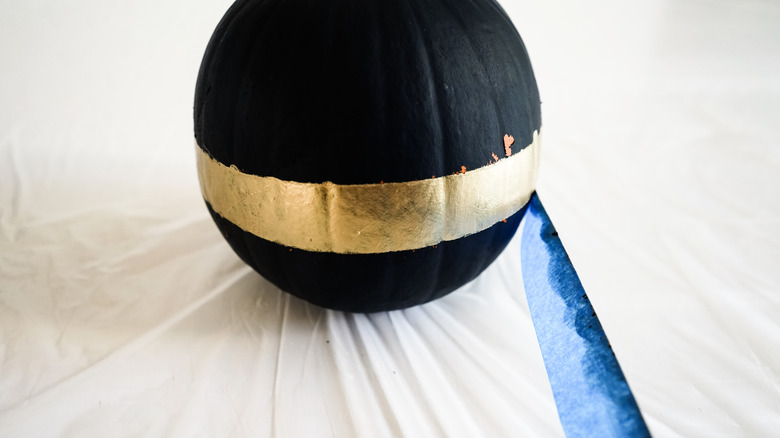
Step 3
When dry, slowly and carefully peel off the painters' tape.
 Maya Marin
As shown below, some of the base coat will likely be removed when you peel off the tape. Not to worry! We'll take care of that in the next step.
 Maya Marin
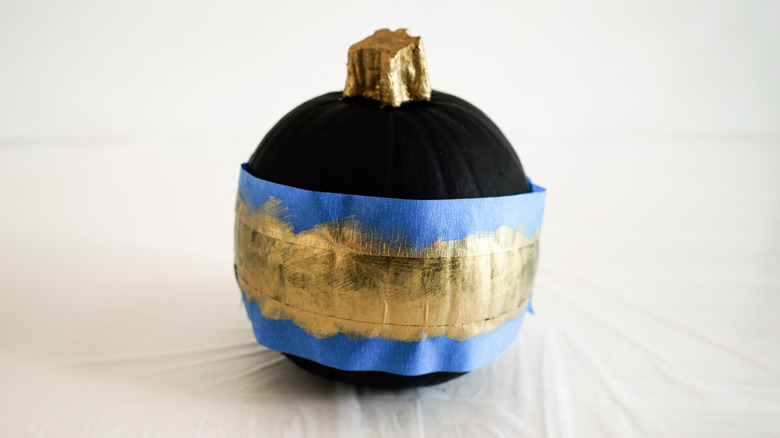
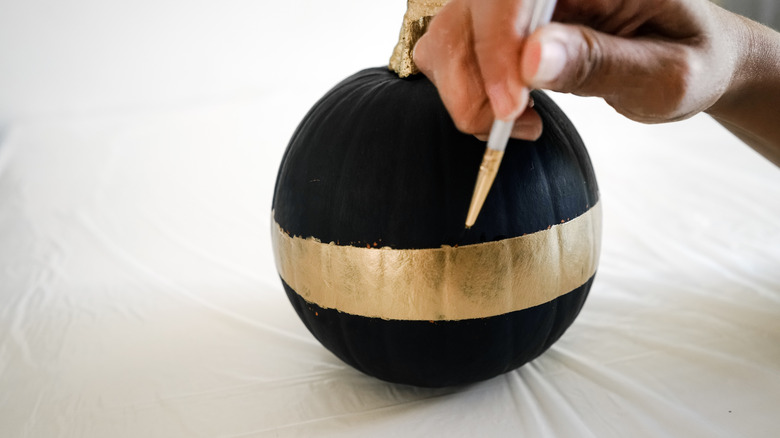
Step 4
Using your #1 or #2 round brush, touch up any rough edges where paint may have seeped under the tape. If the tape pulled off any base paint leaving some empty patches, use your filbert paint brush to fill in those portions.
 Maya Marin
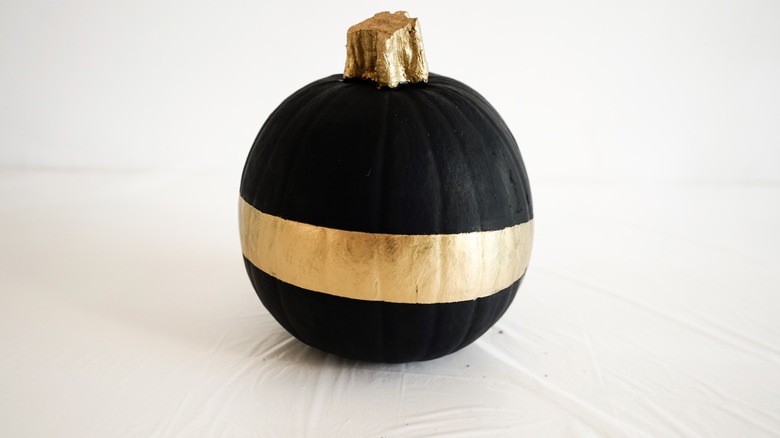
Now let it dry and you're all done!
 Maya Marin
Paint Splatter Pumpkins

Paint Splatter Pumpkins
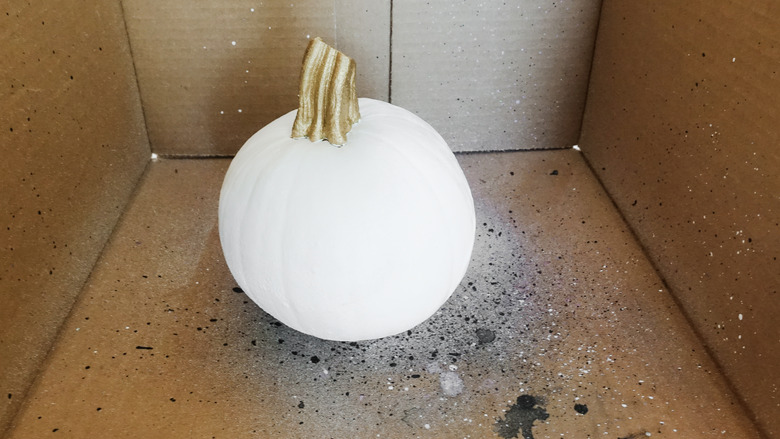
Step 1
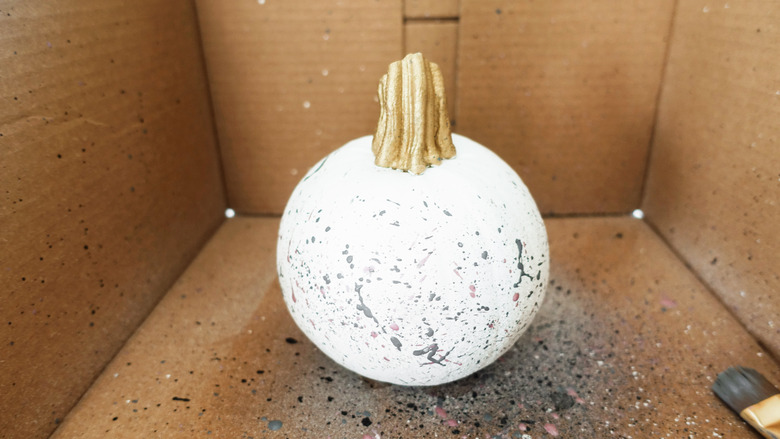
This paint splatter method is as messy as it sounds, so we recommend that you put your pumpkin into a three-sided cardboard box (i.e. a cardboard box with one side removed) to keep the airborne paint specks contained. If you don't have a cardboard box, go outdoors, place a drop cloth underneath, and make sure that everything you'd like to keep splatter-free is at least three-feet away from where you're aiming your paint.
 Maya Marin
Step 2
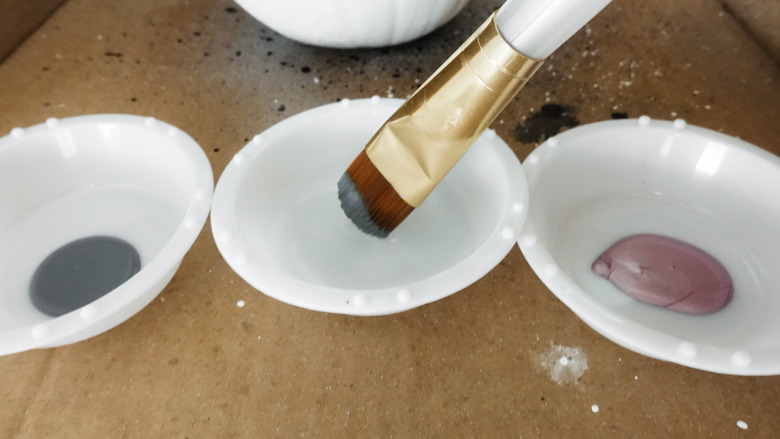
Put a small amount of paint into a container. Likewise, put a small amount of water into a separate container. Dip a brush (any craft brush with fairly long bristles will do) into the paint. Keep in mind that the larger the brush, the more paint will be splattered at once, so use a smaller brush if you want more control over where the paint lands.
 Maya Marin
Now quickly dip it into the water to slightly dilute the paint on the brush. This will enhance the splatter effect.
 Maya Marin
Step 3
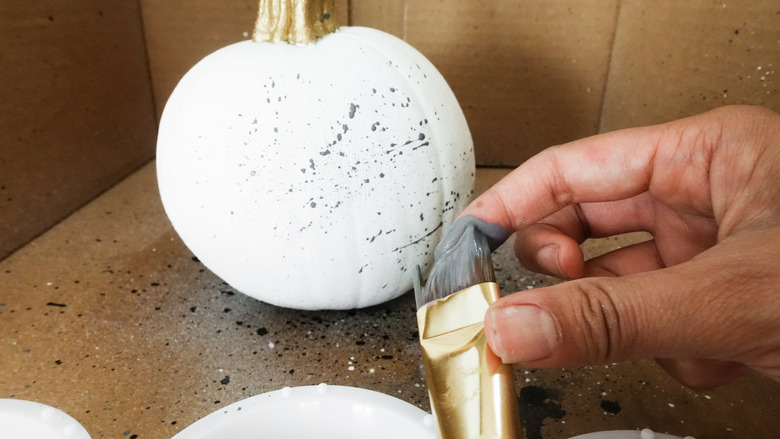
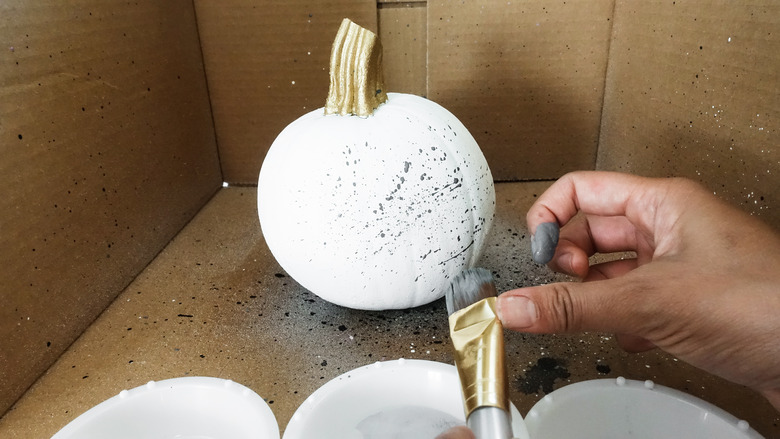
Pull the bristles back with a single finger and, aiming at your pumpkin, allow the bristles to spring back and flick specks of paint onto the surface.
 Maya Marin
 Maya Marin
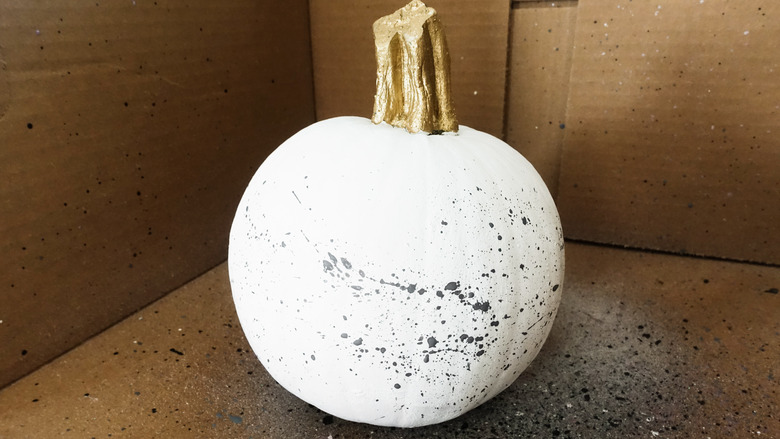
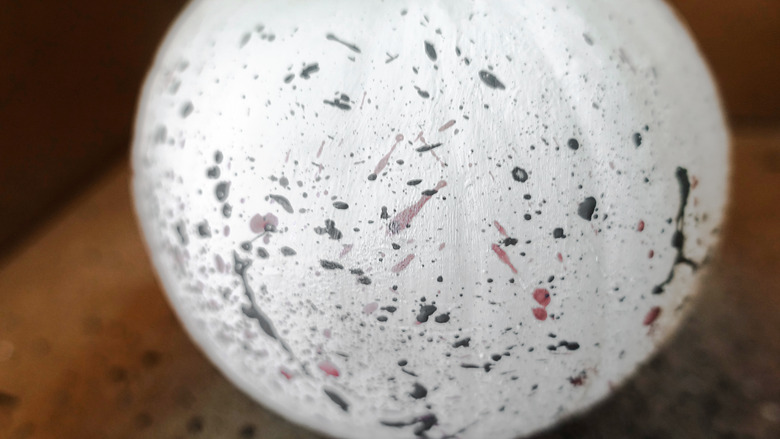
For our first color, we chose a dark gray. Repeat all around the pumpkin at various distances and angles for some variety.
 Maya Marin
Step 4
Repeat step three using a contrasting color. We chose a metallic rose color.
Maya Marin
 Maya Marin
 Maya Marin
Allow to dry.
 Maya Marin
You've created abstract expressionist pumpkin art!
 Maya Marin
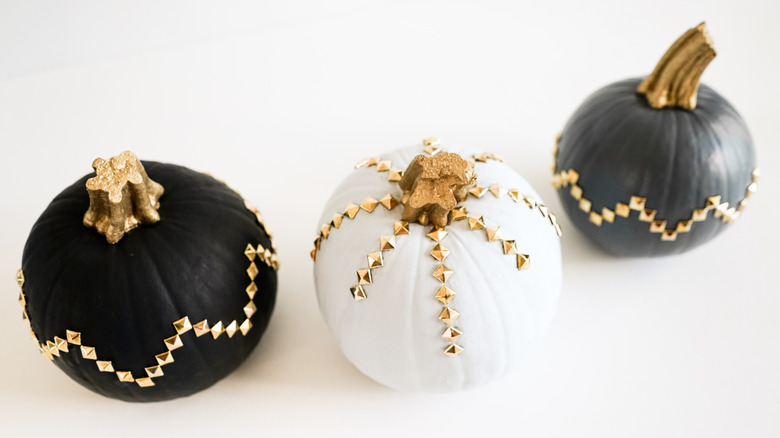
Studded Pumpkins
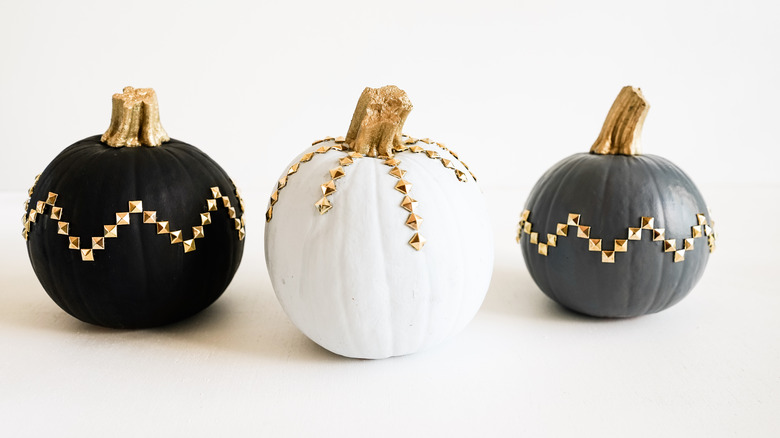
Studded Pumpkins
Step 1
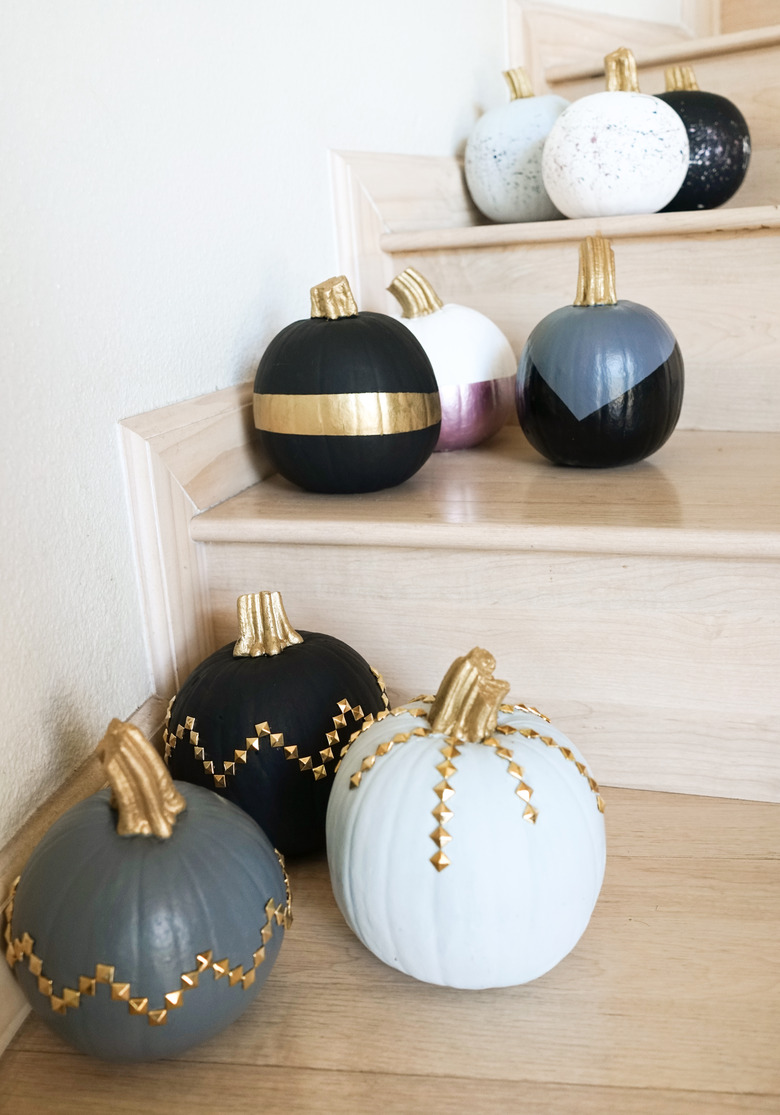
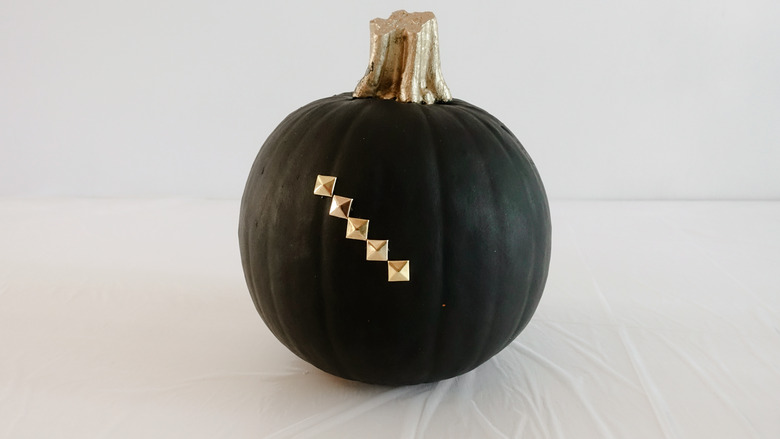
This method is so simple, there's really just two steps involved after the initial pumpkin prep. However, the key to studding success is in choosing the shape and color of your studs and in planning out your design. We've pictured two easy designs in this tutorial (zigzag and sunburst, shown above), but your options are limitless.
 Maya Marin
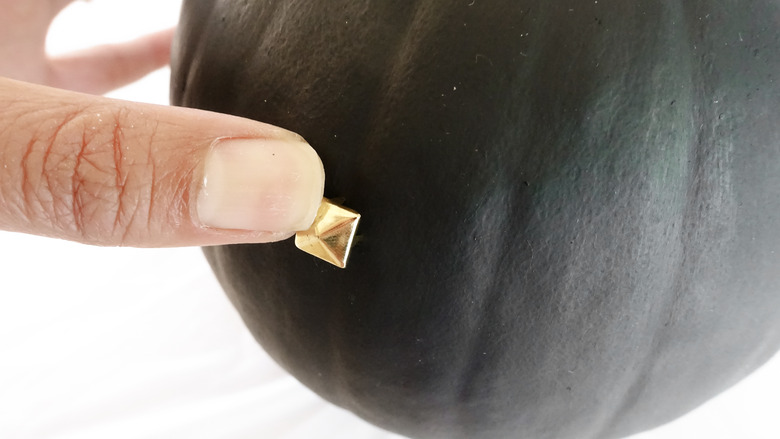
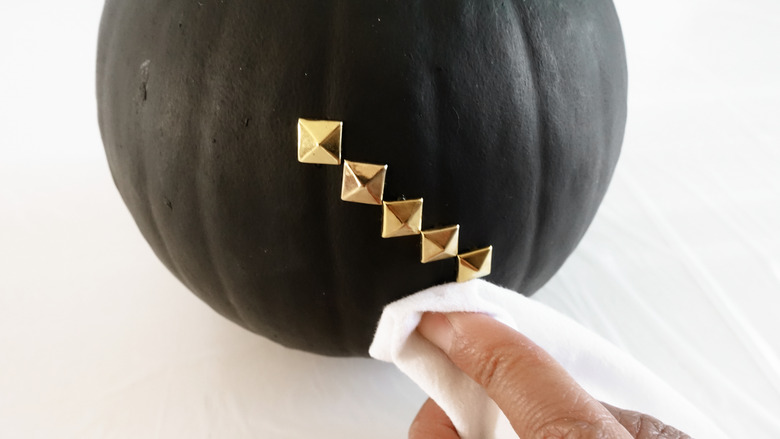
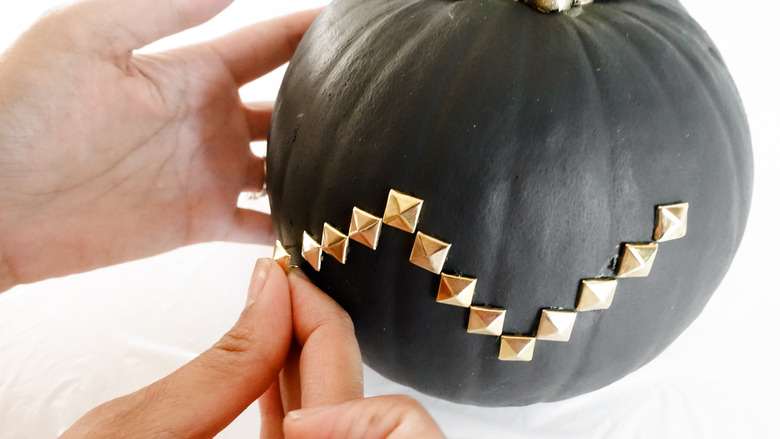
Step 2
Yep — push the studs right into the pumpkin in your desired configuration. That's all there is to it!
 Maya Marin
You'll probably get a little juice dripping from the pumpkin where you puncture it, so keep a colorfast, lint-free cloth rag handy and gently dab the drippage to absorb it. We suggest using cloth and not a paper towel to avoid leaving lint and/or scratching off the base paint on your pumpkin.
 Maya Marin
For two of our pumpkins, we chose pyramid gold tone studs formed into a zig zag pattern. Angular studs like these are a very good option, as the 90-degree corners and straight edges provide helpful guidelines when applying the studs in a repetitive pattern around the pumpkin. For example, it was easy for us to to eyeball a rough 45-degree diagonal line of studs for our zig zag pattern by simply applying the studs corner to corner, as shown below.
 Maya Marin
 Maya Marin
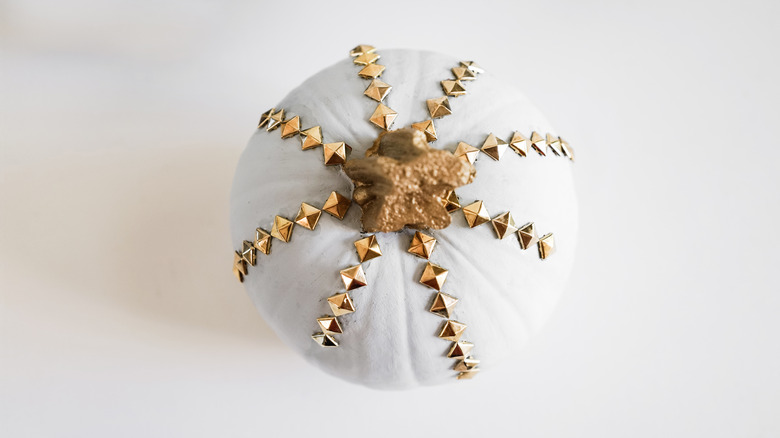
For our third pumpkin, we placed the studs in a starburst pattern (when viewed top down) with alternating short and long lines radiating from the stem.
 Maya Marin
And there you have it — a trio of gorgeous, Instagram-ready pumpkins that never had to go under the knife.
 Maya Marin