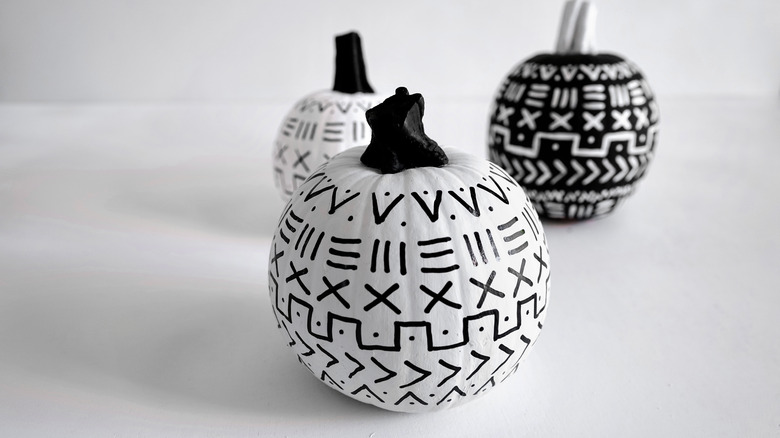
These Mud Cloth-Inspired Pumpkins Are Super Cute DIY Fall Decor

If you love fall seasonal decor but old-school rustic gourds just aren't your jam, you've got options, my friend. Case in point: these modern, mud cloth-inspired pumpkins that are so cute and totally DIY-foolproof (we've included a PDF template). We're kind of obsessed.
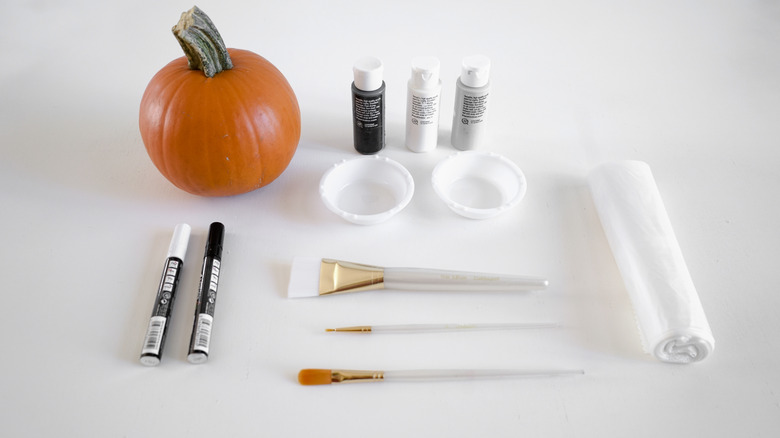
Things Needed
-
Pumpkins
-
Acrylic craft paints (matte black and white, plus other neutral shades like gray, brown, and taupe if desired)
-
Acrylic paint markers in white and black (optional but highly recommended for ease of use)
-
Paint primer (optional)
-
Craft paint brushes (recommended brushes: wash brush, #1 or #2 round, #5 filbert)
-
Pencil (preferably 2H or higher for light, erasable strokes) or white colored pencil
-
Containers for paint
-
Downloadable PDF template (or create your own mud cloth design)
 Maya Marin
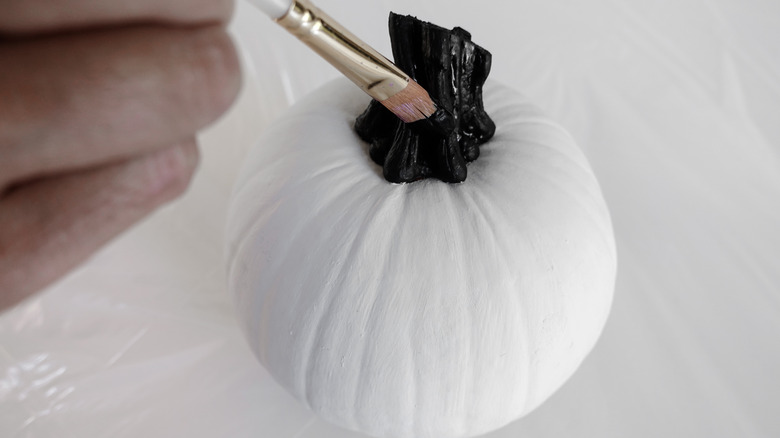
1. Apply a base coast of paint.
Before painting, rinse and dry your pumpkins completely. Paint the body of the pumpkin either black, white, or another neutral shade using the wash brush, and then paint the stem a contrasting color using the filbert brush. This will be your base/background color, which — in traditional mud cloth textiles — is either much darker or much lighter than the line-art, resulting in a high-contrast design.
If painting the body a very dark shade, you'll only need a single coat. If using a lighter color (like white, as shown below), you'll need at least two coats to cover up the pumpkin's natural orange. Or, if using a naturally white pumpkin, you can leave it as is.
 Maya Marin
Wait for paint to dry before proceeding.
TIP: Grocers sometimes apply wax to pumpkins for shine, which might make it hard for paint to adhere. If you notice a lot of wax on your pumpkin, you may choose to apply a coat of spray primer first. However, this isn't absolutely necessary as you'll still be able to easily touch up any base coat paint that has flaked off by simply repainting over those areas.
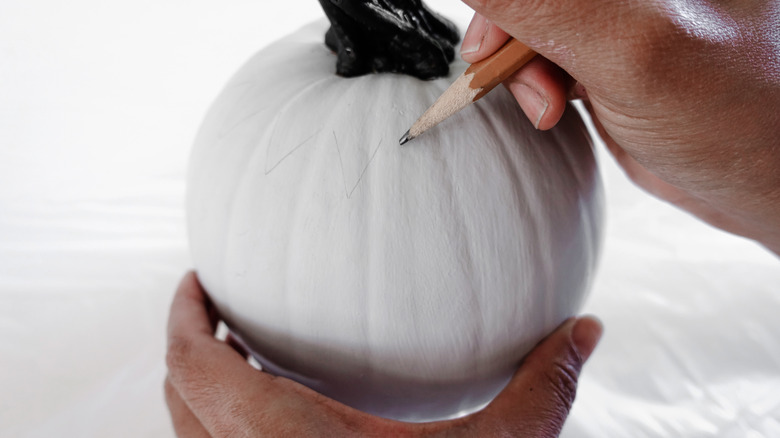
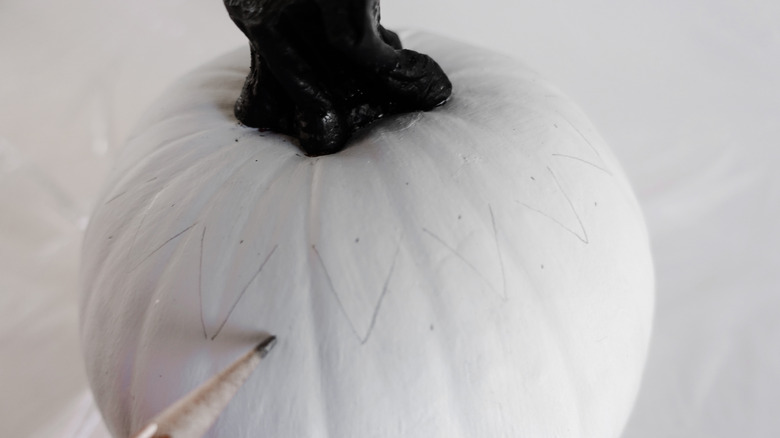
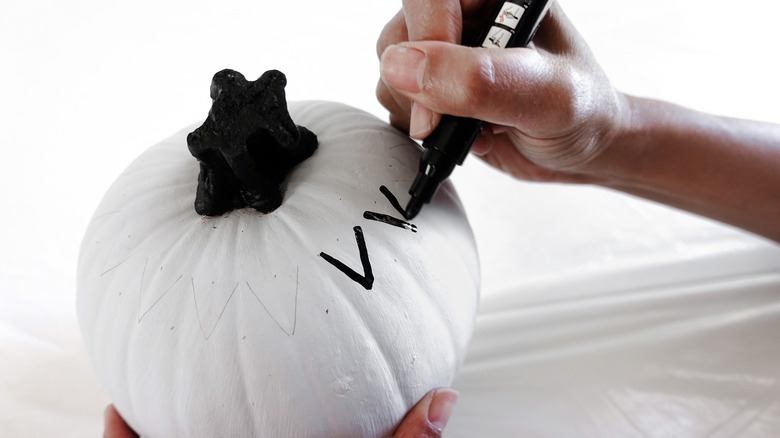
2. Lightly draw on design with pencil.
In order to complete this step, you'll first have to choose a design. To make things extra easy, we've included a PDF template of a mud cloth pattern for you to work from. Or, if you'd really like to personalize the project, you can search the web for traditional Malian mud cloth (a.k.a. bògòlanfini) motifs, as well as discover the symbolic meaning behind them.
Once you've chosen your pattern, use a pencil to lightly draw the design onto your pumpkin to use as guidelines before applying the actual paint (see tip below).
 Maya Marin
If you've used a dark paint as your base color, the pencil marks should still be visible enough to guide you. If not, you can also use a white colored pencil.
 Maya Marin
TIP: If you make a mistake when drawing your preliminary pencil guidelines, don't worry! Depending on the background color you chose and the hardness of your pencil (the harder the graphite, the fainter your lines will be), you may be able to erase (with a very clean eraser!) any pencil marks that aren't quite right. This is why we recommend a pencil at 2H or above on the hardness scale. But if erasing fails, simply finish all of these steps, let the paint dry, then paint over any stray pencil marks with your base coat color to cover them up.
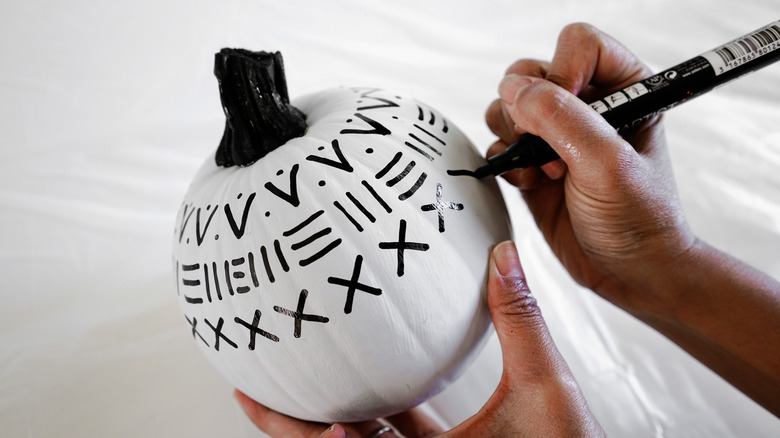
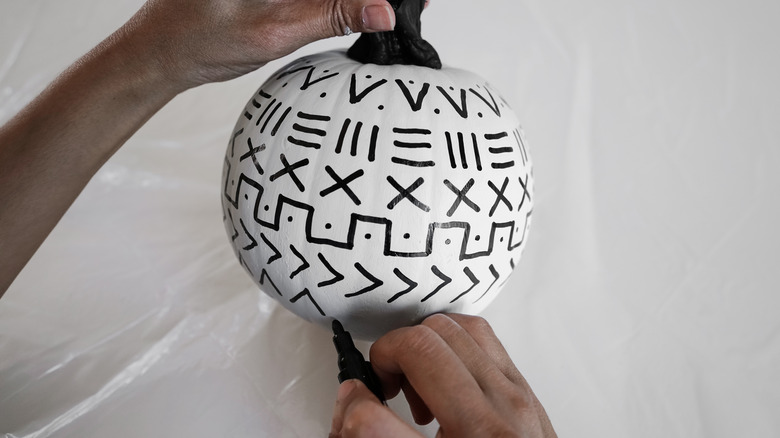
3. Trace over pencil marks with paint.
If using an acrylic paint marker, this final step should be a cinch. Simply trace over your pencil marks in a high-contrast color, taking care not to smudge any wet paint lines as you go. Since you're using acrylic paint, it shouldn't take long for the paint to dry between strokes.
 Maya Marin
Continue until you've covered all of the pencil marks and allow to dry.
 Maya Marin
 Maya Marin
If you don't have an acrylic paint marker, you can use a very small round brush (either size 1 or 2) to paint the design onto your pumpkin. The result will be a less defined, but more organic/boho look, as shown in this pumpkin below. We love this effect, but note that it's much more time consuming than the paint marker method.
 Maya Marin
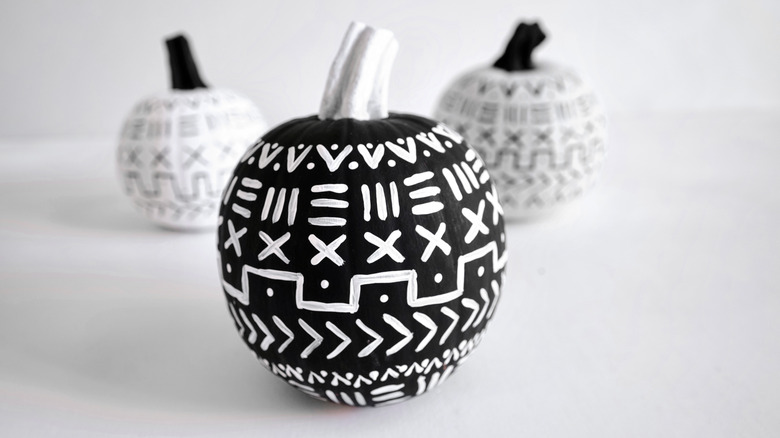
Done! Your mud cloth pumpkins are ready to adorn your coffee table, front door, or used as a modern centerpiece for a festive fall gathering.
 Maya Marin