Oven Heating Element Replacement
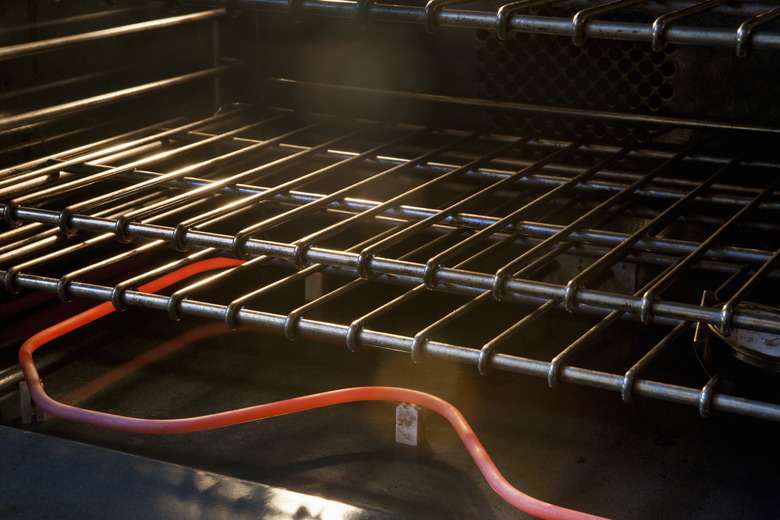
Replacing an element on an electric oven is one of the easiest appliance repairs around the house. And even though there are many different shapes and sizes of elements out there, most are mounted and connected to the oven wires in a similar way. The repair takes just a few minutes and is safe to do as long as you shut off the power to the oven.
 Glasshouse Images/Corbis/GettyImages
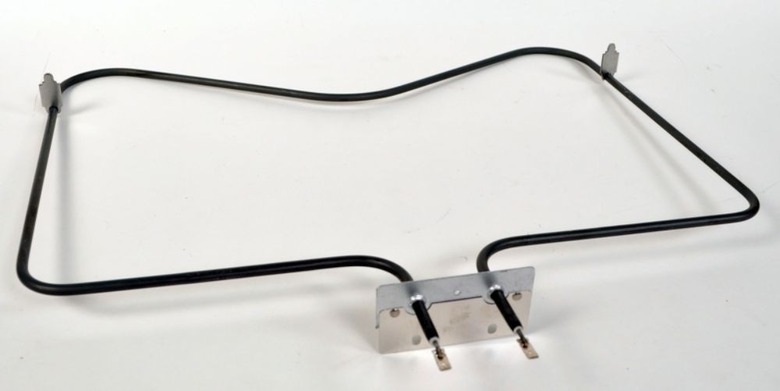
Getting the Right Replacement Part
Getting the Right Replacement Part
Electric ovens typically have two heating elements: a baking element (usually at the bottom of the oven compartment) and a broiler element (usually at the top of the compartment). The two elements work independently and usually go bad at different times. In fact, baking elements burn out a lot more often because they see more use than the broiler elements.
If your oven isn't heating properly, confirm which element has shorted out by setting the oven to bake and broil alternately. You have to replace only the element that's gone bad; there's no reason to replace both to save yourself time in the future. Broiler elements work the same way as baking elements. The only difference is that the broiler element is secured to the top of the oven compartment with brackets, while the baking element usually just rests on the bottom of the compartment.
It's easy to find a replacement element from an online appliance parts retailer. Use the oven's model and serial numbers to be sure you get the correct part. The numbers are noted on a nameplate usually found on the back side of the oven door or drawer, but it can be in other places (most appliance parts websites have a guide suggesting where to look).
 Sears
Sears
Things Needed
-
Screwdriver, nut driver or socket wrench
-
Non-contact voltage tester (as needed)
-
Replacement oven element
How to Replace an Electric Oven Heating Element
1. Turn Off the Power
Ovens in standard (freestanding) ranges usually are plugged into a wall outlet, while wall ovens and other built-in units typically are hard-wired rather than plugged in. In either case, start by turning off the power to the oven's electrical circuit.
- Switch off the breaker to the oven circuit at your home's electrical service panel (breaker box). It should be a double-pole breaker with the number 40, 50 or 60 printed on the breaker (indicating the circuit amperage).
- If the oven is in a range, pull out the drawer below the oven compartment and set it aside. Reach under the oven compartment through the drawer cavity and unplug the range from the wall outlet.
- If the oven is hard-wired, you must test the element wires for power before disconnecting the element.
Warning
Elements on some electric ovens may be energized even when the oven's heating controls are turned off. That's why you must shut off the power at the breaker and unplug the oven before removing the element.
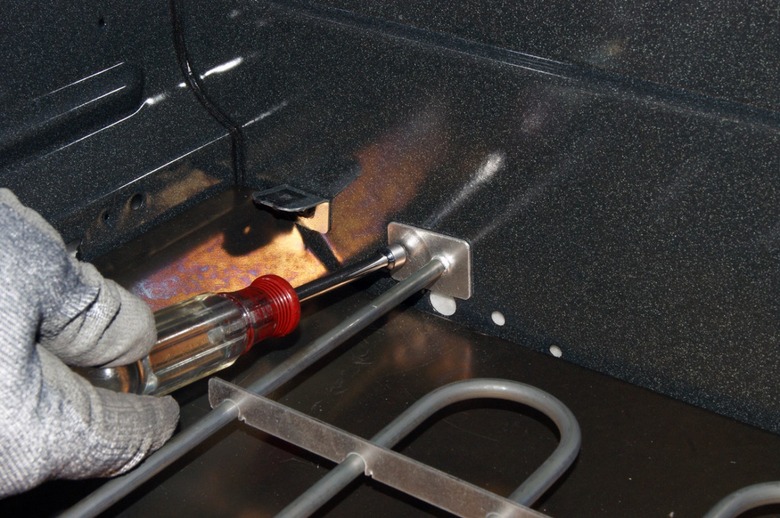
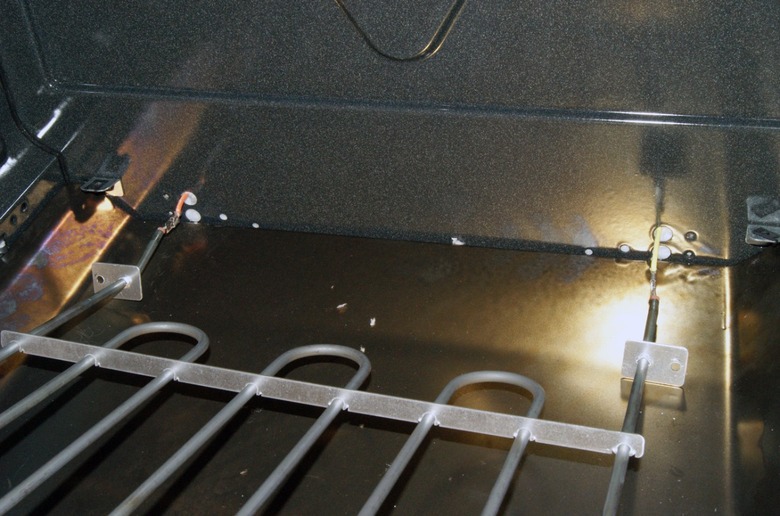
2. Remove the Element
Most elements are connected to the back wall of the oven compartment with one or more mounting plates and screws. Some elements have a single central mounting plate where the two ends of the element meet; others have two separate ends, each with a small mounting plate.
 Sears
Sears
- Remove the oven racks from the oven compartment.
- Remove the mounting screws on the element mounting plate(s), using a screwdriver or a nut driver or socket wrench. For a broiler element, remove the screw for each bracket securing the element to the top of the oven.
- Carefully pull the element away from the oven wall about 1 inch or so to expose the wire ends. If the oven is hard-wired, touch the probe of a non-contact voltage tester to each wire to confirm the power is off.
- Pull out the element a little farther, then carefully slip each wire connector off of the spade (flat tab) terminal on each end of the element.
- Make sure the wires will not fall back into their holes in the oven wall. If necessary, secure the wires to the wall with small pieces of tape. Note: Do not change the orientation of the wires; they must make the same connections to the new element.
- Remove the old element from the oven compartment.
 Sears
Sears
3. Install the New Element
Installing the new element is simply the reverse of removing the old one.
- Position the new element inside the oven compartment in the same position as the old element. If it is a broiler element, secure it to the oven top with the brackets.
- Slide each wire end all the way onto one of the element terminals (using the same orientation as with the old element).
- Fit the element ends into the hole(s) in the oven wall and secure the element mounting plate(s) with the original screws.
 Sears
Sears
4. Test the Oven
Complete the repair by testing the oven for proper operation.
- Plug the range back into the wall outlet, and reinstall the oven drawer, as applicable.
- Switch on the oven's circuit breaker in the breaker box.
- Turn on the oven to test the new element.
- Turn off the oven and let it cool down, then reinstall the oven racks.
Tip
New elements usually have a light coating of oil to protect them from corrosion during storage and shipping. This coating will burn off and may smoke slightly when the element first heats up. This is normal, and the smell will go away in a few minutes.