Grab Bar Installation
Everyone who uses the bathroom can benefit from grab bars, not just seniors and people with disabilities. The tub, shower and bathroom floor all get wet, and a wet surface is hazardous. If someone slips, they may try to break their fall by grabbing onto a towel rack, but towel racks aren't designed for that, and the result could be a serious injury. Grab bars, on the other hand, can support 250 pounds or more. They are most useful when installed in locations prescribed by the Americans with Disabilities Act (ADA), and they can make the difference between a momentary mishap and a life-changing accident.
Public bathrooms, as well as private bathrooms used primarily by seniors or anyone with limited mobility, should be ADA-compliant, and the height and locations of grab bars are among the ADA specifications. A private bathroom isn't required to be ADA-compliant, and that gives you more leeway when it comes to placing grab bars, but the ADA specifications are still good guidelines to follow.
 PlumbingSupply.com
Grab Bar Requirements
Grab Bar Requirements
ADA specifications apply only to public bathrooms, but if you're designing a bathroom for maximum safety and accessibility, or one in a rental unit, it's a good idea to follow them. Here are the key ADA requirements:
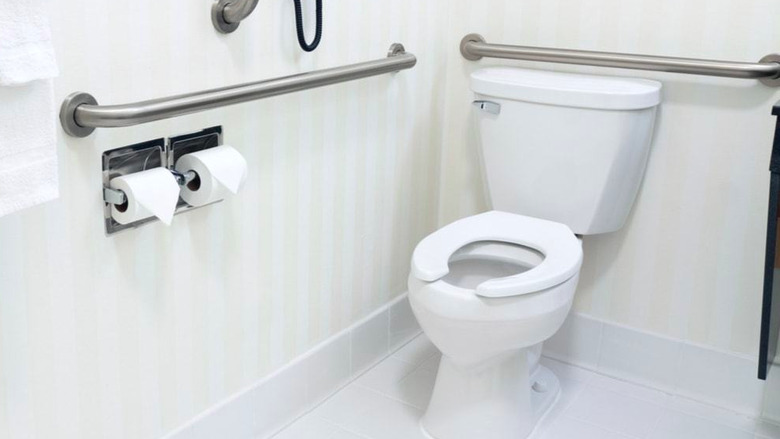
- Toilets: The side bar should be at least 42 inches long and extend at least 54 inches from the back wall. The rear bar should be at least 36 inches long and extend 12 inches to one side of the toilet centerline and 24 inches to the other side.
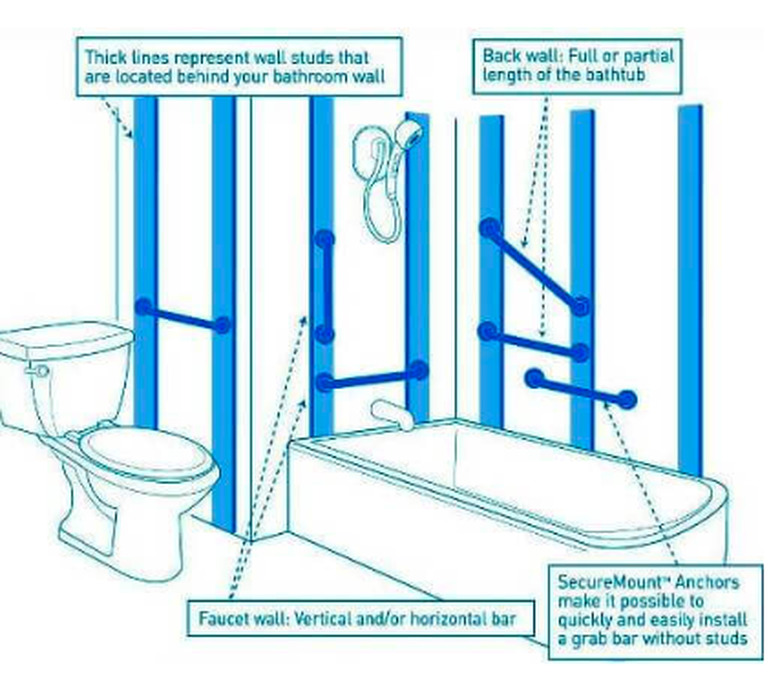
- Bathtubs: A bathtub without a permanent seat should have two, parallel, 24-inch horizontal grab bars on the side wall, with the bottom one located 8 and 10 inches above the rim of the tub and the upper one 33 to 36 inches above the floor. There should also be a 24-inch bar on the control (faucet) wall and a 12-inch bar on the back wall, each at a height of 33 to 36 inches from the floor and with one end aligned with the front edge of the tub.
- Showers: Shower grab bar requirements are given for transfer shower stalls and roll-in shower stalls. A standard 36 x 36-inch transfer stall needs a grab bar along the full length of the control wall and 18 inches along the back wall (an L-shaped grab bar can also be used), both at 33 to 36 inches above the shower floor. A 30 x 60-inch roll-in stall needs three bars (or a single U-shaped bar) at 33 to 36 inches above the shower floor. The bars on the end (short) walls must extend from the front edge to within 6 inches of the back wall. The bar on the back wall must extend to within 6 inches of both end walls.
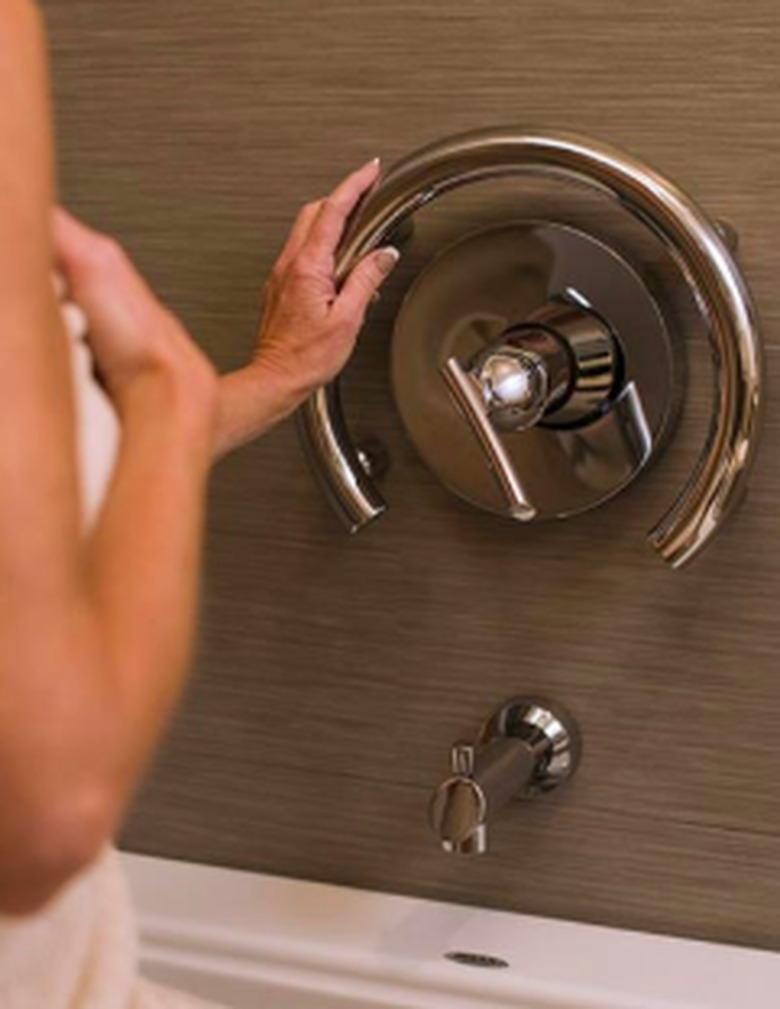
If you're installing grab bars in a private bathroom, they can be positioned anywhere that makes them useful for the people using the bathroom. For example, it often makes sense to install a shower grab bar at an angle instead of horizontally in the manner prescribed by the ADA. An angled installation will make it useful for children as well as adults.
A grab bar won't do the job it is supposed to do if it isn't properly attached to the wall. You should anchor it to wall studs whenever possible. When that isn't possible, opening the wall and installing blocking is the next best option. As a last resort, use wall anchors capable of holding the weight the bar is designed to support.
How to Install Grab Bars
How to Install Grab Bars
Grab bar systems differ by manufacturer, but most include flanges or brackets that you attach securely to the wall. Some grab bars have separate brackets that install first, then you secure the bar to the brackets with screws; others have flanges that are integrated with the bar, and you mount the flanges directly to the wall. Affixing the brackets or flanges securely to the wall at the right height and at the right distance from each other (for brackets only) is the key to proper installation. Manufacturers recommend that you anchor each bracket to flange to a wall stud. Most grab bars are just long enough to overlap two standard-spaced studs when installed horizontally. When installing a grab bar at an angle, you can usually adjust the angle to ensure the bar overlaps a stud on either end.
Selecting Wall Anchors
Selecting Wall Anchors
When you can't attach a grab bar to a stud, you may need to use a wall anchor. Toggle bolts are recommended for tile and for 5/8-inch or thicker drywall. Do not anchor a grab bar to 1/2-inch drywall, as it can easily break. When securing a grab bar to a stud behind a fiberglass shower or tub enclosure, you need special anchors that include spacers to prevent the fiberglass from buckling and cracking when you tighten the screws. You can buy these anchors from plumbing supply or handicap supply dealers. There are also special anchors for installation on stone and concrete walls.
The Procedure
The Procedure
Things Needed
-
Stud finder
-
Erasable crayon
-
2-foot level
-
Drill
-
Drill bit
-
Sponge
-
Silicone caulk
-
Screwdriver or Allen wrench
1. Find the Studs
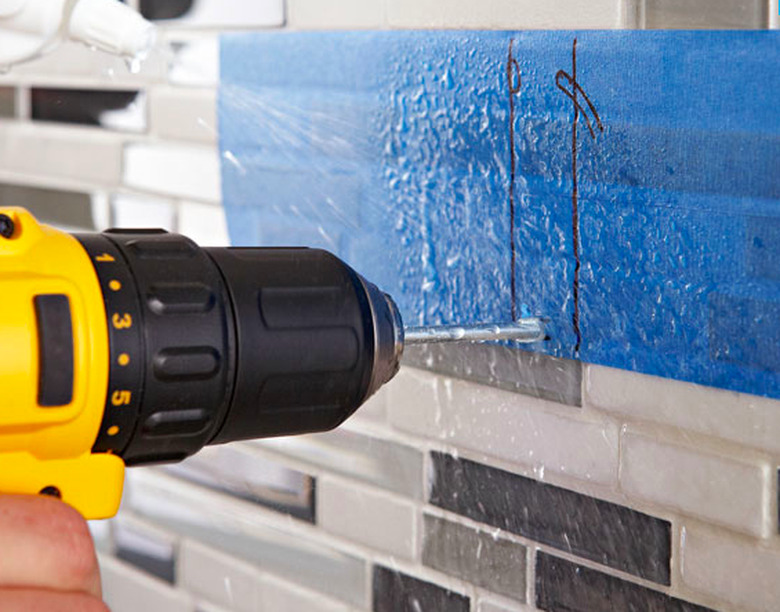
Use a stud finder to locate the studs in the wall in which you want to install the grab bar. If the wall is partially tiled, use the stud finder on the part of the wall that has drywall and draw a line with an erasable crayon down along the tile to the approximate location of the grab bar bracket.
2. Mark the Bracket Locations
Hold the grab bar against the wall at the location where you want to install it, and level it with a 2-foot level. Draw a semicircle around the outer edges of both ends of the grab bar, using the crayon. When you remove the grab bar, these semicircles will indicate the locations of the brackets.
3. Drill Pilot Holes
Set each bracket in place temporarily and mark the positions of the screw holes. Drill a pilot hole on each mark, using a 1/4-inch drill bit. For drywall or wood paneling, drill using a conventional wood twist bit; for tile, stone, or concrete, use a masonry bit to drill the pilot holes. If installing on stone or concrete, drill a hole large enough to accommodate the anchor—usually 3/8 to 1/2 inch in diameter.
When drilling through anything but stone or concrete, make sure the bit bites into the wall stud. You'll be able to feel the resistance of the wood and you'll see wood chips on the end of the bit. If you don't hit a stud, you'll need to drill a larger hole for that screw so you can install a wall anchor to hold it. The size of the hole depends on the anchor, but it's usually about 1/2 inch in diameter.
Tip
If the bracket does not overlap a stud and you're installing the grab bar on drywall, secure it with only two screws instead of three to avoid weakening the drywall with too many holes.
4. Secure the Brackets
Erase the crayon marks with a sponge and place the bracket against the wall. Line up the holes with those on the wall and drive a stainless steel screw (usually provided) into each hole and into the stud. The screws you use should be long enough to sink at least 1 inch into the stud to ensure a firm hold.
5. Install the Grab Bar
Coat the edges of the escutcheons on the grab bar with silicone caulk for extra sealing and adhesion against the wall. Set the grab bar on the brackets and push it against the wall. Tighten the screw(s) on each end of the bar to hold it in place, using a screwdriver or Allen wrench.
Tip
Some manufacturers recommend installing the brackets with lag screws. Drive these with a socket wrench or an appropriate drill attachment. In some cases, the escutcheons snap into place after you've secured the grab bar to the brackets. It's best to hold off on caulking these until after the installation is complete.